Stem seam in video and photo tutorials. How to sew with a stalk seam in stages. Embroidery for beginners. Stalk stitch Making stalk stitch
The stalk stitch is used both to create the outlines of individual elements and to fill them. This type of stitch goes well with wool embroidery, printed and counted cross stitching.
|
Step 1 We withdraw the needle and thread at the point where the seam should begin. Make a stitch about 3 mm long. |
Step 2
Bring the needle back to the right side approximately in the middle of the previous stitch, while being careful not to split the strand of the previous stitch. Pull out the thread to align the stitch. |
|
Step 3
Sew the next stitch, also 3 mm long, with a distance of about 1.5 mm from the edge of the previous stitch. |
Step 4
We bring the thread to the front side in the hole of the previous stitch. In the same way, we make all subsequent stitches to the end of the pattern. |
|
Step 5
In cases where a curved line is desired, sew with the stitches facing outward. Only in this case, you can get a smooth, beautiful line. You can also make the stitches slightly shorter. |
Step 6
If you need to fill an area with a stem seam, you must start each line of filling on the same side. |
|
Step 7
You can embroider capital letters in lettering and initials using the stitched stitch. |


To decorate fabric items: tablecloths, napkins, towels, apron, etc. - embroidery is often used. She makes products stylish, colorful and unique. Even simple decorating seams will allow you to make beautiful embroidery: stalked, tambour, “velvet”, “knots”, “herringbone” and others, the technique of which is really quite accessible. But do not think that a beautiful pattern will turn out right away: even the most elementary seams come out beautiful and neat only after long workouts. Therefore, if you want to decorate clothes, accessories or home textiles with beautiful embroidery, you will have to be patient. The first step should be to purchase accessories for embroidery: special threads (floss), needles, fabrics, hoops (they are necessary, since to get even stitches, the fabric will have to be pulled and pulled very tightly). The second step is to learn the step-by-step instructions for making decorating stitches. You will find them below.
"Lace" and "snake"
Seam Snake
"Lace" and the so-called "snake" are very light seams, it would be more correct to say that they are not simple, but elementary. They are performed on the basis of the simplest forward-needle seam.
- Sew a needle-forward seam, making sure that all stitches are the same size. It is not necessary to grind too much, but coarse stitches are all the more unsuitable. The optimal length is two millimeters.
- To get the "lace", start making the second stitch of the pair to the left, each time threading the needle and thread under the stitches on the front side in the same direction. To obtain a "snake", alternate the direction: pass the needle through the first stitch from the bottom up, through the second - vice versa.
These seams look original only if the threads are taken in two different colors, close in tone or, conversely, contrasting. If the threads are of the same color, these stitches do not look elegant enough to be called decorating. However, they are rarely chosen for embroidery anyway.
Stem seam (step by step)

When creating floral ornaments, a simple decorating seam is most often used, which is called a stem-like seam. It resembles a tightly twisted string. Depending on how frequent and long the stitches are, the appearance of this "string" changes. The same seam is often used to embroider in designs just thin lines, straight and winding, denoting the outline of the design.
Despite the apparent simplicity, the stalk seam requires a certain skill to perform. However, if you follow the step-by-step instructions on the stalk seam technique, decorating products with it will actually be quite simple.
- Stick the needle inside out and pull it out to the right side.
- While holding the thread at the entry point, pull the thread a little to the right and up and make the peg towards you.
- From wrong side, make the next peg about halfway down the stitch and pull out to the right side.
- Repeat the operation as many times as necessary.
In order for the stalk seam to be smooth and attractive, try to make the stitches the same size, preferably medium-sized. In addition, you need to ensure that they fit snugly together - in other words, there should not be a large distance between the stitches. Of course, it will take more time than embroidery with large stitches, but it will look aesthetically pleasing. So there is no need to rush.

Another very beautiful and at the same time simple decorating seam - a chain stitch - can be made with an ordinary needle on your hands. It is also very common when embroiderers create floral ornaments. Outwardly, it resembles a chain.
- Stick a needle and thread from the seamy side to the right side, pull the thread. It is more convenient to make a chain stitch with a needle when it is directed from top to bottom.
- Lower the thread and, holding it with your right thumb, form the outline of the buttonhole.
- Stitch from the thread entry point with the needle down. When pulling the thread with the needle, make sure that they remain inside the loop all the time. The stitch length should be small - along the length of the "link" of the "chain" that you want to get.
- Repeat the operation several times until you get a "chain" of the desired length.
- Try to change the direction of the stitches - this way you can embroider leaves and petals, start up the "chain" with a snake.
"Velvet" seam, or "goat"

The "goat" is often used to embroider the edging of napkins and aprons; From the front, this stitch, which is sometimes called "velvet", resembles intersecting lines, from the inside, there are two dotted lines parallel to each other.
- You need to do the work from left to right. For convenience, you can draw two parallel lines. On the top line, from the inside out, make a peg, pull the thread to the right side.
- Slightly to the right of this point on the bottom line from right to left, make a small stitch, pull the thread with a needle to the right side.
- Stepping back a little more to the right, make the same stitch to the ear on the top line. The next one will be on the bottom line and so on.
"Looped" seam

This type of decorating stitch resembles the one used for. It is performed quite simply - this can be seen in the figure. Even without step-by-step instructions, even an embroiderer who does not have needlework skills can do it. I must say that this light stitch is rarely used for decorating products. They usually let it along the contour of handkerchiefs and napkins.
"Knots"

These elements, reminiscent of nodules or small, tiny buds, are also very simple to perform. Insert the needle into the fabric from wrong side to right side. Thread a thread on it (wind it). Stick the needle from the front to the wrong side at about the same point as the first peg. The fancy stitch is ready. By the way, with the help of this unpretentious stitch and stalk stitch, you can embroider amazingly beautiful patterns - the main thing is to show imagination and be patient, since the work is simple, but painstaking. However, everything in needlework requires both perseverance and creativity.
"Herringbone"

Like the "goat", it is performed between two parallel lines (you can draw them for convenience at once). We will sew from right to left. So, we make the first peg on the upper line. We make the second peg on the lower ruler at the same level, we lead the needle forward and up (at an angle of 45 degrees) to make a stitch, but at the same time we press the thread against the fabric so that the needle from the wrong side comes out on top of it between the rulers. We make the next peg on the top line and tilt it to the left and down, also passing the thread under the needle. So alternately we make the stitches from the top, then from the bottom to the center. It turns out "herringbone". If you make two stitches from above and below each time, you will get a "double" herringbone. Both of them are used most often to decorate baby clothes.
Elena Pronina
Handicrafts especially attract the attention of modern residents. Despite their increased cost, many people prefer to purchase just such products in order to decorate the interior of the living space, to present to friends on the day of their celebration. However, creative people prefer not to buy embroidered products, but to create them on their own.
It is possible to master the basics of embroidery by attending master classes, downloading a training video. Initially, you should familiarize yourself with the variety of seams, learn how to perform them correctly. One of the most "ancient" and common seams is the decorative stalk seam.
What it is
The stalk stitch got its name due to the fact that it is he who allows you to create in the process of embroidery plant stems that are identical to natural ones. Also, decorative thin embroidery allows you to create simple patterns, make neat lines of flowers and leaves.
The graceful contour line, characteristic of the stalk seam, differs in the form of execution, it can be:
- curved;
- straight;
- close in a circle.

If you look closely at the pattern created on the basis of the stalk stitch, it is easy to visualize that the stitch consists of several oblique stitches adjacent to each other. It is necessary to carry out the stalk lines without haste, it is very important that the stitches lie evenly, and also have the same size.
At the time of embroidery, the stalk seams can lie at different angles, as well as in any, but necessarily the same direction, which was originally chosen. It all depends on what details of the pattern you plan to embroider.
The stalk seam is endowed with amazing plasticity, therefore, experienced needlewomen use it quite often when embroidering with satin stitch, especially if it becomes necessary to fill the inner space of irregularly shaped parts. The stalk stitch is one of the main stitches in the embroidery technique, not only with satin stitch, but also with beads and ribbons.
Scheme
If you need to sew a stem stitch, and the embroidery scheme is still not clear to a beginner, you can use small tips that will help you understand the sequence of performing the basic steps.
Stem stitching involves the following steps:
- draw a straight line on the fabric;
- draw four points on the drawn line, equidistant from each other;
- hoop the fabric;
- take a needle, insert a thread, bring it out from the seamy side to the front, be sure to fix it;
- stick a needle into the third point, pull it out from the wrong side;
- withdraw the needle from the second point to the front side;
- stick a needle into the fourth point, remove it from the inside;
- return to the front side, bringing the needle out from the wrong side through the third point.
Before embroidering complex patterns, it is recommended to hone the stitching technique on simple patterns by embroidering small plant stems.

Experienced needlewomen pay attention to the fact that there are two types of creating a stalk seam:
- stabbing (the tissue is pierced, and the needle is brought out to the opposite side);
- sewing (the needle is directed so that it immediately pierces two points, respectively, the punctures are made horizontally).
It is recommended for beginners to practice using a stabbing method to prevent excessive pulling of the fabric. During work, it is important to ensure that the thread does not twist, and the tension is the same every time you create a new stitch.
After the skills of performing the stalk seam have been honed, you can learn the secrets of experienced needlewomen, relying on which you can get original patterns. You can familiarize yourself with such secrets by downloading video tutorials by professional masters.
In particular, if a seam is to be thickened, each successive stitch must be shifted back to the left. If it is very important to get a graceful thin stitch, it is necessary to perform each forthcoming stitch so that it moves slightly to the right.
Stitch stitch is used for satin stitching when a dense filling of the pattern is required. In this case, straight rows are sewn, which are created close to each other.
Fashionistas who prefer to wear only exclusive clothes know that with the help of a stalk seam with the use of beads, you can decorate any wardrobe item in an original way, thanks to which the clothes will become bright and incredibly beautiful. This type of seam is also used when embroidering with ribbons.
Photo
Most novice masters prefer to see once rather than hear verbal explanations many times. By attending master classes, it is really easier to master the technique. An experienced craftsman will be able to correct the direction of movement with his hand at any time. If there is no real opportunity to attend master classes, you can download a training video or detailed instructions on the Internet, supplemented by corresponding photos, which clearly show how the needle is inserted, at what intervals it is brought out to the opposite side.

The masters also list the mistakes that novice needlewomen can make due to inexperience. To make it easier to understand such technical errors, the corresponding photographs are also attached to the explanation. In particular, one of the common mistakes is changing the direction of the working thread. It is not allowed to direct the working thread first up and then down. With this approach, the completely stalked appearance of the seam is lost.
Experienced craftsmen confirm that for most modern people with a creative nature, art is as much a need as food and drink. For this reason, when a desire arises to learn how to embroider, doubts and ridiculous fears should be put aside. It is useful to visit specialized shops selling handicraft goods. There you can always buy ready-made embroidery kits with simple and complex patterns. Subsequently, you can purchase kits for embroidery of large paintings. In such stores, sellers will help you choose needles, threads and canvas that are ideal for satin stitching, including stitching.
Having mastered the technique of performing a chain stitch, stalk seam, you can decorate with it any household item, including pillows, tablecloths, sheets, towels.
A stitch seam or "back needle" is one of the elementary seams that is used when embroidering with satin stitch. The components of this seam are several adjacent horizontal stitches. It is considered ancient and very simple to embroider. That is why novice needlewomen are advised to begin to get acquainted with the embroidery technique from this particular seam. It is often used when sewing outlines and for processing the smallest details.
Necessary for work
Of course, you need to prepare the canvas. It is advisable to choose a material that is not prone to deformation. The fabric must be washed and ironed beforehand. Prepare a hoop, thread, scissors, needle, pencil, carbon paper. Shortly before embroidering, wash the fabric on which you plan to work. This is done to avoid deformation of the fabric, and in the future, and distortion of the pattern. It is recommended to embroider on linen or cotton fabric. The work will look less advantageous on the canvas. For the accuracy of the embroidered pattern, the pattern is applied to the fabric with a simple pencil. The working thread is used of medium length, if it is too long, then difficulties will arise with constant entanglement and twisting.


Execution technique
It is divided into 2 types: ordinary and compacted.


Both the one and the other, like other types of embroidery, are made from left to right. To attach a thread without a knot on the wrong side, you need to sew 2 consecutive stitches along the edge of the pattern. And then back off about 2 mm. to the right, embroider the first stitch, and under  With the wrong side, return the needle to the left, stretch it in the place of the previous puncture. Then, pull the thread, again retreat an equal distance, and repeat the above technology. Observe the tension of the thread carefully so as not to pull it tight after pulling it over the face of the fabric. To obtain a thickened embroidery, it is necessary to pull the needle not to the starting point of the piercing, in the center of the previous stitch. The pattern that comes out will look like a miniature string. The thickness will depend on the thickness of the thread and the length of the stitch. It is often used to make a neat filing. The seam will turn out to be spectacular due to the thick thread. The stalk seam pulls the fabric from the front of the fabric. A special feature of such stitches is that the thread on the seamy side is slightly smaller than the one that directly forms the pattern itself on the front of the work. From this it follows that each subsequent seam will protrude half the length of the previous one.
Under no circumstances should you try to sew a couple of stitches with one puncture. This causes the fabric to become pulled in and the thread twisted. In the proposed technique, one stitch follows another, therefore it is necessary to carefully observe that the thread is always positioned above the needle when making the next stitch. A perfect pattern can only be achieved when all stitches are the same size. The stitch size is determined depending on the thickness of the working thread. If thin, then the stitch is short, if thick - longer. The stitch length is also adjusted based on the pattern. The stitches on the bends of the pattern should be fine. Therefore, you need to look at the drawing in advance and determine where and in what quantity they will be laid. When the stitches are too long to embroider, the quality of the finished product may be adversely affected due to the blurred outline. The needle is brought out to the face of the canvas along the bend from the side into which it curls.

So that you like embroidery and not bring disappointment, you should not set a goal with a rhinestone and carry out complex patterns and patterns. Only a gradual mastering of technology will help you to master needlework. First, try to embroider straight branches, elementary flowers, contour patterns with your own hands.

First, pick a pattern that you can easily repeat. Transfer the drawing with carbon paper onto the canvas. Craftsmen who draw well can independently create original and beautiful patterns for the product. What it will be: letters, outlines of animals, floral ornaments, motifs for embroidery with ribbons - it's up to you to decide. Stitches can be created in two ways: stitching - each subsequent stitch is made by piercing the canvas with a needle pulling it to the opposite side; sewing - threading the fabric horizontally, performing 2 punctures at the same time, then the thread is removed.

Be sure to observe the following rules:
- make a stitch of equal length
- in order to avoid puckering of the fabric, it is better to choose a piercing embroidery technique
- for sharp bends in patterns, only embroider short stitches
- do not twist the working threads
- while embroidering, the threads must always be on one side
- watch the thread tension

Let's summarize everything we learned about today. Learning how to sew using the stem stitch technique is quite simple. The technique is incredibly easy that even beginners can do it right away. You should be very careful to ensure that the stitches are the same size.


We perform the actions in the following order:
We fasten the canvas with the pattern made in advance in the hoop.

Thread the thread through the needle.

Attach it carefully from the inside of the product.
The technology belongs to counting embroidery, it is produced from left to right. The working thread is always on one side. The stitches run close together. The line is made in the following sequence:
- pull the needle and thread to the front side of the canvas to the starting point of the pattern;
- precisely along the line, lay a 4mm forward stitch;
- pierce the material with the needle down;
- pull it out in the center of the previous stitch on the front part;
- repeat all actions.

Video master class "Stalk seam"

Used for contours. The needle always moves forward. The length of the stitches should be the same from the face and from the inside.
Back stitch seam

Used for outlines. First the stitch is sewn forward, then the needle returns to the previous stitch. This creates a single continuous line.
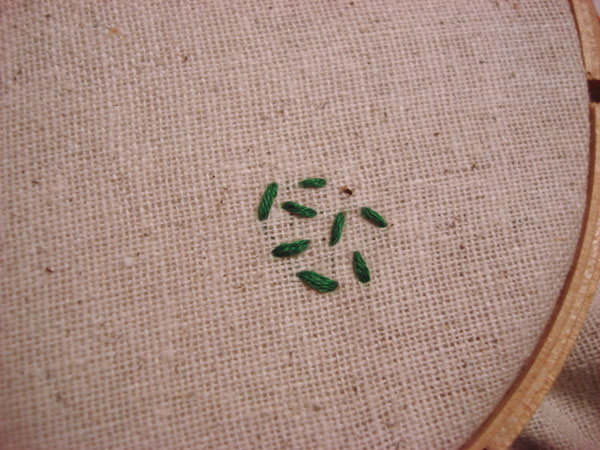
Thread splitting stitch


Used for outlines and for filling. The first stitch is made from the face to the wrong side. Further, from the inside out, the needle should enter the middle of the previous stitch, splitting it.
Stalk seam


Used for embroidery of flower stems and thin twigs. This is done in much the same way as a split stitch. The only difference is that the needle in this case does not split the stitch, but passes next to it.
Smooth

Used to fill drawings, leaves and flower petals. Sew the first stitch from one outline to the next. Then the next stitch starts again from the first outline next to the first stitch. Try to stack the stitches as tightly as possible.
French knot

Used to create accents in the work, for filling, for example, the middle of flowers. Pull the thread over your face and take two turns around the needle. Next, while holding the wound thread, insert the needle near the place where it came out on the face. Without letting go of the stuck threads, pull the needle through to the wrong side until all the loose thread has all gone to the wrong side.
Tambour stitch

Loop with attachment

This stitch is similar to the chain stitch, only in this case the loop is secured with a small stitch. Flowers can be sewn with this stitch.
Herringbone seam


Another type of buttonhole seams. This seam requires a lot of space as the stitches are large enough. In this case, the base of the loop is pulled apart a short distance. The second stitch will be sewn from the center of the previous one. Due to this, each new loop is obtained with an offset.
Loose seam

It is good to fill in small areas of embroidery with such a seam. It is carried out in small stitches "forward to the needle", but in a chaotic manner.