Decorate a bottle of champagne for the new year with napkins. Ideas for decoupage bottles for the new year. How to make New Year's decoupage of champagne bottles with sea salt
In the pre-holiday chores, there is not always enough time to look for gifts for relatives and friends, and decoupage of bottles for the New Year can help you out.
Without leaving home, without spending effort and extra money, you can make an unusual gift with your own hands that will surprise and delight absolutely everyone with originality.


What is decoupage
Decoupage technique is an application made from various materials that are easy to shape. A variety of pictures are cut out, attached or glued to the surface to be decorated with subsequent processing. For beginners, the process will seem impossible, but this is only at first glance. The main condition is patience and a little imagination. The result is a masterpiece that is in no way inferior to antiques. This idea prompted home needlewomen to think about creating presents for the New Year from bottles with their own hands.

New Year's bottle design options

Since preparations are underway for the New Year, Christmas motifs should also be present in the technique. The most popular material for work is paper napkins, three-layer, with New Year's drawings or photos. In addition to them, you will also need:
- PVA glue, if there is no special decoupage;
- acrylic paint (in this case white);
- acrylic varnish, preferably transparent;
- nail polish remover (always at hand);
- cotton pads;
- ribbons of red and green colors, each 1 m long and 0.5 m wide;
- dry sea salt (grinding should be fine);
- brush for varnish and glue;
- sponge or brush for paint;
- paper and scissors;
- rubber spatula;
- container with water.

When all auxiliary materials and tools are prepared, you should pick up a bottle of wine, and it will turn out even more interesting if it is with contents. An alternative would be to decoupage a bottle of vodka for the New Year.

Do-it-yourself bottle decoupage master class
First of all, prepare a bottle of wine by placing it in a container of warm water so that the labels get wet. Hold on until they leave. Then, using a cotton pad, apply nail polish remover to the bottle and degrease the surface. Then paint white. The number of layers depends on the hiding power of the paint, through which the glass should not shine through.

The next step is to work with napkins. They need to be divided into layers, only the upper part, which is with a pattern, is suitable for decoupage. We cut out those motives that we like or fit better, and pre-think over their location. There are two gluing options to choose from: stick the pattern on the base over the glue or first attach a napkin and apply a layer of glue on top. The result is the same, the choice is up to the craftswoman.

Attention must be paid to this moment: when gluing a napkin, it must be ironed with a spatula so that air bubbles do not collect. Thus, the entire bottle of wine is gradually smeared with glue and each of the napkin elements is glued in stages. The resulting decoupage should dry well, and then use a brush with acrylic paint to walk along the edges of the picture to smooth out the outlines. Now varnish the entire surface in several layers, allowing each of them to dry.

The final stage. Depending on the design decision, glue certain areas with glue and roll these places over a sheet of paper with sprinkled with salt. Get the effect of snow. And tie the neck of the bottle with ribbons, tying a bow. The end result is a gift-wrapped bottle of wine.

It was decoupage of bottles for the new year for beginners. As an illustrative example, a photo or a video master class will serve. For those who are not new to this technique, we can offer a more complicated option.
Decoupage of champagne


The main attribute of the New Year's table are bottles of champagne. So why not add some color to your holiday table setting? An interesting and unusual way to decorate bottles with your own hands is with a cloth. Basic materials as in the previous version, only minor changes:
- instead of wine, take a bottle of champagne;
- a piece of cloth, preferably cotton;

Fabric master class
Do-it-yourself step-by-step decoupage of a bottle of champagne for the new year is performed as follows. The bottle is cleaned of labels, the foil remains intact. Glass is degreased.

Then we dilute the PVA glue with water in equal proportions and soak a piece of fabric in the solution to soak it. Squeezing lightly, apply to the bottle, leaving the folds in an arbitrary form until completely dry.


As for the neck of champagne, it can be turned into a melted candle by making drops with a glue gun, or you can simply decorate it with tape. The final touch is a lacquer coating in several stages. Decoupage with fabric is considered the most spectacular. The master class serves as the basis, so all bottles can be decorated for the new year using decoupage technique.
Advice! When working with napkins, it is recommended to tear out the drawings, if they are cut out, the contours will be noticeable.

In addition to the examples above, there are many other types of decoupage. For the New Year, you can prepare a set of bottles with various decor options and styles. For example, it is not necessary to apply a specific pattern, it is enough to cover the entire plane in a chaotic manner with pieces of colored drawings or photos, and then comes the usual decoupage technique.
Another type, the so-called reverse. The New Year motif is attached on the opposite side of the bottle and the process is carried out in the reverse order, that is, the surface is treated from the front side of the pattern.

The combination of pasted New Year's pictures with the use of various other techniques that hide transitions looks fabulous. For example, elements of painting. This creates the effect of painting.
Shells, salt, eggshells, cereals and even putty are used as decoupage material.

No matter what bottle decoupage technique for the New Year you choose, the proposed master class with a photo will certainly help, and for detailed information, you can use the video.
Champagne is recognized by many people as the best and integral part of the New Year. If you want to really surprise your guests and add zest to the festive table setting, then decoupage of a bottle of champagne will be a pleasant and enthusiastic surprise for everyone.
And incredibly effective possibilities are provided by the decorative Seven Champagne Bottle Decorating Options with step-by-step craftsmanship lessons to help you prepare for the New Year effortlessly.
Mastery Lessons:
Basic decoupage techniques

Background coloring
- Lay out the acrylic paint of the desired color on a plastic plate. Take a foam brush or a piece of regular dishwashing sponge and dip the foam into the paint.
- Apply the paint to a clean, dry, unlabeled bottle, lightly pressing the foam against the surface. Let the paint dry for 2 to 3 hours. The paint can be dried with a hair dryer. after work, rinse the brush in running water.
- In the same way, you can apply the second and third layers of paint - on the entire surface of the bottle or on individual parts. be sure to dry each layer, otherwise spoil the whole work.
Gluing motifs (napkins with drawings)
- Cut out the motif you like from a three-layer paper napkin and separate the top layer of the napkin. You can first separate the top layer of the napkin and tear off the excess paper around the pattern you like.
- Attach the motif to the painted surface of the bottle. Type glue on a flat synthetic brush, it is better to use a special decoupage glue varnish, but you can also use ordinary PVA glue, diluting it with water in a 1: 1 ratio.
- With brush movements from the center to the edges of the motif, glue it to the surface, straightening the small wrinkles formed on the paper with the brush.
Decoupage bottles "Forest Bunnies"

You will need:
- bottle of champagne
- Acrylic paint white
- Three-layer paper napkin with a pattern of bunnies
- Acrylic outlines in gold and mother-of-pearl colors
- Silk or satin ribbon matching the color of the bunny picture
Lesson - 1 (Bunnies)
- Free the surface of the bottle from labels and dirt. Dry. With a foam brush, paint the surface with white acrylic paint. Dry.
- The paper motif that you will stick on the bottle should be the size of a large label. separate the upper paint layer from the napkin with the desired motif, from which carefully tear out the picture with your hands, departing from the contour of 5 - 7 mm.
- Attach the picture in the wide part of the bottle in place of the label, then apply decoupage glue on it with a flat brush, gluing the motif to the surface of the bottle. Dry.


4. Paint some details of the picture and background with acrylic paint with gold glitters: sparkles give the product a festive look. Dry.
5. Circle the contours of the Christmas tree branches, baskets, bunny clothes and leaves with an acrylic outline in gold.


6. On a white background, not occupied by the picture, put dots here and there using gold and mother-of-pearl outlines. Dry.
If you wish, instead of dots, you can draw snowflakes or stars with contours.
7. Complete the decoupage of a bottle of champagne and tie a silk ribbon bow at the base of the neck.
Decoupage bottles with napkins - master class

You will need:
- bottle of champagne
- Acrylic paint white
- Three-layer paper napkin with ornaments of balls, ribbons and spruce twigs
- Glue varnish for decoupage with glitters (sparkles)
- Scissors, foam brush, #8 flat synthetic brush
Lesson - 2 (New Year's motives)
- Wash the surface of the bottle well and dry. We paint the bottle with white acrylic paint with a foam brush and dry it again.
- We apply a napkin to the bottle and determine the size of the ornament, as in the photo.


3. Cut out the ornament from the napkin, leaving a white background between its elements. On a surface painted with white paint, white paper will not be visible, so cutting even the most complex ornament will not be difficult.
If cutting out the entire ornament is difficult, cut out individual motifs that will later create a single composition.
Separate the top paint layer from the cut out pictures.
4. Glue motifs to the surface using decoupage glue and a flat synthetic brush. Then dry.


5. Apply acrylic paint with gold glitters to individual details of the ornament with a flat synthetic brush.
6. With the same paint, use the tip of a flat synthetic brush around the ornament to make dots - snowflakes and dry.
Volumetric decoupage of bottles - in stages

You will need:
- bottle of champagne
- Acrylic structural paste
- Decoupage card with clock face pattern, crackers, candies and balloons
- Glue varnish for decoupage with glitters
- Acrylic paint with gold glitter
- Sheet of white paper, scissors, foam brush, flat synthetic brush No. 8, palette knife or regular knife, toothpick, pencil
Lesson - 3 (Happy New Year)
- With a foam brush, paint a clean, dry bottle blue and dry.
- On a piece of paper, draw an oval the size of a large label. Cut out an oval along the outline.
- Attach a paper oval to the surface of the bottle.
- Apply structural paste along the edges of the template and on part of the surface around it.
Volumetric decoupage allows you to model images and lift elements above the surface.

5. After 5 - 7 minutes, remove the template by gently prying it with a toothpick. Dry the composition for 3 - 4 hours.

6. From the decoupage card, cut out the motifs of the clock face, 1 - 2 crackers, three balls, 2 - 3 candies.
7. Arrange the carved motifs inside the blue oval on the bottle, creating a composition. Then, after wetting the motifs in water, glue them one by one in the right places, applying glue to the wrong side of the picture and smoothing the top with a dry synthetic brush. Dry.
8. Paint the entire surface of the bottle, with the exception of the blue oval with pasted pictures, white with a foam brush and dry.


9. On the convex part of the decor, apply a thin layer of blue paint with a flat synthetic brush and dry.
10. On the clock hands, strips of balls and sweets, the "ribs" of the convex part, covered with structural paste, flat synthetic, apply separate strokes of acrylic paint with glitters. Dry.
11. With a golden acrylic outline, write the inscription "Happy New Year!" and dots - snowflakes on the surface of the bottle. The decoupage of the bottle is completed.
New Year's decoupage of the bottle "Snowmen" - napkin technique

You will need:
- bottle of champagne
- Acrylic paints in white and blue
- Three-layer paper napkin with Christmas tree and New Year's gift patterns
- Decoupage card or drawing from a magazine with snowmen
- Glue varnish for decoupage with glitters (sparkles)
- Acrylic paint with gold glitters (sparkles)
- Scissors, foam brush, #8 flat synthetic brush, pencil
Lesson - 4 (Snowmen)
- With a foam brush, paint a clean, dry bottle white and dry.
- Cut out motifs with a Christmas tree and a New Year's gift from a napkin. Cut out three snowmen from the decoupage card.
- Attach the snowmen to the surface of the bottle and circle them with a simple pencil.
4. With a foam brush, paint the surface inside the contours of the snowmen in blue, applying the paint as densely as possible, then apply a thinner layer of blue paint around the contours, expanding the boundaries of the contour by about 0.5 - 1 cm. Dry.
5. Put the cut-out motifs of snowmen for 1 - 2 minutes in a bowl of cold water, then carefully remove them from the water and glue them to the blue-painted places, trying to make the snowmen completely fit on the blue background.
When you do direct decoupage on glass, remember that the finished product is not subject to active use, but carries only a decorative load.
Apply glue to the wrong side of the motif, then attach the motif to the surface and apply another layer of glue from the center of the motif to its edges. Dry well.


6. Cut out motifs with a Christmas tree and a New Year's gift from a napkin. Separate the top paint layer from the motifs, then glue the motifs in the central part of the bottle just above the snowmen and dry.
7. Apply separate strokes of glitter paint to the sides of the snowmen, the gift bag, and the Christmas tree. Dry.
8. With a mother-of-pearl outline, draw dots-balls on the Christmas tree. Dry. The creative process in this lesson is over.
Decor (decoration) bottles in the New Year's style

We will need:
- bottle of champagne
- Three-layer paper napkin with a pattern of bells and a Christmas ornament
- Glue varnish for decoupage with glitters (sparkles)
- Acrylic paint with gold glitters (sparkles)
- Acrylic structural paste
- Acrylic outline in mother-of-pearl color
- White paper sheet, scissors, foam brush, #8 flat synthetic brush, pencil, disposable plastic plate
Lesson - 5 (New Year's chime)
- Decoupage of the bottle, as in previous lessons, begins with surface cleaning and washing. Paint a clean, dry bottle white with a foam brush. Dry.
- On a sheet of paper, draw an arch-shaped template the size of a large label and cut it out along the outline.
- Attach the template to the bottle, apply structural paste around it with a palette knife or knife. After 5 minutes, remove the template by carefully prying it with a toothpick. Dry for 3-4 hours.
- Paint the surface of the bottle, with the exception of the arched window, with a foam brush blue and dry.


5. On a plastic plate, mix white and blue paint until a lighter tone is obtained.
Acrylic paints and pastes dry quickly, so close jars immediately after use and rinse tools with water.
6. With a foam brush, apply light blue paint with tamping movements to the part of the bottle covered with structural paste, and then further. 3 - 5 cm around it, creating a smooth transition from light blue to dark blue. Dry.
7. Cut out the bell motif and ornament. Separate the top paint layer from the cut out motifs, then stick them into the window in the form of an arch. Dry.


8. On the “ribs” of the part covered with structural paste, as well as on the bells, apply separate strokes of acrylic paint with gold glitters with a flat synthetic brush and dry.
9. Decorate the blue part of the bottle with dots-snowflakes made with mother-of-pearl acrylic outline. Dry. Decoupage of the bottle is done.
DIY Christmas bottle decor for Christmas

You will need:
- bottle of champagne
- Acrylic paints in white, blue and gold
- Three-layer paper napkin with poinsettia pattern
- Glue varnish for decoupage with glitters (sparkles)
- Acrylic paint with gold glitters (sparkles)
- Acrylic outline in gold color
- Sheet of white paper, scissors, foam brush, flat synthetic brush No. 8
Lesson - 6 (Christmas star)
- With a foam brush, paint the surface of a clean, dry bottle blue and dry.
- Cut out some poinsettia motifs from the napkin. Place the motifs on white paper and draw circles around them, leaving about 2 mm from the edge of the motif.


3. Carefully cut out the circles. Use the resulting holes in a sheet of paper as a stencil: attach the circle to the surface of the bottle and use a foam brush to paint the background inside the circle with white acrylic paint, trying to apply more paint in the center and less closer to the edge of the circle. Dry.
4. Separate the top paint layer from the cut out motifs, then stick the motifs on white circles of appropriate sizes using a synthetic brush and decoupage glue. Dry your work.
5. Paint the neck of the bottle with gold acrylic paint, and on the "shoulders" of the bottle, draw triangles of different lengths with the tip of the brush, and then paint over them with gold acrylic paint - this will make a real Christmas star at the top of the bottle. Dry.


6. On the corners of the rays of the golden star and on the white background around the poinsettias, apply acrylic paint with glitters.
7. Decorate the contours of triangles (star rays) and white circles (Christmas balls) with lines consisting of dots applied with a gold acrylic outline.
8. Draw strings for balls with the same contour and dry. The decoupage of the bottle with the decoration of Christmas stars is finished.
Decoupage of a bottle of champagne with Santa Claus for the New Year 2018

You will need:
- bottle of champagne
- Acrylic paints in blue and white
- Three-layer paper napkin with Santa Claus pattern
- Glue varnish for decoupage with glitters (sparkles)
- Acrylic paint with gold glitters (sparkles)
- Acrylic outline in mother-of-pearl color
- Silver foil paper
- Shaped snowflake punch, scissors, foam brush, synthetic flat brush No. 8
Lesson - 7 (Santa Claus)
- Make the surface of the bottle clean and dry. With a foam brush, paint the surface of the bottle blue and dry.
- Paint the part of the bottle on which the picture will be located with white acrylic paint, and in the center you need to apply the paint as tightly as possible, and closer to the edges - with a thin layer. This is so that the picture from a thin napkin after gluing does not disappear on a dark background.

3. Cut out the desired motif from a paper napkin and separate the top paint layer.
To stick a napkin, you need quite a bit of glue.
4. Attach the motif to the part of the bottle painted with white paint and glue using decoupage glue and a flat synthetic brush. Dry.
5. Apply acrylic paint with gold glitters to individual parts of the motif. Dry.


6. Using a foil paper punch, cut out the snowflakes and stick around the glued pattern on a white background.
7. On a blue background that is not occupied by a picture, draw dots, stars or snowflakes here and there with a mother-of-pearl outline. Dry.
Decorating a bottle for the New Year - video
By sticking images cut out of paper on the surface, anyone who does not own a brush can decorate their home with an imitation of chic bottle paintings.
How to beautifully decorate New Year's champagne with your own hands - video
Today you got acquainted with a fashionable type of decorative art - decoupage. Bottles decorated using decoupage technique are a unique and inimitable decoration of the New Year's interior.
It's hard to imagine the New Year without champagne accompanied by the chiming clock. Therefore, it is not surprising that, recently, along with decorating an apartment and a Christmas tree, decoupage of bottles is gaining more and more popularity. Today, there are many ways to decorate champagne using decoupage technique, each of which will allow you to create an amazing craft with your own hands, which you can proudly put on the festive table. You just have to choose the design option!
If you have a bottle of champagne with a neck framed in gold foil, you should not get rid of such a spectacular and elegant element: you can skillfully use it in your design and make it part of the bottle's festive decor. To do this, we need gold paint, a decorative primer or acrylic, brushes, New Year's napkins or pictures for appliqué, a foam sponge, decoupage varnish.
Before starting work, the label with the name of the champagne should be removed, and the surface of the bottle should be washed, dried and degreased. Then, a primer or acrylic should be applied in several layers. If roughness remains on the surface, they must be sanded: the coating must be perfectly even. You can decorate the bottle with the help of New Year's napkins or printed on a color printer and cut out pictures in the New Year's theme. You can glue the elements on decoupage glue or diluted one to one with PVA water.
Dry elements should be glued on a completely dry surface, applying strokes from the center to the periphery, carefully making sure that no air remains under the applications.
After the applications have dried, the surface of the bottle should be painted with gold paint using a dry foam sponge in several layers. You can go to the borders of the pictures. After the surface has dried, the bottle should be varnished. In this way, we will keep the coating for a long time and achieve an elegant shine of the golden surface.
Decoupage bottles of champagne for the new year with a window
A bottle with a window is an original craft that imitates a window cut into the surface of the bottle, through which you can see the inside of the container with a pattern. Making a bottle of champagne in this way with your own hands is very simple. To do this, you will need: a bottle (preferably with the lightest possible glass), a napkin with a New Year's motif, a decorative primer or acrylic, adhesive paper or tape, decorative elements, a fixative varnish.

To perform decoupage you need:
- Prepare the bottle for decoration. To do this, remove the label, thoroughly wash and degrease the surface.
- Glue the napkin with the image inside (this image will be viewed through the “window”).
- Glue the area opposite to the image with adhesive paper or tape. It is not necessary that the “window” be round: you can glue the area in a square, make the window oval or in the form of a semicircle.
- Cover the bottle with primer or paint (do not completely cover the area with self-adhesive). You can use for this an ordinary household sponge, a decoupage fan brush or a special palette knife. It all depends on the surface you want to get.
- If you want to make the bottle bright, then you can paint it any color over the primer.
- After the bottle dries, you need to remove the adhesive paper with a clerical knife - the window is ready!
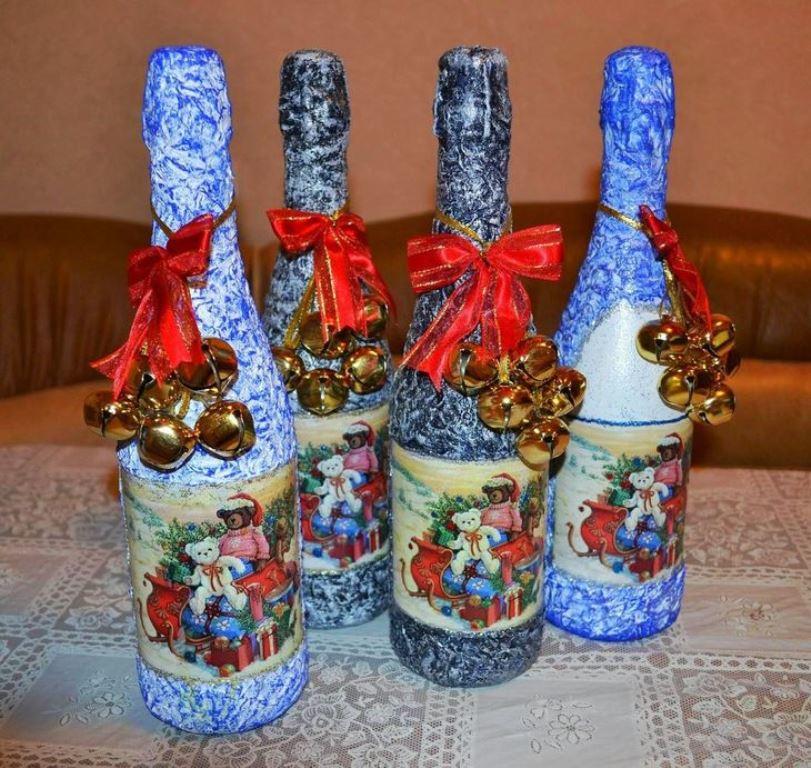
How to make New Year's decoupage of champagne bottles with sea salt
Making a bottle for the New Year is hard to imagine without imitation of snow and ice. The easiest way to do this is with a special decorative paste, but if you couldn’t find one, improvised means are also suitable for volumetric imitation. Decorating with sea salt is a great option. In addition, we will need a primer or white acrylic, PVA glue, brushes, a sponge, a napkin with winter motifs (one large, clear image is perfect, for example, an elegant Christmas tree, a bullfinch on a branch, etc.).
.jpg)
In order to make decoupage, we need:
- Prepare the surface of the bottle and cover it tightly with a primer or white acrylic, wait for it to dry completely.
- Cut out the image from the napkin and stick it on the surface of the bottle in the center of the widest part.
- Put sea salt on a sheet of clean paper.
- When the napkin dries and grabs well with a primer or acrylic, coat the entire surface of the container with glue, slightly going to the borders of the image.
- Take a bottle and roll it over a sheet of sea salt.
Thus, we will get a three-dimensional imitation of a bottle in ice with a central image. To fix the result, you can cover the bottle with a fixative spray.
New Year's decoupage of champagne: a master class
You can also get a volumetric imitation of snow with the help of semolina. For decoupage, we need: in fact, the bottle of champagne itself, a napkin with a New Year's image, a white decorative primer and acrylic paint, brushes, a foam rubber sponge, silver glitter, decoupage glue or PVA, fixative varnish.

To make a bottle you need:
- Prepare the surface of the bottle. Remove all labels, degrease the surface and cover it tightly with a white primer using a foam sponge.
- Cut out the image from the napkin. It is not worth working clearly along the contour: you just need to cut the napkin a little above or below so that you can conveniently place it in the widest part of the bottle.
- Attach the image to the bottle using the decoupage technique (the first master class tells more about the application).
- If there are color transitions (for example, the sky on the napkin is made in purple tones), then it is worth hiding them, applying acrylic paint to match the napkin with a sponge over the entire surface of the bottle.
- Lubricate the “snowy” places (roofs of houses, treetops, etc.) and the bottom of the bottle with glue, put semolina on it.
- Next, paint the “snow” with white acrylic and, after drying, add silver glitter, lightly touching the snow with a sponge.
- We decorate the bottle and the image of our own accord (you can add sequins, sparkles, etc.).
- We cover the bottle with a fixative after the decor has completely dried.
Decoupage of the New Year's bottle of champagne: master class (video)
Making New Year's bottles of champagne using decoupage technique can be an excellent New Year's Eve tradition, which will gather all family members. The resulting crafts can be collected in a collection, reviewing which, you will be pleased to plunge into the atmosphere of the holiday. And most importantly, all the bottles will be unique and creative, because decoupage opens up so many opportunities for the realization of ideas. The main thing here is to show imagination and not be afraid of experiments!
More recently, in Russia, people began to relax during the New Year holidays with the whole family. Not only schoolchildren and students, but also the working population has the opportunity to visit relatives, take a walk, go in for sports and devote time to their favorite hobby.
Decoration of interior items in technology is gaining more and more popularity among the fair sex. You can decorate in this way not only cutting boards, photo frames and other little things, but also bottles, for example, with champagne. These works will decorate the table, refresh it, make it special. Even if you didn’t have time in the bustle to master a new technique of creativity all year long, you can do it just on New Year’s days.
In this master class, we will consider the technique of direct decoupage from a file, while we will put the pattern on the bottle around, with the edge over the edge. When decorating directly with a napkin, champagne will stand, and not lie on its side, as when gluing a small motif.
Here it will be useful to indicate the terms used by the masters of this technique.
A motif is a drawing from a napkin or decoupage card, which will be located on the surface. The primer is acrylic paint or a mixture of paint with PVA glue, which is applied to the glass in the first and second layers.
For decoupage, PVA glue is usually used, slightly diluted with water. It is also important to remember that when wet, the size of the napkin increases by approximately 0.5 cm on each side, which is very noticeable if you first apply a dry napkin to the surface to determine the boundaries where the motif will lie.
Materials and tools
The craftswoman should always have toothpicks, cotton buds, sheets of paper or newspapers, cotton wool at hand. All this can be found in every home. Pay attention to the reasonable arrangement of the workplace, to the protection of hands, face (especially eyes) from the effects of varnishes and paints. Therefore, it will not be superfluous to purchase gloves, masks, etc. In addition to the above, prepare:- acrylic paints: white and mother-of-pearl;
- regular brushes, as for watercolors;
- a sponge sponge or a piece of dry dishwashing sponge attached to a clothespin;
- acrylic lacquer;
- sandpaper the smallest;
- acrylate putty for decorative work;
- napkins of a suitable theme, I took New Year's ones;
- branches of an artificial Christmas tree, real cones;
- for artificial snow foam balls;
- PVA glue for paper and cardboard or construction;
- scissors;
- clerical file, better dense.
Inspiration, creative message and free time, as well as a good mood, will also come in handy. In time, work can take several days, since it is necessary to dry each layer thoroughly, but when using a hair dryer, it can be accelerated to several hours.
Beginning of work
Purchase good quality champagne.
As in the case of reworking an old one, old decorative layers must be removed before applying any type of coating. When decorating a bottle, these are labels and excise stamps. First I soak the glass in water, then I remove the label with a brush. Paper and glue residue can be easily removed with vegetable oil and sandpaper, rubbing the bottle vigorously.

Choose a napkin in advance.

Before you start priming the glass, degrease it with window cleaner or alcohol.
Add PVA glue to the paint and prepare a foam sponge.

Apply the primer to the surface with small dotted movements.

Two or three layers is enough. Let the bottle dry or dry thoroughly with a hair dryer on all sides.
Now take fine sandpaper and sand the surface.

In the process of grinding, you will realize that the graininess is not completely removed. In order to prepare the surface for decoupage from a file, take an acrylate putty.

Apply the paste to the bottle in the thinnest layer. To do this, take a plastic card of any bank instead of a spatula, or just use your finger. You can also remove excess with a thread. The bottle should be on its side.

Let's use the hair dryer again. The paste dries very quickly.

Cover the bottom of the bottle with it as well.

If necessary, go over the surface with a jumper again. Here is how smooth the bottle turned out as a result. Now she is ready to apply the motive.

Decoupage
The easiest way to decoupage for beginners is to decoupage from a file. I chose a motif depicting Christmas balls, cinnamon, fir branches. The drawing does not end on a quarter of the napkin, as usual, but is located on the half, as shown in the figure.
If you wrap a bottle with a napkin, it becomes clear that you will have to reduce it a little. But let's not rush.
Make the edges of the motif uneven by cutting them off. Unfold the napkin.


You may have to iron the motif from the inside on the “silk” mode.

Lay the colorful layer of the tissue paper on the file, pattern side down, and start dripping water on top of it, from the middle to the edges. It is necessary that the entire napkin is in the water. In fact, by straightening it, you will not touch the paper with a brush, you will touch the water, and the napkin will straighten itself.

Smooth out the motif, expel the air from under it, the folds will straighten out. However, do not keep the tissue in the water for too long! The edges of the motif can be safely removed, as the paper has increased in size.
The motif on the file can be raised in this way, as shown in the figure.

Lubricate the bottle thickly with PVA glue, while diluting it is not necessary in this case.


Now the most interesting and most difficult part of the work begins. Starting from the middle of the motif, lean the file against the bottle, but not all at once, but only the middle, and iron the file with your hands up and down, and also a little to the sides.

Next, you need to put one edge of the napkin on the glue and slowly separate it from the file. If necessary, straighten with a wide brush with water, but it is better to stick evenly immediately.

The photo below clearly shows that one part of the napkin is still on the file, and the other is already on the bottle.

Now overlap the rest of the napkin, adding a little glue. This whole process requires skill, attention and concentration. If necessary, carefully cut off the excess part of the image.

Take a look at the following photo. It shows that the last part of the napkin did not stick very evenly, and when trying to smooth the motif, it began to tear. At this stage, if this happens to you, it is best to exhale. Let the napkin dry naturally, a hair dryer will only hurt here.

Glue now the top of the napkin, which previously remained just in the air. If creases form, they can be removed later with sandpaper.
Pick a color and finish the background with the same sponge.

While the paint dries, prepare the fake snow. To do this, mix white paint, PVA glue and semolina or such foam balls as in the photo.

Coat the bottle with two coats of varnish and let it dry. Before that, it was possible to depict patterns on the surface.
Close the lid with foil and apply artificial snow on it.

In conclusion, hide the bumps and the "seam" of the napkin with a few sprigs of an artificial Christmas tree or tinsel. I also glued real cones, covered the branches with artificial snow. You can attach this to a glue gun, which you can buy at the Fix Price store for no more than 100 rubles.

That's it, beautiful ready!


In the turmoil, there is not always enough time and energy to purchase all the gifts. In this case, do-it-yourself decoupage of bottles for the New Year can help out. By making such a present, you can take into account all the tastes and preferences of the recipient and give the souvenir an individuality.
Decoupage technique
Decoupage is an application made of various kinds of materials, which can be easily given the desired shape. Most often, napkins, cloth, ribbons and twine are used. Additionally, stickers with a New Year theme, sparkles, sequins and other elements are used as decor. Even a beginner can handle this technique with a little patience and skill.
Separately, you can take out the decoration of bottles with sweets and other edible treats. This is not decoupage in the direct sense, but it looks no less impressive and festive.
Napkins
For a classic New Year's decoupage of a bottle of champagne with your own hands, you will need:
- three-layer napkin or rice paper with the desired pattern;
- primer;
- alcohol or degreaser;
- foam sponge;
- acrylic paints;
- brushes;
- various decorative elements (sequins, sequins, ribbon beads).
Now you can get to work.
- First you need to remove all paper stickers from the bottle, as well as the excise tax, wipe it with alcohol or a degreaser and wipe it dry.

- Next, you need to prime the surface of the bottle with a special artistic primer so that it merges with the future pattern. The easiest way to do this is with a foam sponge. But you can also use a brush.
Important! Do not try to apply the primer perfectly evenly, it will still practically not be visible under the drawing.

- If the primer used is of a thick consistency, then one layer will be enough. Otherwise, it is better to repeat the procedures so that there are no gaps in the glass. After application, leave the bottle to dry.
- Cut out your favorite design from the napkin.

- We attach the drawing to the bottle and apply decoupage varnish on it. At the same time, gently smooth the napkin, trying not to tear or wrinkle. The varnish should completely soak the napkin.

- If the borders of the picture are clearly distinguished, then they can be masked with the help of soil.
- When the varnish dries, you can proceed to additional decor. Add sequins or tie a ribbon.

Advice! Such a bottle can be placed under the Christmas tree or presented as a gift to family and friends.
If you are doing decoupage with napkins for the first time, then it is better to view photo and video tutorials in order to avoid mistakes. Below you can clearly see the step-by-step instructions for decoupage a bottle of champagne.
cloth
This method will help create a three-dimensional image on the bottle. For this you will need:
- fabric, preferably cotton;
- PVA glue;
- alcohol or degreaser;
- acrylic paints;
- brushes;
- three-layer napkin;
- decor elements.
Making such a bottle with your own hands will not take much time.

Advice! For decoupage, you can use any New Year and Christmas drawings.
Below is an interesting video with precise instructions for decoupage using fabrics.
candy decoration
This way of decorating a bottle of champagne is no less spectacular and interesting than decoupage. Even a beginner can handle it with a little effort and patience. For manufacturing you will need:
- a bottle of champagne or other drink;
- candies;
- glue gun;
- orange and green tissue paper;
- raffia.
Now we proceed directly to manufacturing.

Decor with burlap and twine
Another way to decorate a bottle of champagne with your own hands is to use burlap and twine. With the help of these simple details, you can make a really beautiful and original present. You will need:
- a bottle of champagne;
- leg-split;
- scissors;
- glue gun or PVA glue;
- additional decor (beads, beads, braid, lace);
- alcohol or degreaser.
When all the necessary tools and materials are prepared, you can start manufacturing.
- Clean the bottle from paper stickers of the manufacturer and excise tax. Wipe the glass with a degreaser or alcohol.
- Now we begin to glue the twine with a glue gun or PVA glue from below, moving in a circle.


Advice! To avoid gaps between the rows of twine, try to stick it as close to each other as possible.
- Let the glue dry, and only then proceed to additional decor with beads, beads or lace.

Advice! To give the bottle a New Year's mood, you should add a little sparkle.
Design options
Even a beginner can decorate a bottle for the new year with his own hands. There are a huge number of design options. You can come up with something exclusively of your own, taking into account the personal characteristics of the person to whom the present is being prepared. The main thing is to include imagination and a little skill.