Women's bag organizer patterns online. Storage ideas: Organizers for every occasion and taste. Wardrobe organizer options
About the lack of order in anecdotes have long been composed, with which, even if desired, you can not argue. Indeed, almost all the representatives of the fair sex have in their bag not only a mess, but downright chaos, which at the crucial moment sucks such necessary items like a phone, wallet, business card holder or a tube of hand cream.
But any chaos can be dealt with. The chaos that lives in women's handbags will help subdue the bag organizer, in which you can put important little things, and then simply transfer it from bag to bag. There are two options for organizers - a bag organizer with a pattern, which itself looks like a small bag, but there is an easier way to make a DIY bag organizer that does not require patterns or professional sewing skills.
Let's take a closer look at how to sew a bag organizer that will help you organize things in your purse and pacify the mess.
Master class - bag organizer
Step 1: To simplify the sewing process, you can take not just a piece of fabric, but a linen towel or napkin so as not to process the edges. Fold the fabric in half and iron this fold well with an iron.


Step 3: Using a pencil or soap, depending on whether your fabric is light or dark, make a markup by drawing lines on both sides of the fabric 1.5 cm to the edge.

Step 4: Next, you need to make markings for the pockets. In principle, everything is individual here, depending on what size pockets you need, but on average, draw lines at a distance of 10 cm from each other.

Step 5: The next step is to make a loop of elastic band. The size of the buttonhole depends on the size of the button you are going to use.

Step 6: Sew the edge of the garment to secure the buttonhole. For reliability, you can make a double seam. Also sew all the previously marked lines.

Step 7: So, at this stage of manufacturing, the organizer looks exactly like this.


Step 9: Sew a button to the edge to secure your organizer.

Step 10: And now, as they say, you can enjoy the creation of your own hands.

The manufacturing process of such an organizer for women's handbag very simple and any girl can handle it, even one who has almost no sewing skills, and the small size of such an organizer will allow you to carry it even in a small handbag.
Psychologists from France have proven that the presence of disorder in a woman's handbag indicates not only the dreaminess of her mistress, but also disorganization, inability, passivity and the inability to get together at a particular moment. Organizer for the bag will help to put things in order. It acquires special value if it is made by hand.
A bag organizer is very convenient if a woman has several bags for all occasions. Thanks to this small accessory, the fair sex manages to keep travel cosmetics, a wallet and other little things in order, and the process of changing one handbag to another is quick and easy.
The bag organizer has the following advantages:
Organizes the contents of any handbag;
Always has a stylish design;
Virtually invisible in the bag;
It is the perfect gift for any woman;
Perfect for various types bags.

A bag organizer can be sewn independently by any woman who wishes to do this, even without special sewing skills. For the top surface of the organizer, you need to choose a dense fabric (you can even use artificial leather). For strength, it can be duplicated with synthetic winterizer or non-woven fabric.
So let's consider simplest way how to sew an organizer for should be done on paper, and only then cut out of fabric in the form of two rectangles with obligatory allowances for seams up to 1 cm on each side. Next, you need to sew around the perimeter of the edges of these rectangles, while leaving a small hole (up to 5 cm) unsewn, with which the organizer can be turned inside out.
The next step is to mark the fold line of the organizer. Basically, it is located 10 cm from the edge of the product, stitched and turned inside out. Now you can fold the fabric and iron.

Next, sew on pieces of adhesive tape, which will be used instead of the fastener. To do this, one part of the adhesive tape is located on the inside, and the other on the outside. Stitch the short edges of this accessory.
If there is a need for constant presence in a purse mobile phone, hair brushes, notebook, business card holders and pens, it is necessary to outline future pockets and stitch them with a double line.
If the fair sex leads an active lifestyle associated with business or sports, then an organizer bag will help to arrange all the necessary things and little things that she needs every day and may need at any moment. This is a medium-sized bag made of dense fabric or leather (both natural and artificial), with a large number of pockets located both on the outside of the bag and inside it. With the use of such a bag, a woman will have all her things in their places, and it will be easy to find any of them. However, there is one drawback - when changing the bag, shifting all the little things will take a certain period of time.
A bag organizer is an indispensable thing for any girl. With it, you can easily put things in order even in the most chaotic pile of ladies' accessories. Thanks to him, your bag will always be in perfect order and there will be much more free space, and finding and getting something will be much easier than before.
Every woman faces such a problem as the difficulty in getting something out of her purse. Necessary and not very things in it are always either dumped in one heap, or stuffed into all the pockets in a row. This creates a lot of obstacles in the way of the hand in the expanses of the insides of the accessory.
And when the time comes to take another bag and put everything you need from the old one into it, the “move” is long and painful. After that, you still need to remember what lies in which pocket, because in each accessory their number, size and location are different.
Therefore, in order to simplify her life, every girl needs a special bag organizer. Doing it with your own hands is not too easy, but it is quite possible. Consider an example detailed instructions for the manufacture of such.
Parameters and materials
The work begins with the definition required dimensions. When choosing the parameters of a craft, be guided by the fact that it fits into any of your bags, is moderately compact, but at the same time roomy.
A fairly versatile option: length 26 cm, height - 17 cm and thickness - 8 cm.
Now we collect the materials necessary to create the product. You will need:
- regular (two colors) and lining fabrics;
- zipper with lock;
- adhesive interlining (you will strengthen the sides and bottom of the product with it);
- needle, thread.
We work out every detail
The organizer pattern for a bag consists of several parts - departments of the future accessory.
Cut blanks with the following parameters:
- 4 large side pieces for inside and outside - 28 x 19 cm.
- 4 small edges - 10 by 19 cm.
- Bottom - 10 by 28 cm.
After cutting, reinforce each prepared element with interlining.
External pockets
It is impossible to imagine a bag organizer without pockets. Cut out 2 blanks for large outer ones, 40 by 26 cm in size, and the same number for inner ones - 40 by 22 cm. For side elements, cut blanks according to the same principle.

Make sure that they are wider than the walls of the organizer themselves. So you can make the pockets more spacious. Sew all the workpieces along the fold. You can use one or two parallel stitches for this.
Form pockets, cut off unnecessary from them and collect them in a fold to add volume to them.
After that, combine the blanks for external decoration into a ring. Sew them from top to bottom. In this case, it is necessary to leave about 1 cm free so that the bottom can be attached to it.
Steam and iron all the stitching lines well with an iron so that they look neat. You can use a small press to increase the leveling effect. For this purpose, for example, a smooth birch bar is suitable.
We fix the bottom
Next, you need to insert and fix the bottom into the organizer for the bag. First, pin it to the allowance left earlier with the help of safety pins.
After that, sew the material along the narrow sides. At the same time, leave at the end of each row of stitches 1 cm of free space.
Unscrew the allowance for long edges blanks, fasten them to the bottom using all the same pins. Sew, leaving a margin of 1 cm at the ends. Combine the remaining sides in the same way. After that, remove the fabric from the corners and cut all the allowances in half.

The entire organizer for the bag is sewn according to this pattern. On the inside, you must perform the same actions as on the outside. The only difference is the preliminary creation on one of the large sides of the pocket with a zipper.
Inner pocket
Mark on the inside the place where the entrance to the pocket will be located. Then cut it, overcast and iron the edges. On the inside, put a zipper, fix it with pins and sew.
Then tidy up reverse side lining, attaching small pieces of it along the edges of the snake. In this case, you can not grab the fabric from the side elements of the craft. Now shape the pocket and sew it on the outside of the inside of the side, while folding the lining up.
Turn the part you are working on right side out and cover it with an additional layer of lining. Use pins for preliminary fixation, and try to place the seam as close to the edge as possible. Trim off any excess fabric that sticks out from under the stitching. This completes your work on this pocket.

Now you can safely begin to combine all the details located inside the future accessory. Put all the formed departments together and sew the right places.
If you do it right, you will create the accessory your bag needs. An organizer for a bathroom or any other place can be made according to the same principle.
Like many mothers, and women in general, I have encountered such a problem that it is absolutely impossible to find anything in my own bag (especially in a nursery, because the manufacturers of strollers, in addition to which there are bags, do not particularly bother about this) . Completely annoyed by the eternal mess in my children's bag, I decided to sew an organizer where all the children's personal belongings that you constantly carry with you would fit without any problems. And here's how I did it.
To begin with, I measured my children's bag so that the organizer would fit in it without any problems. As a result, I got the following details: 2 front walls, 1 rib that serves as both side walls and bottom, 3 internal dividers, 2 external pockets (one for each front wall) and two pockets per rib. In all cases, the fabric is folded in half.

When I was thinking about the organizer, the question arose - how should I strengthen the walls so that they keep their shape (otherwise my organizer will simply turn into a bag that only adds chaos to the bag). I'm not really such a seamstress and all sorts of doublers-non-woven fabrics and something else happens - for me it's darkness, especially since I have absolutely no way to look for them in stores. Therefore, in a well-known store, where everything is at the same price, I purchased such a shopping bag of a material unknown to me. It holds its shape well and is not thick at all. from it I cut out 2 more front walls and a rib.

I prepared the internal partitions and pockets - I sewed it from the inside out, turned it inside out and stitched it again from above (while sewing up the place where I turned it inside out)

I unfolded the front wall (it turned out the fabric in one layer) and sewed on the side pocket, dividing it with a line into three separate pockets. I did the same with the second front wall.

On the other half of the front wall I sew internal partitions. The photo is not very visible, but when sewing on the partition, I made only one straight line (on the right).

Then she unscrewed the partition and sewed the second one in the same way.

And the third.

Then you need to sew partitions to the second front wall. We lay out the unfolded halves side by side and alternately, starting from the extreme left, we sew all three partitions. Then we fold our front walls so that the fabric again lies in half.

The end result is something like this.

We insert our duplicate material between the halves of the front walls and stitch it so that it does not move. It turns out here is such a detail.

In the same way, we flash the understudy and the edge. Don't forget the side pockets.

In our review - a lot of ideas plus three detailed master classes.
Textile organizer with pockets
Based step by step master class By making the simplest basic model of a wall organizer, you can make any organizer - with more or less compartments, a wider or longer organizer, a bathroom organizer from waterproof material.
You will need:
- A large piece of fabric for a double-sided organizer base;
- Smaller cuts - for pockets;
- Slim durable plastic material to strengthen the base and pockets (if you wish, you can use dublerin by gluing it to the fabric with an iron);
- Ribbon or ready-made bias binding of sufficient length to process pockets and the base of the organizer;
- eyelets
Step 1
First, decide on the size of the organizer and pockets. For example, in this case, we start from the size of a standard A4 sheet - you can use it as a template. Cut plastic into rectangles of the appropriate size, and from fabric - pieces twice the size, not forgetting a few centimeters for the volume of each pocket and good seam allowances.Step 2
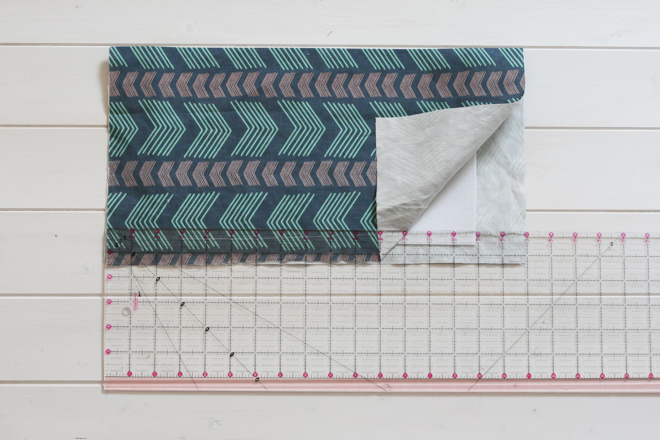

photo: blog.spoonflower.com
Fold each pocket piece in half inside out, insert a piece of plastic inside and topstitch.
Step 3


photo: blog.spoonflower.com
Iron the fabric on the sides inward with an “accordion” so that allowances remain on the side.
Step 4

photo: blog.spoonflower.com
Stitch the folds of the edge of the pocket. So process each of the pockets.
Step 5

photo: blog.spoonflower.com
Now let's get to work on the basic organizer. Place the plastic part between the layers of the double fabric part.
Step 6

photo blog.spoonflower.com
Attach the details of the pockets to the base and pin them with pins.
Step 7

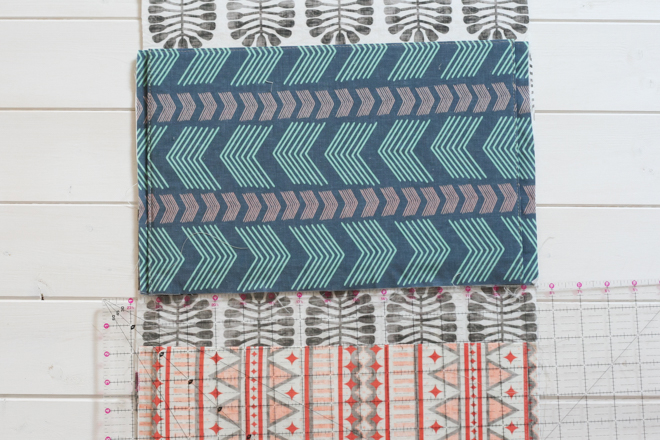
photo: blog.spoonflower.com
Sew the pockets to the base.
Step 8

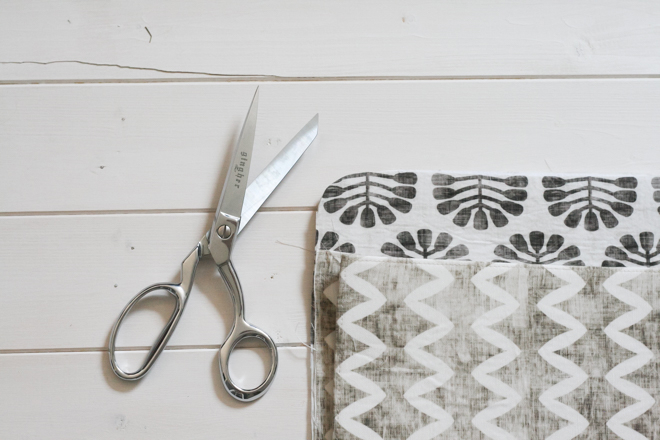
photo: blog.spoonflower.com
Using a round object as a template, round off the corners of the base.
Step 9


photo: blog.spoonflower.com
Work the organizer in a circle with bias tape or tape.
Step 10


photo: blog.spoonflower.com
Mark the location of the eyelets and install them. Ready.
Variants of textile organizers with pockets

photo: apartmenttherapy.com

photo: handmadepride.tumblr.com
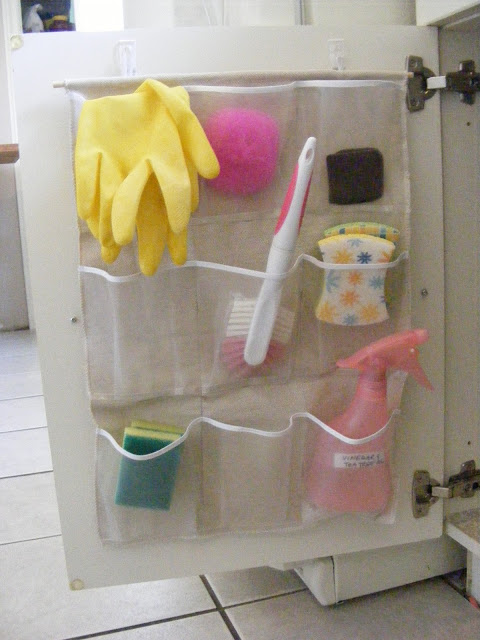
photo: imperfecthomemaking.com

photo: livesimplybiannie.com
A similar organizer can be adapted for a bed.

photo: static1.squarespace.com
do it yourself
Organizer "shoulders" in the closet

photo: blog.spoonflower.com
If your closet lacks compartments with shelves, you can add them by sewing a similar organizer. It will come in handy in the bathroom, for example, for towels, and in the nursery - for toys, and in the hallway - for hats and scarves.
You will need:
- The same amount of fabric for the outer and inner sides (take a dense, strong fabric);
- A piece of Velcro tape (Velcro) 10+ cm long;
- Thick cardboard or plastic to strengthen the organizer;
- Hanger
Step 1


photo: blog.spoonflower.com
Cut out the fabric and cardboard according to the diagram in the picture (the number is the number of parts).
12 parts 23x23 cm (lining fabric);
2 parts 23x32 cm (main fabric);
2 parts 20x23 cm (main fabric);
2 parts 32x69 cm (main fabric).
Remember to add 0.5 cm allowances.
Step 2


photo: blog.spoonflower.com
Sew, as shown in the picture, the details of 20x23 cm. Turn it inside out, iron it, sew on the Velcro.
Step 3

photo: blog.spoonflower.com
Mark the middle of this part and sew with two lines to the middle of one of the parts of the main fabric 23x32 cm.
Step 4


photo: blog.spoonflower.com
Connect this piece to one of the lining pieces. Sew the details as shown in the photo. Insert cardboard between the shelves.
Step 5


photo: blog.spoonflower.com
Lay out the finished wrong side of the organizer on the table and baste, and then attach the details from the outer fabric 32x69 cm. On one side, leave a piece for eversion unstitched.
Step 6
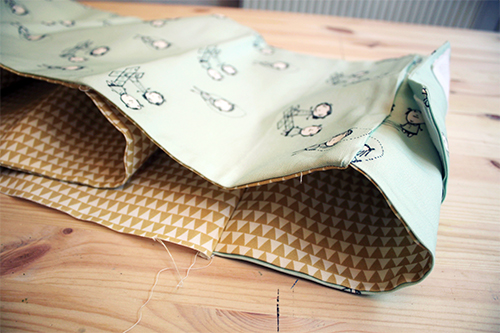

photo: blog.spoonflower.com
Turn it right side out and sew up the open section.
Step 7

photo: blog.spoonflower.com
It remains to attach the hanger with Velcro.
do it yourself
Wardrobe organizer options

photo: ebootcamp.org

photo: ebootcamp.org

photo: diyjoy.com
Closet storage options with homemade organizers
Storing shoes and bags:

photo: s-media-cache-ak0.pinimg.com
Shoe storage plus a variant of the "shelves" organizer, supplemented by boxes:

photo: simplesdecoracao.com
Bag storage:

photo: cheapbuynsave.com
Shoe storage:

photo: casatemperada.blogspot.com
Homemade covers for clothes:

photo: amazinginterior-design.com
Bag Organizer
Such an organizer will help, on the one hand, make a large bag with no pockets more convenient, and on the other hand, it will facilitate the transfer of everything you need from one bag to another. It is very convenient for those who pick up a new handbag for each outfit.This organizer is sewn from thin felt. We recommend this particular material: it holds its shape well and does not require edge processing.
You will need felt sewing machine, threads, scissors.
To sew the organizer, follow the instructions in the video:
Small organizer options:

photo: 1.bp.blogspot.com

photo: coupons.com

photo: craftbnb.com

photo: pdc2011.org