DIY gift: a pretty pillow. DIY decorative pillows DIY pillows for lovers
It is sewn mostly simply, rarely requires exotic materials. That is why an amazing journey into the world of pillow dreams awaits you.
Step-by-step master classes and patterns or how to sew a pillow with your own hands
A lot of master classes are waiting for you now. Let's start with baby pillows.
Pillows - toys for adults and kids
Soft plush friends are always in the price of children. But what if we make them a little more practical, but no less original? In this section you will see a lot of children's pillows in the form of toys and just unusual and bright designs for a great rest for your baby.
Children's pillow - toy "Rosalina"
With this shy beauty, children's sleep will always be a joy. To sew a soft zaya for a child, you will need:

- velsoft (for the base of Rosalina, you can take artificial fur and fleece);
- thin felt (for muzzle decoration);
- threads in the color of the fabric + black;
- lace 2 colors (for decoration);
- small rose (for the central part of the bow);
- synthetic winterizer (for stuffing);
- dry pastel (to give a gentle blush);
- cotton pad (optional)
- chalk or pencil (for transferring patterns to fabric);
- needle;
- pins (for chipping parts);
- scissors.
Here are the patterns for Rosalina (click to enlarge):


Cut them out carefully, velsoft is a capricious fabric. We start with the ears. Sew them as below. Turn the ears inside out and stuff with padding polyester.


Put the ears inside the head. Pin along the edge, baste and sew, leaving a hole at the bottom.


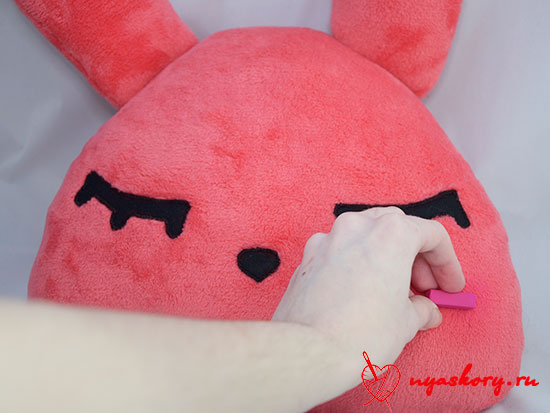
Turn the head inside out along with the ears. I got it like this:

Stuff Rosalina with padding polyester, sew the bottom hole with a blind seam.

Now we have to make Rosalina's face. To do this, take all the details of the face, pin them to the head with pins (so that they do not move out), and then sew them with a small hidden seam.
To apply blush, simply take a pastel chalk and rub the bunny's cheeks, rub with your finger. If the pile on the fabric is not very long, you can do this with a cotton pad, after applying a pastel on it.


Rosalina definitely needs to make a pretty headband! To do this, cut the lace so long that it is slightly longer than the distance between the ears.
Sew the ends of this piece to the ears, as if pulling it.

Now let's make a bow! To do this, take another piece of lace, fold it in half and sew the ends.

Now simply sew a line of running stitches down the center of the bow. And pull off.


Quad cat
Necessary materials
What is useful to us for a pillow - a Quadrocat toy?

Here is the list:
- fleece of 2 colors (for muzzle and head);
- felt (for eyes and nose);
- threads in the color of the fabric;
- synthetic winterizer or synthetic winterizer (for stuffing);
- white acrylic paint for the pupil (or rhinestones)
- a glass of water (if you use paint);
- second glue (if you chose rhinestones);
- pencil or chalk for transferring patterns to fabric;
- sewing needle;
- paper for transferring patterns to fabric;
- scissors.
Before you start sewing, you will need the patterns that I have prepared for you (click):

First of all, I want to say: this is only a quarter of the pattern (for the head and muzzle), for the nose it is half. For felt parts, allowances are not needed. For everyone else, half a centimeter should be enough.
First of all, cut out and sew the ears together. Trim off excess seam allowances. Turn out the ears.


Ears while you can put aside, take the muzzle and head. Sew the muzzle into the head as shown below.
In order not to get lost, you can make small notes in the same places on the muzzle and border.

This is what the cat's face looks like:


Now put the ears inside the Quad Cat where you like and sew them on. Also sew the cat along the edge, leaving a small hole at the bottom.
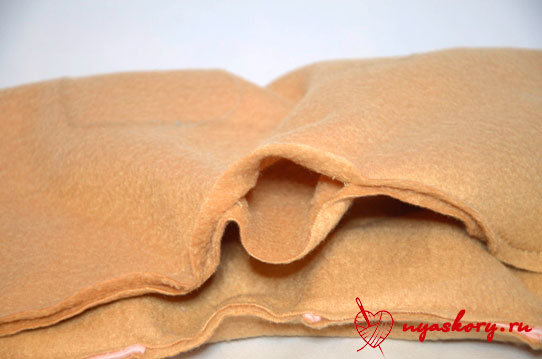
Turn out the pillow. While the Quadcat looks like this:

And now you need to fill the pillow with padding polyester as tightly as possible, since fleece is very sensitive to stretching and it can just turn out to be “orange peel” if the stuffing is not dense enough

And sew the bottom hole with a hidden seam. At the bottom you can see the already completely sewn hole.

Our cat is still without a face! Let's fix this. Take the eyes and nose and attach them where you would like to see the muzzle.
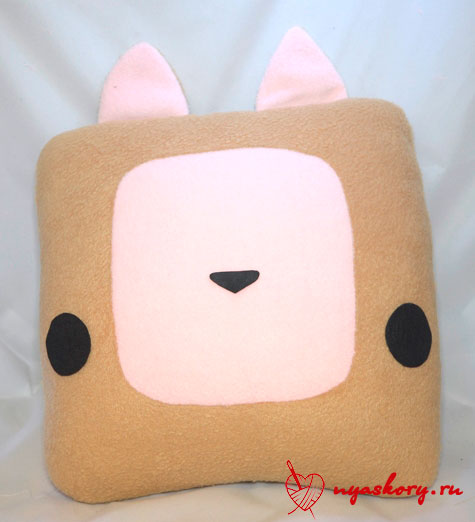
We will sew on the eyes and nose. To do this, bring the thread out, as below, and sew with a buttonhole, but VERY small. That is, there should be no distance at all between the stitches.

This process is quite painstaking, but it's worth it! Final photo:

Do-it-yourself letter pillows
A very common type of sofa cushions. They are sewn quite simply, the main thing is to have an alphabet with the desired language at hand. And increase the letters to right size, certainly.
The most important thing is not to forget to cut off the right amount of strip for the side jumper.

I found two such alphabets, but there are still very a large number of different fonts, each of which is applicable for letter art. 
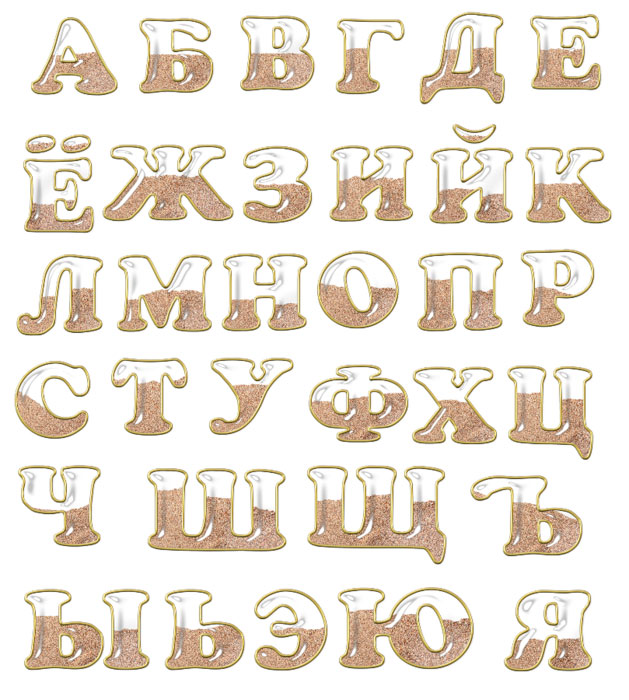
Photo of children's pillows


There will also be many inspirational photos at the end of the article, so don't miss it.
DIY decorative pillows: photos and creation schemes
There will be rollers, and flower pillows, and just unusual, practical and easy-to-do ideas.
Soft heart dear
Now we will talk about how to make a gift to your loved one with your own hands. And then Valentine's Day is about to come, and somehow I rarely prepare you for this)
What gift am I talking about? We will sew a beautiful pink pillow in the shape of a heart with frills from a veil.
Necessary materials

- faux fur for the heart itself (the pillow is large enough, so the dimensions of the material are decent: 110 x 40 cm);
- veil, chiffon or organza for ruffles and flowers (dimensions: 300 x 30 cm);
- sintepuh or synthetic winterizer for stuffing;
- threads in the color of the fabric;
- satin ribbon for a bow;
- rhinestones;
- pattern paper;
- pencil for translating patterns;
- scissors;
- needle;
- pins for pinning patterns and frills.
You will need patterns (click to enlarge):


As you can see, this is only half of our heart. Therefore, when you cut it out, first translate one half, then the other. And so for both parts.
Cut out two pieces so that the direction of the pile on them is the same. Cut off a strip of the following sizes from the veil: 300 x 18 cm. Such a large length is needed so that, with further shirring of this strip, you can insert it into the edges of the pillow.

Now fold the strip in half lengthwise. Sew on sewing machine two lines at a distance from the edge and from each other by about 5 - 7 mm. But do not fasten the ends of the thread! And leave a larger supply of thread on all sides.

We haven't secured our stitches, so now we can tighten them. Just pull on both threads and slowly gather our frill to the desired state (the length of the finished frill should be equal to the length of the edge of the pillow itself).

After the threads are tightened, tie all the threads into knots at the ends and cut off the excess threads.


Now you need to put the frill inside the pillow, as shown below, and stick it in.
 And then sweep and sew, without sewing to the end. Leave a small hole. After everything is sewn, turn the future pillow inside out and stuff it with sintepuh.
Now sew together the ends of the frill, as in the bottom photo.

If you have a small spare of frill left, then you can hide the seam slightly by laying a small fold. It remains to sew up the left hole.

Our pillow, of course, is good, but there are not enough decorative elements on it, so we will make roses with you To make roses, you will need 3 strips of veil with the following dimensions: 9 x 50 cm, 5 x 30 cm and 4 x 17 cm. Process them as well as a frill for a pillow.

It's time to wrap our rose! To do this, start folding the rosette, as below. But when wrapping the flower, bend the edges of the rose to make it look more natural. Make all 3 roses in this manner.


The roses came out great, didn't they? I hope everything worked out for you too. By the way, I wrote about creating similar roses in one of my previous posts.
It remains only to sew or glue the rose to the pillow. It comes out very nice:

Other sofa cushions
It seems that a few more detailed master classes will not hurt you)
butterflies

Lamb

Bear and dog


Frill

roses 
Roller “Princess Hotdog”(do not bother with the name, this is a character from one stoned cartoon)
I don’t have a detailed photo description, but I can say one thing: for the body you will need six elongated wedges and two parts (almost semicircles) for the muzzle.

Other fabric fantasies


It's nice to know that blog readers are inspired by my posts. The beautiful needlewoman Marina Grudzinskaya sewed pillows based on the works presented in this article. Come visit her (profile in In contact with and Instagram) and evaluate the products themselves:


I want to show you where to buy great materials to create super-soft and delicate pillows that are indistinguishable from store-bought ones. I bought this myself wonderful fleece— I'm overjoyed, he's so glorious. The most important thing is that the color palette is on top.
On this, Dear friends, I'm begging you. This time it turned out to be a very plump article on ideas (I personally counted about 50 ideas). I hope that you found exactly the option that you wanted. See you soon!
Sincerely, Anastasia Skoreva
A handmade gift is unconventional and fun! A gift shaving set or cologne cannot evoke as many joyful emotions and delight as a personal unique gift that is not sold anywhere.
This is an opportunity to surprise your loved one and show him that you have a good sense of humor - they appreciate it in girls.
Today I have collected 6 unusual ideas for those who decided to congratulate a guy in a special way.
Idea #1: A gift for a "hot" guy
 To emphasize the high degree of relations between lovers, you can present your chosen one with a box in the shape of a heart, inside which he will find several small bottles with expensive brands of cognac.
On the inside cover of the box, write some touching message: congratulations, or a comic instruction on how to dispose of its contents.
To make the gift look presentable, you can line the box with shreds of beautiful fabric, and scatter a few bright heart-shaped chocolates between the bottles.
These boxes are available in gift wrapping departments, or take a candy box.
Idea #2: Sweet Box
If your boyfriend basically does not recognize alcohol, and you love and know how to cook deliciously, you can pamper him with your own baked goods.
You can bake cookies for him, put everything in the same box in the shape of a heart and give it as a gift, accompanied by wishes appropriate for the occasion. And be prepared for the fact that he will eat the delicacies you have prepared. You can make the box yourself from under the shoes by pasting it with gift paper.
And if you don’t have time to cook, fill the box with kinder surprises, Love Is gum or tangerines, mixed with notes about your feelings.


Idea #3: 100 reasons why I love you
If your relationship is still in that wonderful stage when a loved one has not a single flaw, and he is all solid virtues, this idea of a romantic gift will give him real pleasure.
You will need:
- Nice box or glass jar.
- 100 strips of paper.
- Multi-colored ribbons or small bright elastic bands.
- Beautiful sticker stickers.
- Small chocolates or sweets.
And now you have to activate your imagination so much that on a hundred small leaves you can explain to your chosen one the reasons for this very love. One leaf, one reason.
We fold the notes with confessions into a tube, tie them with a ribbon or an elastic band, put them in a box, add a certain amount of sweets and chocolates there (to make the reading process even more enjoyable) and with the help of stickers we beautifully decorate the lid, not forgetting to provide it with the inscription “100 reasons for my love to you".


Idea #4: Checkbook of Desires
This idea will help make your relationship more interesting. Perhaps this is the most original and unusual gift beloved man with his own hands, as he grants wishes! The essence of the gift is that on each check page you write small amenities that you will do to your loved one upon presentation of the check. One check is designed to fulfill one wish. The book may have 15-20 pages.
Examples of wishes for him:
- Beer with friends
- Barbecue in nature
- Relaxing massage
- Play World Of Tanks all day
- Fulfillment of any whim, etc.


Idea No. 5: Photo for memory
Do you have any favorite photos with him? Make a photo souvenir out of them! This option is suitable if the guy has everything and you don’t know what to buy - give him memories. Lots of options:
- Photo collage on the wall in the form of a heart or the word LOVE from many of your small photos.
- Pillow or blanket with black and white print best moments of your life.
- Wall clock with your smiles.
- Wall painting on canvas.
This is a real work of art, this is an interior decoration. You can order a photo souvenir at any advertising agency. All you need is digital photos. It will take about a week to make a gift.


A cozy home cannot be imagined without decorative pillows. After all, just a couple of new pillows are enough to revive and decorate the interior of a living room, bedroom or children's room.
This simple and at the same time beautiful decor gives a unique look to any room. Designers recommend laying out three to six pillows. But it seems to me that there are never too many pillows!
After all, you can place pillows not only on the sofa and bed, but also on chairs and even throw them on the floor! Pillows can play the role of a bright accent in a light interior. In addition, charming can be a great gift.
DIY decorative pillows
Editorial "So simple!" prepared for you 21 great ideas for creating decorative pillows for home with your own hands.
- This delightful idea can be realized thanks to embroidery with ribbons. These pillows look elegant and cute.
With ribbons, you can create flowers, patterns, bows, and even such magnificent butterflies. In addition, finishing with ribbons is quite simple and does not require special skills. Trim pillows with ribbons even beginner needlewomen can.

- If in childhood the appliqué was your thing, then it is worth remembering your school skills and using multi-colored scraps of fabric, scissors, threads and, of course, imagination to create a stylish and original little thing for the home.


- And here step by step master class, how to make original pillow with your own hands.

- This option is just a godsend for those who constantly lose the remote control from the TV and air conditioner. Perhaps I will adopt this useful idea.


- And for lovers of glamor, there is such a pillowcase decor with the help of bright beads and sequins.


- I just love these amazing flowers! To create a decor, you will need velor or such material for creativity as foamiran. With it, you can easily and easily create flowers of any size, using only the warmth of your hands to shape the petals.


- And this effect can be achieved using pre-made stencils.


- This decorative pillow will look great on the sofa. You can make both burlap pillowcases and the pillow itself by filling it with feathers or synthetic materials.


- Quite simple, but very nice solution. All you need is a set of multi-colored buttons, threads of different shades and inspiration to create such beauty.


- Here is another stylish flower idea.


- Just an amazing solution, isn't it?

Do-it-yourself pillows will become a bright accent of the interior, and by changing pillowcases, you can set the style for the entire interior and achieve various effects.
Handmade gifts are of particular value, because in addition to time and effort, a piece of warmth and kindness is invested in them. An original do-it-yourself pillow can also become an interesting gift friend, husband or mother-in-law. For a child, you can sew a pillow-toy that will decorate the room and entertain the child. If you have at least basic sewing skills, then such a thing will not be difficult to do.
Interior
Every housewife dreams of the comfort and beauty of her home. You can diversify the interior by adding original ones to it. For example, you can sew on an existing pillow satin ribbon by making small frills. Or decorate it with lace. Another option for decoration is embroidery. It can be done on a special machine or by hand.
An interesting idea can be a pillow from old jeans. Such a little thing is very multifunctional: in addition to its direct duties, it will play the role of a warehouse for frequently lost things, for example, a TV remote control, glasses or a cell phone. And you can make several and change them according to your mood. A red pillow will mean that everything is fine, green - you are calm, black - you are angry. And the husband, when he comes home from work, will see what color it is today, and will know how to behave today.
For loved ones as a gift
Such an original do-it-yourself pillow is made simply and is suitable for a gift for Valentine's Day. To do this, we need a pillow, a pillowcase of a solid color, red knitted fabric, thread, scissors and pencil.
If there is no finished pillow, then it can be sewn (size - 50 * 50 cm). Next, cut out a heart from the fabric. We put the parts on top of each other and sew on the pillowcase in transverse stripes with a distance of 3 cm between them. After completing all the seams, the sewn heart must be cut (exactly between the seams).
Knitted pillows
To add warmth and comfort to the atmosphere of the house, knitting or crocheting is suitable.

It is better to take thick yarn for knitting: this way the texture will be better visible, and the creation process will go much faster. For inexperienced knitters, such a variant of the pattern as the "tangle" pattern is suitable. It is also called "pearl pattern". The number of loops must be a multiple of two.
- 1st row: knit, purl.
- 2nd row: purl, front.
It turns out that the loop that we knitted in the previous row with the front one, in the next we also knit the front one. The drawing comes out in a checkerboard pattern - simple, but very interesting and beautiful.
You can make a pillowcase from an old or sweater. It would also be nice to make a product using the patchwork technique, but then you need to work with a crochet hook. Any leftover yarn will be used. We knit many different squares from them, which we then crochet around the perimeter. It turns out bright and cheerful pillows.
Pillow toys
The interior of the children's room can also be varied. The original pillow, made in the form of soft toys, will delight the child for more than one year. In addition, you can not only lie down on it, but also play. Patterns of original pillows can be prepared by yourself according to the samples presented below. For example, sew the legendary and beloved electronic pet Pu.

For this we take Brown and cut out two parts from it. On one detail we sew eyes and embroider a mouth. Then we sew the parts together, leaving a small opening for stuffing. As a filler, you can use a synthetic winterizer, holofiber or cotton wool. The stuffing material you use will determine whether the pillows will be soft or not.

Girls will surely love the kitty kitty pillow. Here you can pick up a fabric with a higher pile, for example, velor or terry. We also cut out two parts and embroider a muzzle on the front side of one of them. Then sew them together by machine or by hand. We make the bow separately, fill it with filler and sew it to the finished pillow.
Cushion letters
Today, at the peak of popularity, you can use them for their intended purpose for learning the alphabet with young children or decorate a sofa by putting a name on it. Such an original do-it-yourself pillow is sewn a little more difficult than the previous ones.
To get started, you need to decide on the size of the letters. If you are going to make one initial of your name, then it should be large enough, up to 50 cm in size. If you sew the name completely, then you can limit yourself to 30 cm. As toys for children, you can make small letters 10 cm in size. So , the size is selected.
Now we draw a pattern on paper in full size. To build a pattern, it is best to use its low price, and the pattern will turn out to be accurate. It should be borne in mind that letters such as B, C, and K cannot be turned over to the other side - based on this, it is necessary to observe the location of the pattern when cutting on the fabric. the best way to do this is to fold the fabric with the right sides inward, after which we connect the material with pins and cut out two parts at once. A pattern for the side parts is not built: a long rectangle is simply taken here, equal to the intended width of the letter, and sewn along the contour of the pillow. We make seam allowances on all details. Also, when constructing a pattern, it must be taken into account that when filling the pillow with padding polyester, it will lose about 2-3 cm in size.
Pillows for pregnant women
Well, you can not bypass the side of the pillow in the form of a horseshoe.

Here we are no longer talking about beauty and style, but about comfort and convenience. People who often have back pain or pregnant women cannot do without it. You can put it not only under your back, but also under your head during sleep. And when the baby is born, you can put it on a pillow to feed it. In this position, the nursing mother will not get tired of her back, and feeding the baby will be a real joy. And when the child grows up and learns to sit, you can safely put him in the middle of the pillow without fear that he will fall.
The sizes of such products are different, from 70 cm to the average human height, so if you decide to sew such a thing for yourself, then you need to stock up on a large amount of padding polyester and fabric for sewing. If you plan to use a pillow for a child, then you need to sew two zippered cotton pillowcases.
6 182 752
Beautiful decorative pillows can revive even the most restrained interior. They bring a cozy atmosphere home warmth and let you relax. To decorate your home with them, it is not necessary to spend a lot of money, because you can create these cute decor elements yourself.
We have selected themed workshops for you, from which you will learn how to sew the pillow of your dreams. With step by step photos and detailed description even a beginner can handle it.
Volumetric heart of roses
A handmade pillow can be a wonderful gift. Armed with fantasy and a thread with a needle, it can even be turned into a unique Valentine. We offer you a step-by-step master class for making an unusual pillow with a voluminous heart.
For work you will need:
- finished pillow of the desired size;
- fabric for roses, which does not require overcasting;
- scissors;
- needle with thread.
Take a circle of fabric by the middle, gather it up, forming folds as in the photo. Fix the workpiece in the desired position with a couple of stitches.
Sew another circle of fabric on the bottom, forming a voluminous bud.

Continue sewing the circles onto the rosette until you have the size you want.

Prepare the rest of the roses in the same way. Their number depends on the size of the flower heart.

Sew the flowers to the pillow starting from the outline of the heart.

Arrange the blanks close to each other so that there are no gaps between them. A magnificent heart is ready to conquer and win hearts.

Such a designer pillow will decorate the room of a capricious fashionista or will become a highlight of your living room. And she will cheer you up just by looking at her.

fluffy pillow
The original pillow with a fringe will successfully fit into any interior. Pleasant to the touch fleece will make it a favorite thing not only in the children's room.
For work you will need:
- fleece for the base of the pillow and fringe;
- filler;
- scissors;
- threads;
- pins;
- sewing machine.

For fringe, it is better to choose a fabric several colors of the same range- get a stylish transition between them. In our case, 10 strips of 37 * 10 cm in three shades of brown are used.

Fold each strip in half and cut the fringe.
Sew the first strip to the base of the pillow, stepping back 1 cm from the edges. This is the result you should get.

Next, fold the fringe to one side.

Sew next to the second strip at a distance of about 1.5 cm from the first.

Continue sewing on the fringe in the same way. Alternate dark stripes with light stripes in several rows, achieving a beautiful and smooth transition of colors.

Put a second square on top of the fringed blank and pin it around the edges with pins. Sew the pillow around the perimeter, leaving a small opening for stuffing.

Turn pillow inside out and stuff with filling. It is better to use a synthetic winterizer or holofiber. Natural materials such as cotton wool and fluff can clump over time and the product will lose its neat appearance.
Sew up the opening with a blind stitch.

It turns out very beautiful cushion which will create an atmosphere of warmth and comfort in your home.

Pillow "Butterfly Wings"
We present to you detailed photo lesson on decorating an interior pillow. Even if sewing is not your forte, you can easily master it: you will need a ready-made pillow for work. Guided step by step instructions, you will turn an ordinary pillowcase into a masterpiece of art design.Pillow-toy "Owl"
A funny and bright owl is a win-win gift option for both an adult and a child. When such a cute bird settles in your baby's bedroom, he will not only sleep with her, but also play with her.
For work you will need:
- cotton in two colors;
- felt for eyes and beak;
- black buttons or beads for pupils;
- bow ribbon;
- crayon;
- threads;
- needle and pins for sewing;
- scissors;
- lace;
- filler.

Attach the template to the fabric and cut out the necessary details, make an allowance of 1 centimeter for the body and wings.

To decorate the toy, lace, bows and a wooden flower button are used. If you are using a full-size pattern, then cut out an 8 * 16 cm rectangle and a 4.5 cm square for the bow, or change the size of these parts in proportion to the owl.
Sew on the beak and lace with a zigzag stitch. Lace is placed in the center of the body, between the wings.

Sew wings and eyes with the same seam. Attach the black pupil buttons by hand.

Fold the body parts of the owl right side inward, secure with pins and sew. Leave a hole at the bottom between the wings for further manipulations.

Turn the toy inside out, iron it and stuff it with stuffing. If you used ordinary scissors to cut out the details, make neat notches near the ears and in all convex places before turning out so that the fabric does not shrink.

Sew up the opening with a blind stitch.
You can do decor. Fold the square for the bow into a strip and iron it.
Fold the rectangle in half right side inward and sew, leaving a 1 cm allowance.

Turn it inside out, gather in the middle and sew on the prepared strip, forming a bow. Sew it on the owl's ear.

Tie a bow from a small piece of ribbon, sew it and a wooden button to the body of the toy.
Such a cute owl will reliably guard your sleep.
Another idea for implementation is to sew a solid owl according to this pattern. It is enough just to show imagination and choose the appropriate toy color scheme and decoration.
Pillow with application "Cat in love"
An elegant pillow with a cool application is a wonderful gift for any occasion. With its help, you can confess your feelings or just cheer up your loved one.
For work you will need:
- thick white pillowcase 35*35cm;
- shreds of cotton 4 colors;
- white interlining;
- iron;
- 3 green beads for the eyes;
- threads to match the fabric;
- decorative braid.

Cut out two rectangles 17*13 cm- clouds around the cat and the fish. In our case, they are white with orange polka dots. You can choose the color of your choice.
The cat's body is a rectangle 16*12cm, orange with small white polka dots.
Cut a rectangle out of white fabric 20*11 cm. It will make the eyes and thoughts of a cat.
Cut out the rectangle 10*5 cm from green fabric for the body of the fish.
Fold the interlining adhesive side with the wrong side of the rectangles and iron them so that they stick together. So it will be easier to cut small parts and they will not crumble.

Cut out blanks for the appliqué. You can use cardboard templates or immediately cut out the details from the fabric.

Arrange the elements on the pillowcase and achieve the desired picture. Mark the ground line with decorative tape. Choose the expression of the cat's loving eyes.

When you decide on the location of all the elements of the application, you can proceed to the last step. It remains to sew them to the pillowcase.
Sew with a small white zigzag the outline of a white cloud to a polka dot cloud.

Sew the contour of the fish to the prepared two-layer cloud with a green zigzag. Embroider the fish's fins and outline of the head. Attach an eye bead.

Sew the details of the cat with a small zigzag thread to match the fabric. Lastly, attach the eyes and embroider his mustache.

Embroidered paws will give the animal even more charm. You can add small flowers to the application to make the composition more expressive.

The finished pillow will definitely take the crown place on the sofa in the living room and will become the star of your interior.
Pillow-spyushka "Sleeping Kitten"
Want even more cats? We are offering to you interesting idea for creativity: sew a charming kitten, which, with its very appearance, evokes drowsiness and peace.
For work you will need:
- cotton fabric 3 colors;
- fleece;
- interlining;
- scissors;
- iron;
- filler;
- chalk or a special marker for fabric;
- floss threads;
- 2 buttons;
- pins;
- pattern.

Attach the patterns of the torso to the fabric, circle and cut it with an allowance of 1 cm. Place the part with the wrong side on the adhesive side of the interlining, secure with pins and cut it out. Prepare the second part of the fleece body in the same way.

Cut out the paws, ears and tail of the kitten.

Remove the pins and iron the two-layer parts of the body with an iron so that the cotton sticks to the interlining.

Fold the parts of the ears, paws and tail in pairs right side in and sew them on the machine, leaving holes for eversion. Cut the stitched blanks with curly scissors or make the notches normal.

Turn the parts inside out and iron them, stuff with filler. Sew the holes in a zigzag pattern. Attach the resulting parts with pins to the front side of the front of the cat. Sew them to the body of the kitten in a zigzag.

Draw the cat's face with chalk.

Put the fleece part (back) on top and fix it with pins. Sew the blanks, leaving a small opening at the bottom for eversion. Trim the seam allowances with curly scissors or cut the notches normally.

Turn the piece right side out and iron it. Stuff the toy with filler and sew up the opening left earlier with a blind seam.
Sew upper legs and buttons to the body for decoration.

Embroider the nose and closed eyes with floss threads.

The soft splyushka cat is looking for its loving owner. Everyone will be happy with such a pet. He will be happy to settle both in the baby's crib and in the cozy living room.

Do you feel the strength and desire to create, but still consider yourself a beginner? We bring to your attention educational video, from which you will learn how to sew a funny cat pillow from a regular pillowcase. An original pattern, a minimum of action, a little decor and imagination - and you will get an elegant cat or a mischievous cat.
By the same principle, a cheerful hare will turn out, it is enough just to make the ears longer.

Download even more funny cat patterns to make your wildest ones come true. creative ideas. Such cute little animals will be a wonderful decor for your home or cottage, as well as original present for the people you love.


Cushion-dog
Do you think that animals do not belong in the house? And here you are wrong. You can always get yourself an adorable pillow dog. A cheerful dachshund will gladly take his place on the sofa and will not cause you any trouble.A detailed description is presented in our step-by-step master class.
According to this scheme, you will get both a small toy puppy and a solid adult dog. It all depends on the amount of materials at hand and your desire.
And if you have a lot of unclaimed pieces and shreds of fabric left, then you can sew a bright dog pillow out of them. This patchwork toy with a cute face, made in the technique of patchwork, will become a favorite character in the children's room.

This toy can be made together with children and have a fun and useful time. And your child will receive the first lessons of cutting and sewing.
Piggy bank of master classes on pillows + interesting ideas
Heart valentine pillow:Original circles:


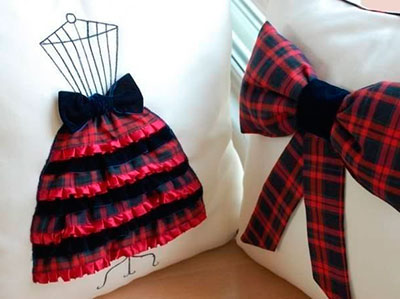
Checkered dog:
Romantic option:
In the form of a star:
A few more original pillows for inspiration:


Pillows for children: cats, bunnies, owls, dogs, bears:


Decorate pillowcases with plant prints
An original way to decorate a pillowcase with a floral ornament is to transfer prints of live fresh grass and leaves onto it. A product with such a design will be unique and one of a kind. And it will keep you warm winter evenings thoughts of a warm summer.
For work you will need:
- natural light fabric;
- freshly picked plants;
- a hammer;
- scissors;
- parchment, preferably siliconized for baking.

Fern, plantain, clover are perfect for prints. Tear off the plant you need, spread it on the fabric and cover with parchment. Beat it very hard with a hammer so that the juice stands out from the leaves, which is absorbed into the fabric and forms an imprint. Remember: you need to beat off the plants on a hard, flat surface.

Experiment with different leaves, stems and their arrangement to get the desired result.