Papier mache mask. Doing with children - papier-mâché carnival mask. How to make a papier-mache mask with your own hands
Parties, carnivals and balls - these events are not complete without fancy dress. And the most important detail of such an outfit is often a mask. What to do if you can't buy it? A technique describing how to make a papier-mâché mask will help save the costume. Consider several options for the manufacture of carnival paraphernalia.
Papier-mache, or “torn paper” in French, is an ideal way to make relief crafts: casts, masks for a masquerade or Halloween, various figures for decoration. Working with paper has a number of advantages:
- the availability of the material;
- ease of execution (paper, especially wet, is very pliable);
- a rather short process of manufacturing and drying (it takes about 2 days to completely dry the craft).
The nuances of working with the material
In order for a papier-mâché mask to turn out to be of high quality, it is important to choose the right materials for its manufacture.
- It is better to take newsprint paper: it is thinner, which means it is more plastic.
- The first layers can be made from napkins, just keep in mind that they form folds and lumps when wet. By the way, this property is convenient in the manufacture of masks for the elderly: natural wrinkles and folds are obtained.
- Strips of newspapers are better to tear, not cut. The fact is that torn edges are better aligned on the surface of the product.
Also, for papier-mâché masks, you will need glue. You can use PVA, wallpaper or paste. As for homemade glue, you can make it in just 5 minutes.
Instruction:
- Mix ½ tbsp. water and ½ tbsp. flour (you can take starch).
- Mix thoroughly so that there are no lumps.
- We put on fire and cook for 2-3 minutes until the paste thickens.
- We use cooled glue.
To shape the mask, you need a base. As a base for solidification of the material, you can use:
- balloon;
- foil cast;
- gypsum;
- polymer clay.
For some options, you will have to apply the material to the face, so it must first be lubricated with a greasy cream so as not to damage the skin.
Consider a technology that describes how to make papier-mâché at home using a foil base.
Materials:
- foil;
- several napkins;
- a couple of sheets of white writing paper;
- newspapers;
- paste;
- sandpaper;
- brushes (thick for applying paste and thin for decoration);
- paints (for example, gouache);
- decorative elements (rhinestones, beads, ribbons, lace).
Instruction:
- We put several layers of foil on the face, give it the shape of bulges and bends.
- We remove the base, make cuts for the eyes.
- Let's get to the mask. We tear strips from newspapers about 8 cm long and 2 cm wide.
- Wet the wipes with water and apply them to the base.
- Next, we dip each piece of newspaper into the glue and glue it to the base, brushing well on top with a brush dipped in paste.
- We spread 2-3 layers and level the surface, releasing air and removing irregularities.
- In total, we apply about 8-10 layers.
- The last layer is made of white paper.
- We make holes for the nose and mouth.
- Let the mixture dry for 2 days.
- Sandpaper smooth the surface of the mask.
- Let's get to the decor. We apply several layers of paint with a brush, decorate with rhinestones, lace.
mask in style Venetian carnival easy to do on a plaster mold.
Materials:
- sheet of paper, pencil;
- 2 small bags of alabaster (gypsum);
- plasticine;
- newspapers;
- stationery knife;
- glue brush;
- paste;
- PVA glue;
- a piece of velvet;
- braid;
- thread, needle, pins.
Instruction:

masquerade party- it is always a mass of bright masks, costumes and people. Lately they have improved even more, because the new time has brought a lot of new technologies with which unique things are created. In order not to spend a lot of money on masks and costumes, you can make a mask yourself, and we will help you with this.
How to make a papier-mâché mask with your own hands?
On the this moment there are many different masks in the world, but they are all made by approximately the same method.
Let's get started!
1.
First, we make a sketch of the person's face, for which we will make a mask. To do this, we should take a regular bag and a newspaper cut into strips. We put a bag on the face, make holes for the nostrils and eyes. Then the newspaper, slightly moistened with water, put on the face. It costs about three layers to apply, then let the paper dry.
2. After the paper dries, we continue to glue a few more layers, now we will use paper of a higher density.

3.
After drying, you can remove our workpiece and continue working. Trim the edges of the mask to give it shape.

Do not cut off a lot of paper at once, do it gradually so that the mask does not deteriorate.
4. We cover the entire surface with a cloth to avoid delamination.

5.
We cover the front side with putty. After drying, clean and paint.

6.
The mask is almost ready, it remains only to do the decor. Here you can create, invent and do everything to your taste!

VIDEO. How to make a paper mask?
If you are lucky enough to become a member of the upcoming carnival party, then you should think about the costume in advance. You can choose from ready-made options - fortunately, today this should not be a problem, but you can take a moment and create your own masterpiece. Let's start with a mask, which is easily made from papier-mâché, and also with your own hands!
We make a cute papier-mâché mask with our own hands
For the base of the carnival mask, you will need simple components:
- Newspaper (or any other paper that gets wet but doesn't become runny)
- Napkins (paper towel)
- A piece of cotton fabric or writing paper
- PVA glue (or hand-welded paste)
- Tools: scissors, brushes
- Vaseline or heavy cream
- As well as decor for decoration (fabric for the base, beads, sequins, ribbons, lace, feathers. You can be inspired by the decor of a classic Venetian mask)
Before the stage of creating a product from papier mache, you need to acquire a base with which it will be convenient to make an impression. Of the possible ready-made options, the most successful, perhaps, will be a hockey mask. Its shape has been polished over the years and there is no doubt that after taking the cast, the homemade mask will sit on the face like a glove, and the eye sockets will not be in the nose area.
But, not always at hand there is a mask of a hockey player lying around. And to be precise, for most people this is a rarity. We will use the option of making a mask on our own face. Using the example of a half mask, let's see how this is done.
But first, let's check all the materials and tools. If PVA is not of the best quality at hand (stationery is sometimes too liquid, and construction is sold in oversized jars), then grandfather's old paste recipe will come to the rescue. It is boiled from flour or starch.
To make a starch paste you will need: 2-3 tablespoons of any starch per liter of water. A small mug will be enough for the mask (recalculate the proportions according to your volume). The required amount of starch is diluted in a small amount cold water, mix until smooth and add boiling water to all the remaining water. Cook over low heat, stirring all the time, until thickened.

Proportions for flour paste: 1 cup per liter of water plus 50 grams of wood glue, previously diluted with water. Then the same as with starch paste - dilute the flour with cold water, add boiling water and cook.
Before you start making a papier-mâché mask, you need to put on a scarf or a hoop on your head so as not to stain your hair with your own hands.
On the face with a thick layer, not particularly modest, you need to apply petroleum jelly (or cream). We lay out the soaked newspaper (it is better to choose pieces where there is the least printing) according to the shape of the future mask.
The next layer is applied with the addition of glue. Each piece must be well pressed to the surface, increasing the adhesion of the layers and squeezing out, thereby, the air.
Such pieces must evenly cover the entire surface, leaving no gaps. In order not to get confused in the layers, you can somehow mark them or just use them on the first layer newspaper sheet from the inner tab, black and white, and for the second take a color spread.
After the first two layers of newspaper, add napkins.
Gradually alternate napkins and newspaper. We collect up to five layers.

When the mask becomes thick enough, gently and slowly begin to dry it with a hair dryer. If it does not cause much discomfort, then you can just walk around with a homemade mask on your face for a while, as with a cosmetic one.
The final step. The last layer, in front of the decorative one, is glued with either white writing paper or fabric, but not a bandage - it will spoil the final stage with an unsightly appearance. When the glue dries, by hand or wet wipe you need to walk along the joints of the pieces to smooth out the nervousness.
Remove the well-dried mask and leave to dry at least overnight. On the battery, at a good temperature, you can dry out the product, so it is better to put it near the heating device, and not directly on it. For the integrity of the form, a fabric roller can be placed inside so that the mask does not twist.
After drying, cut off all unnecessary, trim the cut of the eyes.
This completes the master class on how to make the basis for the mask.
What remains is the creative process of decorating. To do this, a fabric is stretched over the mask (it is advisable to choose from expensive pieces: velvet, velor, crepe-satin and other elastic materials that will not wrinkle).
In the area of the eyes, holes are cut with a bend allowance, if it is not planned to decorate the eye sockets (this option is possible, as with the fabric in the photo).

We glue the fabric to the base and glue the folds in the eye sockets and throughout the mask.
Instead of PVA, it is better to use special fabric glue or superglue.
We also glue the inside with a fabric that is pleasant to the body. It's better if it's cotton. Ties or elastic should be attached before gluing the inner fabric.
And then it remains only to decorate with a spectacular decor!

Video selection on the topic of the article
Design options can be seen in these videos:
On the eve of the New Year, I think this MK will be appropriate.
I will try to describe the process of making a papier-mache mask with feathers, because. the issue of attaching feathers to the mask is quite painful.
When I had such a problem, I invented my own method, which, perhaps, is not very original, but it makes life a lot easier.
Perhaps it will be useful to some of you.
So, I'll start from the very beginning.
I immediately warn you that this MK uses pictures taken during the manufacture of different masks, but I chose the most revealing, understandable for you.
Initially, I make a model of the future mask.
In this case, the model was made from "Jovi" self-hardening plastic purchased from an art supply store.
The cost of packing is 200 - 250 rubles.
The model dries for 2-3 days, almost without deforming.
You can use sculptural clay. He does not shrink.
The next stage: making a mold according to the model.
As a model for a papier-mâché mask, you can also take a ready-made plastic mask bought in a store for 250-300 rubles.
I lay the model on the board, moisten everything with water and cover with 2-3 layers of toilet paper, going beyond the top and sides of the head.
Thus, a kokoshnik is formed, on which I will later lay feathers.

Not every paper is suitable. The fewer layers it has, the easier it is to work.
In this case, "Zeva" was used, but Nab.-Chelninskaya paper of the old sample is best suited.
Now we are preparing the adhesive composition. I usually use a mixture of PVA glue with dry wallpaper paste (1: 2 ratio), diluted with water to a creamy state.
Sometimes I coat some layers with PVA without dilution.
The next layer is a gauze bandage, cut into small pieces.

I lay it on top of the paper, smooth it with a wide brush, abundantly dipped in glue.
I dry aside from the included oven for 3-6 hours.
Then I paste pieces of newspaper and notebook paper in different directions.
Why notebook? Yes, just a lot of notebooks left after the end of the school year!

Then I make 5-6 layers of fabric. This may be a gauze bandage, which I already laid in the second layer (we remember that the first layer is toilet paper!).
Or maybe coarse calico or a similar fabric, cut into larger pieces (for example, an old pillowcase). The color doesn't matter.
You just need to remember: since the fabric is denser, it means that it must be glued more carefully.
You can lay 1 more fabric layer.
And so on until I get 13-14 layers.
In the process of work, I dry the future mask 2-3 times, without removing from the form.
When the mask is completely dry, I cut out the palpebral fissures. Here it is necessary to show special care. First I draw lines with a pencil, then carefully make incisions with a medical scalpel.
No scalpel - use a clerical knife.
Then I evenly apply primer from the usual acrylic putty, bought at a hardware store. A bucket of putty in 900 gr costs 120 rubles.
It will last for a long time, even for other types of work.
For about 100 g of putty for elasticity, I add PVA glue (approximately 1 teaspoon). The glue slows down the drying of the primer mixture, thereby protecting the surface from cracking.

It is not bad, has a fine structure, but is not inferior to putty. And the price is many times higher.
At work I use a palette knife.
If you don't have one, use a serving knife (only without cloves). Very handy too!
Important! I don’t remove the mask from the form yet! The putty is wet, and Her Majesty Deformation is guarding me at every step!
I give symmetry to the facial features, do the detailing: I build up the cheekbones, the tip of the nose, form the mouth, etc.


I smooth the still damp surface with a brush dipped in water.
Dry until the underside of the mask is completely dry.
Now I remove the mask from the form and start sanding it. First I use a fine-grained skin with great care so that no defects form. Then I finish with a skin-zero front part smooth masks. I don't touch the kokoshnik. It doesn't matter to him, because he will be covered with feathers.
If defects are nevertheless formed, I put a layer of putty on these places again. I dry, I go through the skin.
With a dry brush, I brush off all the dust that has formed and pass over the face of the mask with a slightly moistened sponge.
The next step is to cover the front of the mask with white acrylic paint, dry (you can help the paint with a hairdryer, but use only warm air. Otherwise, cracks may appear). Again I go through the zero.

Now the mask is ready for decoration - the most interesting part of the work, for which, in fact, I tried!
I will not write about face decor - there are many master classes on this topic.
Now I will move on to feathers, but first I will briefly talk about another (very easy and fast) way to make a kokoshnik. It is intended more for a finished plastic base, and not for papier-mâché.
I lay the plastic mask on thick cardboard and trace the outline of the head on the sides and crown with a pencil.

I put the mask aside.
I cut cloves along the inner surface of the kokoshnik. I cut an arc along the outer part.

It turned out to be a kokoshnik. On the one hand (this will be the wrong side of the work), using diluted PVA glue, I smooth a piece of dense fabric with a hot iron. I fold the edges of the fabric and glue to cover the edges of the cardboard.

The underside of the mask should also be neat - this is an indicator of quality work.
I bend the teeth inside the mask and glue the kokoshnik to the top of the head.
When the glue has set, I start laying out the feathers. I start with the biggest ones - they create a backdrop for all this fluffy beauty. I use a hot glue gun - it clings to the feathers tightly, penetrating between their hairs. The picture shows pieces of 2-sided mirror tape - it is convenient for the feathers to stick together well. But you can do fine without it.

Next comes the second layer of feathers, shorter. Third, etc.

The very last layer in my case - above the forehead - these are short, very small and light feathers of budgerigars (on one mask) and some exotic birds from our zoo (on the second mask). Next, I decorate the frontal part under the feathers with a cord or lace.


There will be questions - ask.
If you are interested in the topic of masked papier mache, I can continue it with the next blog, in which I will post a detailed analysis based on my experiments and failures in this technique.
Report to moderator
Before the holidays, it's time to think about the right outfit. What if it's for children? New Year's party, a carnival party or even a masquerade ball, then, perhaps, the most important accessory of an invented image should be a face mask. To date, on sale you can find a lot of bright and colorful masks and choose the one that fits the chosen outfit. But papier-mâché masks created with your own hands from available materials will look much more harmonious and interesting.
"Papier-mache" is translated into our language as "torn paper", which fully reflects the essence of this material. Papier-mâché is nothing more than paper pulp with the addition of PVA glue or paste for paper bonding. It is best to use old newspapers to prepare the mass with your own hands, the paper of which is most suitable for papier-mâché, but in the absence of the proposed material, they can be replaced with toilet paper, paper napkins or towels.
Previously, before you start creating a face mask with your own hands, it is important to worry about choosing the basis for it.

For this, a number of methods for manufacturing various bases can be proposed.:
- An old face mask. Can be used as a base simple mask without any extra bumps. Just remember that before covering it with a mass of papier-mâché, it is worth wrapping the surface old mask cling film to avoid sticking of the material to the base.
- Inflated balloon. The most suitable base for beginners. Thanks to the smooth rubber surface, it will be easy to make a mask, since the papier-mâché will not stick to the base and after the material hardens, the balloon can be easily removed.
How to make a Venetian papier-mâché mask (video)
Papier-mâché face mask
The problem with many purchased carnival masks is that they do not fit snugly on a person’s face, which in turn leads to its constant slipping. But during the holiday you want to have a good time, and not constantly correct the annoying accessory. Therefore, an accessory made with your own hands based on a cast of your face will be a great solution, because the mask will not only look original, but the canvas will also sit, which means it will cause less inconvenience.
To make a cast of the face yourself, you can use sculptural clay.

A sufficient amount of material must be carefully kneaded in your hands and give it the shape of a pancake with a layer thickness of about two centimeters. After that, the resulting pancake is applied to the face (before this procedure, it is recommended to lubricate the skin with a cream with a greasy texture) and carefully shape the shape of the face into plasticine.
They remove the plasticine form from the face very carefully so as not to damage the result of the procedure performed, and lay it on the work surface. After that, the base for the mask, made by hand, is ready.
But this method there is one undoubted minus - not every person may have sculptural clay at hand. Therefore, the basis for manufacturing can be made from a more affordable material - food foil. The foil must be folded several times so that the resulting web is sufficiently hard, but at the same time easily takes the desired shape. After that, the resulting piece of foil is applied to the face and with the help of finger pressure, we give the foil the shape of the face.

The almost finished base must be removed, if there is, to correct irregularities and make cuts in the foil for the eyes and nose. The resulting shape can be corrected by adding plasticine to it in the right places. After that, the base is wrapped in cling film and it is ready for papier-mâché.
Papier-mache masks: instructions for making
During a small master class, you will learn how to make a mask on your own and about several options for its design.
In order to make the desired mask, you need to collect some materials and tools that will be needed during the creation of the accessory, namely:
- The basis for the mask.
- Paper (newsprint, toilet paper or paper napkins).
- Water.
- Glue (it is preferable to use PVA).
- Brush.
- Dyes, ribbons, feathers, beads, or other decoration material.
To make the necessary papier-mâché accessory, you need to follow the general instructions step by step, which will help you carry out the whole process from kneading the paper pulp to decorating the finished mask.
Instruction:
- Finely tear the paper into small pieces and soak them in a solution of water and glue. In this case, glue and water are taken in a ratio of one to one.
- Cover the hand-made form with the resulting papier-mâché and wait for the mixture to dry completely.
- After drying, the resulting workpiece must be carefully removed from the base so as not to spoil the outlines.
- We make the necessary holes for the ties so that the mask can stay on the face.
- Then you can decorate the mask, according to the wishes and the chosen outfit.

How to paint a papier-mâché mask
Before decorating the resulting workpiece, it is necessary to draw the outlines of the desired shape on its surface with a pencil or felt-tip pen. Next, along the outlined contour, carefully cut out the final shape of the mask. After that, you can apply the necessary paints and decorations.
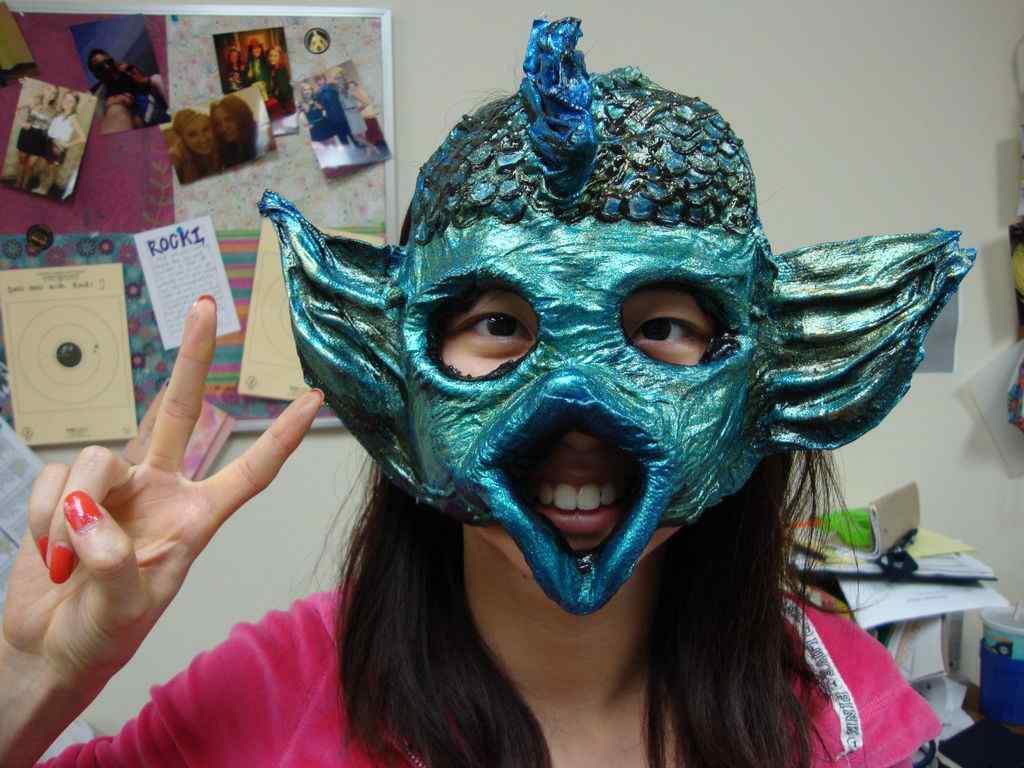
The most common design option is the Venetian mask, made in the Italian style. When designing a mask, you can use combinations of several colors for the background of the mask, various feathers and ribbons as decoration.
Another of the most popular design examples is a cat (cat) mask, which will look relevant at any theme party.
The main attribute of a hand-made accessory is the ears, which can be made from any material or immediately give the appropriate shape to the workpiece.

Also, as an imitation of animal fur, you can use ordinary feathers for decoration or artificial fur.
For boys, the most relevant outfits are the images of superheroes (Batman, Spiderman), the main attribute of which is the mask. Looking at the faces of the characters, you can try to make their papier-mâché masks, the main thing is to use an identical color scheme.
The examples listed are not the only options for decorating carnival masks with your own hands, for example, you can choose an African style using a palette Brown color and drawing out the shape of the mask, or create your own, embodying your imagination and sense of style.
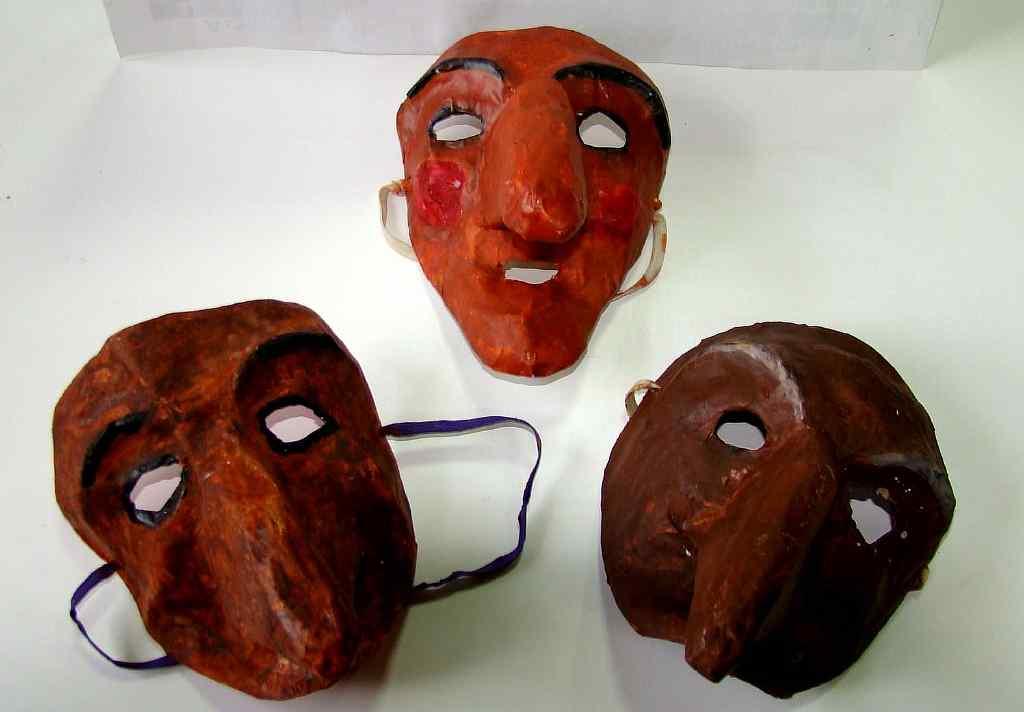
Papier-mâché masks from the USSR
In the Soviet Union, carnival masks were an attribute inseparable from organized Christmas trees, children's matinees and carnivals. Most often, at these festivities one could meet various animals (bunnies, chanterelles, cockerels, bears, wolves) and fairy-tale characters (Babu Yaga, Koshchei the Immortal, Chipolino).

A feature of such masks was the bright saturated colors used to decorate accessories.
Do-it-yourself papier-mâché masks (video)
To date, such masks are very rare on store shelves, most often they can be purchased only from individuals who have preserved such masks. But if you really want to make a splash at the upcoming event, then you can try to reproduce this accessory yourself. To do this, you need only a little free time and the ability to work with your hands and papier-mâché masks in the style of past years will make a splash at any thematic event.
Examples of do-it-yourself papier-mâché masks (photo)


1.jpg)


