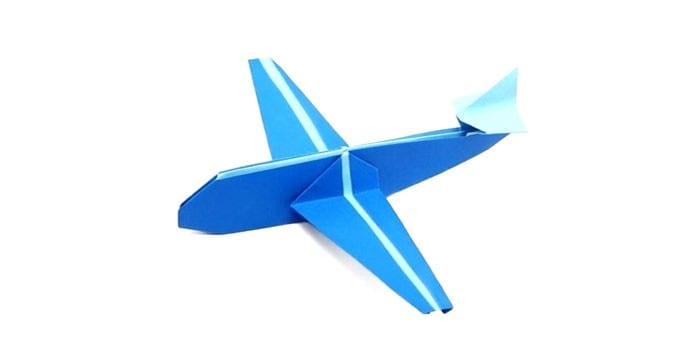
Volumetric plane made of cardboard. How to make an airplane out of cardboard with your own hands. Several design options. To make a paper fighter, take
In childhood, everyone was fond of throwing a paper airplane to each other. Many adults remember such entertainment only with the advent of children, when the basic skills for collecting complex origami crafts are already lost. To please and occupy your child for a while, learn how to make a paper airplane according to a simple pattern, teach crafts to fly, what you need to fold the model.
How to make paper airplanes
The art of aerogami has been around for over 50 years. During this time, craftsmen were able to come up with and skillfully bring to life hundreds of different models of paper planes. Some of them fly for a short time and only along one trajectory, but there are those that are able to cover long distances. Modern designs of the boomerang or the unusual Glider appeared.
How to glue a paper plane
A thick A4 sheet, a ruler, glue, scissors and possibly felt-tip pens - this is all you need to glue a paper plane with your own hands. It will be good if you find a ready-made drawing on the Internet in advance and simply print the drawing. If the photo shows dotted line- this is the place of the fold. The arrows on the sketch indicate the turn of the paper in a certain direction, and the straight lines indicate the place of the cut.
origami planes
It will be easier for beginners to assemble a glider model from common materials: A4 sheets, thin paper, notebook sheets or newspaper clippings. The main requirement for the material is that it should resemble a square or rectangle in shape. To make an origami plane, you just need to follow clear instructions. There is one more little trick: in order for the parts to keep their shape better, aerogami professionals recommend drawing along the fold with a ruler.
How to make a paper plane - step by step instructions
In order for the assembled model to keep its shape well and not fall apart from touch, you need to take a few tips into service:
- It is optimal to use sheets of small size with a density of 100g/m².
- During operation, you must strictly follow the instructions, iron the bends well and fold the material according to the scheme.
- To launch a paper plane, it is important that all the details are symmetrical. Especially for balance, you need to pay attention to the bow and tail.
simple airplane
When teaching aerogamy to children, it is better to start with the development of simple models. The way to make a classic layout is as follows:
- Prepare a landscape sheet. Turn it towards you with the short side.
- Fold the sheet in half and mark the middle of the sheet. The crease does not need to be smoothed out.
- Unfold the paper and fold its edges so that the corners touch the marked center line.
- Grasp the top of the sheet so that the junction of the two folded corners becomes its fold.
- Fold the top left corner in the same way. Repeat the same action with the upper right corner.
- A triangle should have formed, bend it up.
- Fold the model in half. Form the wings.
Airplane
This model is almost the same as the assembly method from the previous version, the only difference is the blunt nose. To assemble an airplane airplane, follow these instructions:
- With a sheet of thick paper, do the first 4 steps from the instructions above.
- Bend the upper left and right corner so that a straight line remains in the center, 0.8-1.5 cm long.
- Secure the part with the bottom triangle.
- Turn the model inside out along the center fold.
- Straighten all parts, set the desired angle of the wing.

Paraglider
Thanks to the wide wings, this model can soar beautifully in the air. To make an airplane out of a sheet of paper, you need to follow the tips:
- Bend and unfold the rectangular sheet lengthwise as always.
- Measure about ¼ from the top and wrap towards the center.
- Bend both corners inward so that their noses do not go beyond the intended line.
- Flip the model over and fold the folded half over.
- Bend and fold the small corners in the center.
- Bend the model along the central fold, unfold the nose and form the wings.
small plane
The dimensions of this model are small, so get ready to do painstaking work. How to make a paper airplane:
- Take any sheet of paper measuring 20 * 20 cm.
- Fold in half, iron the fold.
- Fold in half again to form a square. Mark the center.
- Fold one half of the paper onto ¼ of the sheet, make a note.
- Bend the sheet inward from the ¼ mark and to the top edge, you get a triangle. Smooth the edge.
- Turn the edge outward so that a small triangle forms at the top.
- Turn the sheet over, bend the other side of the triangle inward.
- Bend the wide end towards the pocket, a few millimeters short of the edge.
- Do the same with the other side.
- Put the fingers of one hand under the fuselage, fix the nose of the aircraft with the other. Lift the paper slightly with your hands.
- Fold the corner into a pocket. Repeat the previous two steps on the other side of the sheet.
- Fold up the side of the large pocket. Do the same on the other side.
- Open the model, bend its front edge inward.
- Turn the workpiece over, push the front part, using the corners as a guide.
- Fold the plane in half, go through the folds.
- Fold one side down along a line that is parallel to the center fold.
- Do the same on the other side.
- Fold the edge of the wing up for better aerodynamics. Straighten the model with your hands.

big plane
This model can decorate a children's room. To fold the liner, prepare cardboard, glue, scissors, a matchbox and follow the instructions:
- Cut a long strip of cardboard 2 cm wide. Fold it in half.
- Fix the edges with glue in the center of the matchbox top and bottom.
- Cut two strips of cardboard 4 cm wide. Round off the edges.
- Glue to the matchbox on the sides.
- Cut out a thin strip of cardboard and fold it in half.
- Wrap the edges of the strip up, indenting from the edge by 1 cm.
- Glue the workpiece to the tail.
square plane
Many are accustomed to seeing flying machines with a pointed nose, but not all models may look like this. Try folding the paper airplane differently:
- Unfold a piece of paper with the wide side facing you. Fold in half.
- Turn the sheet over to the other side, with the narrow side facing you. Fold in half.
- Turn the sheet to the other side. Fold the edge towards the center of the fold.
- Fold in the corners on both sides.
- Flip the paper over with the folded side facing you. Fold the edge to the center.
- Fold the plane along the center perpendicular line.
- Fold over the folded edge. Open the pocket, holding the center with your fingers.
- Expand the pocket. Bend the wings to the triangle marked in the center.
volumetric aircraft
After you have mastered simple models, you need to learn to understand more complex schemes. Described below step-by-step instruction how to assemble a volumetric flying plane:
- Bend the sheet lengthwise, unfold.
- Fold the paper in half. From the center, fold the edges down, and then unfold half.
- Unbend the sides from the side, tuck each lapel inward.
- Bend part of the wings back.
- Bend the wings from the bottom a short distance.
- Press the fold lines with your fingers. Bend the resulting lines parallel to the folds of the wings.
beautiful plane
You can decorate a children's room with paper crafts by collecting a whole collection of different models. To make flying machines pleasing to the eye, they can be made of colored paper or cardboard, decorated with applications - numbers, inscriptions or asterisks. Looks good on the shelf in the nursery three-dimensional models passenger liners. It will take a little more time to make them.
How to make a passenger plane out of paper
To create this model, you must download and print the Concorde airliner assembly diagram in advance. Then, to fold the passenger plane, follow the instructions:
- Make folds in the center and top corners.
- Fold the side parts to the middle, then bend their edges back along the dotted line.
- Roll up the figure front part up the center line.
- Bend the corner along line 5, smooth it out, and then return the figure to its original position.
- Repeat the same on the other side.
- Tuck the edge inside the case along the dotted line, then pulling its end back and bending along line 6.
- Bend both wings up, fix the tail with tape.
How to make a cool paper plane
There are also models of devices that are able to gently plan long time or travel long distances. They are slightly different in design from their simple counterparts. If you want the airplane to fly further, choose a model with narrow wings and a long tail. Balanced airplanes with a large wingspan are capable of long flights.
How to make a paper plane that flies
If you get bored with the basics of aircraft construction, try making a cool model with good aerodynamics:
- Make a midline and fold the corners around the edges.
- Fold the product across exactly in the center, turn it over.
- Under a slight slope, fold the corners, not reaching a little to the fold.
- Wrap the resulting angle, straighten the part bent on the other side of the aircraft.
- Fold the model along the base, form wings at the same distance.
- Make small bends of the wings along the edges.

How to make a paper plane that flies far
This design provides for the formation of additional wings in the nose of the apparatus, which will ensure the flight range. To make a paper airplane, follow the instructions:
- Mark the center line, fold the edges to it at an angle of 90 degrees.
- Turn the workpiece over, bend the corners towards the center again so that a sharp edge forms in the center.
- Raise the triangle at the back, and fold the resulting square in half.
- Mark the crease with a pencil, fill the rectangle in the middle of the pocket.
- Bend the wings at a 90 degree angle.
How to make a military plane out of paper
Boys who are fond of war games, shooting games and armored vehicles will love the idea of creating a collection of military aircraft at home. There are a lot of models of such aircraft. You can fold the Fighter, Bomber, Il-2, Messerschmitt or other equipment. To make such toys look colorful and be as similar as possible to the original, it is recommended to make them from colored paper.
Fighter
Options for making such paper toys can be found on the Internet, or you can make a paper fighter according to the following scheme:
- Take a rectangular sheet. Fold in half along the widest part.
- Bend two corners towards you.
- Bend the corners again diagonally, starting the movement of the hand from the sharp nose.
- Fold the product across so that the sharp part is in the center of the opposite side.
- Turn the paper over, fold the top edges down.
- Wrap the resulting corner on yourself.
- Bend the figure in half. Form the wings and flaps of the aircraft.

bomber aircraft
This beautiful model a little more difficult to create, but the result is worth the time spent. To make it work, follow the tips:
- Fold up upper part leaf with a double triangle.
- By analogy, bend the left corner, aligning the top of the sheet with the right side.
- Make a fold of paper that will pass through the intersection point of all the resulting lines.
- Fold the side triangles along it inward.
- Mark a center line at the bottom of the sheet.
- Mark a line that is parallel to the base of the triangle.
- Flip the paper over to the other side.
- Bend the corner towards you.
- Turn the layout over again and bend the two corners up, tucking the top half in half.
- Turn the figure over, bend the corner.
- Fold the right and left edge which is inside the layout.
- Bend the corner away from you, fold the plane along the central bend.
- Bring the edges inward, fold the figure in half, and then turn it on yourself.
long-haul aircraft
This model will be able to overcome any distance. It has good aerodynamics, is well balanced and weighs little. Long-haul aircraft do this:
- Make notes of the center of the sheet, bend the upper corners.
- Fold the sheet in half, forming a roof with sharp corners.
- Fold the edges of future wings inward to further sharpen the nose.
- The layout is turned down with the front side, then the wrong side is folded vertically. without touching the bottom corners.
- The wing is bent so that it captures the entire length of the workpiece.
- Set the wings to the desired angle of inclination.
Video
Probably every adult in our country knows how to make an airplane out of paper. After all, this unpretentious toy, originally from childhood, invariably delights and delights with its ability to fly. Before the dominance of tablets and other gadgets, it was ordinary paper airplanes that pleased boys of all ages at recess.
And how many schemes for collecting this toy do you know? Do you know that from an ordinary sheet of A4 paper, you can add a lot of various kinds aircraft, including long and far flying, as well as military models?
Are you already intrigued? You can start folding airplanes right now. After all, for this you need only paper, desire, a little patience and our schemes. Let's fly!
Before proceeding to complex models, let's brush up on the basics of aircraft construction. We bring to your attention 2 of the most simple ways fold the plane.
Using the first scheme, it is easy to get a universal aircraft familiar from childhood. It does not differ in special takeoff and landing characteristics, but it will not be difficult even for a child to fold it. And an adult will cope with the assembly in just a minute.

Even if the first scheme seemed too complicated for you, use the simplified method. It allows you to get the desired result as quickly as possible.

Similar "Arrow" video:
A plane that flies for a long time
The dream of any child is a long-flying airplane. And now we will help you make it a reality. According to the diagram provided, you can fold the model, which is distinguished by the duration of the flight.
Remember that flight performance is affected by the dimensions of your aircraft.
Excess weight, which means the length of the wings, prevents the aircraft from flying. That is, a glider aircraft must have short, wide wings. Another friend of planning is the absolute symmetry of the model.
You need to throw it not forward, but up. In this case, it will stay in the sky for a long time, smoothly descending from a height.

For answers to the remaining questions and all the subtleties of folding the Lightning Strike paper glider, look for a step-by-step video tutorial.
Plans for fast flight
Interested in participating in a model aircraft competition? They are easy to arrange at home. Just fold high-speed planes out of paper - and you can set your own records.

Be sure to check out the video master class on creating fast paper planes to avoid annoying mistakes and learn from someone else's experience.
Step-by-step following our photo instructions is the key to success. A number of general recommendations will also help novice paper aviation enthusiasts.
- To improve flight performance, use only a completely flat sheet of paper. Ideal for ordinary office printers. Any bruises and folds repeatedly worsen the aerodynamic properties of the model.
- Iron all the folds with a ruler to make them clearer.
- Pointy aircraft nose increases his speed, but at the same time range decreases flight.

Ready-made crafts can be painted with children. This exciting activity will allow you to turn a folded piece of paper into a real attack aircraft or an unusual fighter.
Approach building your models like a science experiment. The speed and ease of assembly of origami airplanes allow you to analyze their flight and make the necessary changes to the design.

Paper long-range fighter
Describing this model aircraft, many enthusiastically promise that it will be able to fly 100 meters, and call it a super-aircraft. At the same time, they are absolutely not embarrassed that the officially registered record for the flight range of a paper airplane is only 69 m 14 cm.
However, doubts are gone. In any case, such a cool handsome man is worthy of your efforts to create it. For this craft, stock up on a sheet of A4 paper (you can take a thick colored paper to make the airplane as beautiful as possible), with boundless patience and accuracy. If your goal is a realistic fighter, assemble it slowly and follow the photo instructions step by step.
Also at your service is a video from which you will learn how to correctly assemble a paper fighter plane that stays in the air for a long time.
A model with stable flight
A paper airplane takes off and immediately starts to fall, or instead of a straight trajectory, it writes out arcs. Are you familiar with this?
Even this children's toy has certain aerodynamic properties. This means that it is the duty of all novice aircraft builders to approach the design of a paper model with full responsibility.
We suggest you fold another cool airplane. Thanks to the blunt nose and wide deltoid wings, it will not go into a tailspin, but will please you with a beautiful flight.

Do you want to master all the subtleties of building this glider? Check out the detailed and accessible video tutorial. After a powerful charge of inspiration, you will definitely want to fold an airplane with your own hands, which will flutter like a bird.
Cornflower plane - an original craft for young aircraft modellers
Do you have a boy growing up who already loves to craft, glue and cut something? Give him a little time - and together you can make a small mock-up of a corn plane. It will surely bring a lot of joy: first from joint creativity, and then from fun with a toy made by oneself.

For work, you will need the following improvised materials:
- colored paper;
- double-sided colored cardboard;
- Matchbox;
- scissors;
- PVA glue.
The process of creating a toy is as simple as possible: forget about exact drawings and the need to first download and then print a complex template. Even under your guidance Small child will be able to build his first plane.
First of all, glue the matchbox with colored or white paper. Cut a strip of cardboard 3 cm wide. Half of its length will correspond to the length of the aircraft fuselage. Fold the strip in half and glue it to the box.

Cut out two identical rounded wings, their width should be slightly larger than the width of the box.
Glue the wings to the plane. This can be entrusted to a little helper, he will be happy with such an important mission and will do everything well and carefully. Cut and glue a rectangle on the front to hide the box.
Glue the blanks to the tail of the maize. The resulting cardboard masterpiece remains to be decorated according to your desire. You can glue stars or small pictures to it. A good addition would be a propeller made of thin strips of paper.

Such a wonderful plane can be taken to the kindergarten as a craft or please dad on February 23.
Video bonuses
Do you want to get a plane that can not only take off high, but also return back to your hands? Think it can't be? And here you are wrong.
Tireless craftsmen-experimenters have developed a scheme for an amazing aircraft - boomerang.
With it, you can show your friends a stunning trick: a launched airplane will obediently fall right into your hands every time. To be known as the master of paper planes, check out this video - you will definitely succeed.
It would seem that all samples of paper planes have already been reviewed and tested in practice, but we still have something to surprise you with. We invite you to watch a video tutorial on creating a realistic glider.
You don't even need origami folding skills, you just cut out the outline from paper. This model has excellent flight characteristics, and the whole secret lies in ... ordinary plasticine. Watch the video, be surprised and surprise.
Creating various paper planes is not only a wonderful activity that allows you to drive away boredom and put off the ubiquitous gadgets. It develops intelligence, accuracy and fine motor skills hands That is why it is so useful to include this type of activity in the program of joint leisure with children.
Perhaps the first unsightly model will be your child's first step towards a serious passion for aircraft modeling. And it is in your family that a brilliant designer of passenger liners or new jet fighters will grow up. Everything can be. It makes no sense to look far into the future, but devoting an hour or two to folding paper airplanes is definitely worth it.
|
Birthday boy Boy |
||
|
Number of guests not limited |
||
|
Age from 3 years |
||
|
Holiday duration 1.5 - 2 hours |
||
|
Location house and yard |
||
| Holiday colors Blue, cyan, orange, white |
||
| Treats Cloud muffins, lozenges, sweets, airplane mousse, cake |
||
| Decor Paper airplane garlands, mineral wool clouds, striped holiday caps, a large map of the world, an "airplane" from a cardboard box |
||
| Thematic entertainment
Paper plane launch, balancing, packing for speed |
The main characters of the holiday of pilots
The theme of aircraft in our house is very relevant. In less than a week, a new toy aircraft model appears in our son's collection. Therefore, the idea for the next birthday of our child was born by itself. And yet, purely by chance, I saw just such a picture - an illustration for the summer holiday of another kid.


Is it really inspiring? Of course, such a holiday requires careful preparation and considerable effort. And not everyone will be allowed on the runway of a real airport. Therefore, we did not dare to repeat the "feat" of the parents of this boy. But our holiday, created at home, turned out no worse!
PREPARATION FOR THE PLANE HOLIDAY
1. Invitations
Invitations must certainly correspond to the theme of the holiday! It is best to use the air ticket format for this purpose and pack it in a standard airmail envelope.

And the text inside should be in the style of the future game. We "invented" this one:
Russian (French, American, etc. to choose from) airlines invite Mr. (Miss) __________ (guest name) to take part in a festive flight, which is dedicated to the birthday of the head of the national aviation fleet _______ (birthday name) _________.
Flight time: (holiday date and start time).
Direction: ______(address)_____
Seat #: First seat for best friend.
Confirm your flight: (a phone number is provided so that the parents of the invited guest can confirm the presence of the child, or refuse the invitation).
You can fasten envelopes with such a homemade air seal. The base is half a potato. "Ink" - ordinary gouache. Entrust the process of "printing" envelopes to the very future birthday person. Thus, he will feel his importance and delve deeper into the idea of a future holiday.

2. Playground decoration, scenery
Of course, it is quite logical that you need to decorate, first of all, the ceiling (as an analogue of the real sky). For this purpose, you can use the entire "hangar" of your child. Plastic, inflatable, rubber planes, wooden model gliders - everything will work! To the ceiling, such "decorations" are best hooked with a fishing line or elastic band. This will create the illusion of real planes hovering over the heads of the guys.

In addition, you can make real clouds from rock wool, or cut them out of plain cardboard.


An excellent solution is a garland of many multi-colored paper airplanes. And of course - Balloons! They are a wonderful decoration for any holiday, especially for a summer one!

For young aeronauts, you can also purchase such an interesting flying machine! A photo session in such an “airplane” will be a great gift-reminder of the holiday!

A balloon plane can be installed near the entrance to your home. It will be a kind of symbol of the upcoming event!
And further. The game involves the use of several diverse zones. For example, we had an airport in the hallway (with passport control, a luggage department, etc.), a waiting room with a cafeteria in the living room, and an aircraft hangar in the nursery. And in the yard we made something like a take-off platform. It turned out interesting!


3. Game props, costumes
Almost all the games scheduled for this evening assumed the distribution of the guys into "pilots" and "passengers of the aircraft."
And what is the distinguishing feature of the pilot? Of course, cap


Well, maybe the badge is a symbol of airlines.

And the passenger? Naturally - luggage!


HOLIDAY PROCESS
1. We meet guests
Of course, our little guests could not remain indifferent to the balloon plane. Everyone, as expected, tried on the role of "first pilot". When the guys played enough, we invited them to the house. Immediately upon entering, the roles were assigned. Naturally, the birthday boy became the first pilot. Two more guys - co-pilot and navigator. Girls - so far occupied the vacant passenger seats (we handed them the previously prepared "suitcases" and "passports"). Dad was already waiting in the hallway for the passengers. He carried out passport control.

2. Games, entertainment
While the girls were going through the procedure of checking documents and luggage, the boys were preparing the plane for flight in a makeshift hangar (there their grandfather was already waiting for them).

So that they do not get bored, our old master showed them different models planes, painted on the map the trajectory of their takeoff and landing ... And also - he allowed to launch small airplanes - crackers.


And here is our most important invention! Real plane! We made it from a cardboard box from under the refrigerator. Decorated with foil. And the propeller was built from thin fiberboard. He really rolled!

Of course, all our guests did not fit into the cabin of the aircraft. I had to come up with options! We decided to do so. The cardboard box became the cockpit, and the passenger department quickly "grew" out of small chairs that we attached to the box - the plane.
(speaking into a shout): Attention! Attention! Boarding of passengers on the flight Moscow - Paris is coming to an end. Fasten your seat belts! Before takeoff - 40 seconds!
It would be nice to hang a large map of the world in the "flight room", right in front of the eyes of little pilots. On it, using a bright marker, draw the route of the aircraft.
(now she pretended to play the role of a flight attendant): Dear passengers! Who wants coffee, tea? Or maybe a set lunch?
Plastic and paper containers for the “transit lunch” were prepared in advance. There were crackers, muffins, sweets.

Attention! Attention! The plane starts landing. Paris airport accepts us! Fasten your seat belts! We are descending!
In "Paris" the children saw the sights (you can show a photo, or a filmstrip, it's more interesting). But! Looking at the masterpieces of Paris, they forgot about time! Need to hurry! Soon the plane will fly to Melbourne! And the suitcases are still in the hotel!
Task 1. Collect a suitcase for speed
Children are divided into two teams. Each team is offered a suitcase and a pile of clothes. The first participant must put everything in the suitcase as quickly as possible, and the second must unpack everything. And so - to the last participant. The team whose last player completes the process of collecting - parsing the suitcase faster - will win.

In this article, you will be presented with several popular aircraft schemes that differ from each other not only appearance, but also flying properties. To create origami, you only need a sheet of paper 20x30 cm or A4. All models may well be assembled by a child of 5 years old with their own hands without the help of an adult. Waiting at the end of the article detailed description a paper airplane very much like a modern fighter.
How to make a flying paper plane popular schemes.
1. Planes made according to the first and second schemes are the most common. Such an origami is going to be done with your own hands quite quickly, despite this the plane flies far enough due to its design.
2. As mentioned above, such a paper plane is the basic model. Almost all children and adults know it.

3. A feature of this model of the aircraft are wide wings, similar to a paraglider. This design allows it to soar high in the air. With proper, uniform folding such a paraglider can fly long, far and, most importantly, beautifully. Don't expect super speeds from him.

4. This model was obtained as a result of the modernization of the first and second schemes. Distinctive feature aircraft model is its fast and uniform flight. Due to the front supporting wings, the nose does not collapse, providing a long flight.

5.
Also a very interesting paper airplane design. It assembles very quickly and easily with your own hands. In terms of speed, it is certainly inferior to some previous schemes. But a good, stable, long flight will give your child. 
6 . The model looks like a large passenger plane. It cannot boast of a flight range, but it flies quite beautifully from a great height.

7. A very unusual paper fighter. It assembles easily, flies quickly and for a long time due to the balanced design.

8 . Sleek design and wide fenders will delight you long, fast flight.

9. The plane looks very unusual, looks like a fighter. Don't expect any superpowers from him. He will delight with his unusual and complex assembly process with his own hands.

10 . The scheme is very similar to scheme number 8. However, the nose of such a model is very steep, it folds much more accurately. It doesn't affect the flying properties in any way.

11. The shape and design resembles model number 9. Only it is a little easier to assemble and flies a little further, due to the ribs on the wings.

12. One of the varieties of a fighter with fender liner down. The launcher of such an aircraft will enjoy a steady, fast flight very much.

How to make a far flying fighter plane out of paper.
Above, phased diagrams of airplanes were provided. Finally, we have reached the best. Now you have to get acquainted with a step-by-step origami photo instruction, assembling the farthest flying fighter. The aircraft not only has good flying properties, it also looks great and will give you a lot of positive emotions.
detailed, step by step photo instruction, wonderful origami.

1
.
We need an A4 sheet, it is advisable to take thin paper, so a do-it-yourself plane will fly even further. You can choose the color of your choice. Fold and unfold the sheet in half along the short side. 
2
.
Fold the sheet in half along the long side. 
3 . We bend, iron one corner as shown in the picture.

4 . With the second corner, we do the same as in step number 3. It should turn out as in the photo.

5 . We turn the resulting corners in half again, iron it well with our own hands.

6 . Open each side and fold inward.

7 . You should get the following.

8 .

9 . We bend the upper part of the plane out of paper on both sides.

10 . Flip the piece over and do the same on the other side.

11 . Open both parts along the fold line. Look carefully as shown in the photo.

12 . On the other hand, we do the same, we should get an isosceles triangle.

13 . Fold the figure in half along the fold line. We will receive as shown in the picture.

14 . We outline a line on both sides about 2.5 cm from the base of the aircraft. We will bend our future wing along this line.

15 . Gently bend and iron one wing from the beginning.

16 . Folding the second wing

17 . Draw another parallel line. We will need it for precise bending of the stability wings.

18 .

19 . On the second side, in the same way, draw a line and bend a corner along it.

20. At your discretion, you can make small flaps, if you make them carefully and bend them a little, your fighter will fly a little further. Also, these fender liner will keep the stability wings at right angles.

Congratulations, you just learned how to make a paper airplane. If necessary, you can glue the base of a far-flying aircraft with your own hands. 
An interesting type of creativity is the manufacture of paper and cardboard crafts. Often and in kindergarten, and at school, children are given the task of making some kind of paper craft with their own hands. From cardboard, such products are more solid, hold their shape well, and do not wrinkle. With such crafts, the child can play for a long time.
The boys love different technique: cars, helicopters, planes, tanks. All of these can be made from waste material, which is at hand in any home. This article will discuss how to make an airplane out of cardboard. Consider a few various options starting with the lightest item.
Flat plane made of cardboard according to the scheme
For such an air liner, you need to have a sheet of corrugated cardboard. You can use any hard cookie or shoe box. Using the diagram below, silhouettes of parts are drawn on a sheet with a simple pencil. Then carefully cut out each element along the contour with scissors. The inner hole can be cut with a sharp knife.
Before assembly, you need to apply a drawing to each part or paste it with colored paper. In the end, it just remains to put together all the elements. You don't even need to use glue or tape to do this. Do-it-yourself wing and tail of an airplane made of cardboard are simply inserted tightly into the main part of the structure.
Volumetric flying machine
To understand how to make an airplane out of cardboard, you need to carefully examine the photo of the craft. There is nothing complicated here. It is necessary to draw on cardboard a drawing of all parts of the structure: a body with a hole for the pilot, a wing, two parts for the tail and two wheels.
Parents can help with the diagram in this case by drawing the details with a simple pencil, especially if the child is preschool or younger. school age. Further, the boy can already make an airplane out of

The first part of the work is cutting out all the details along the contour with scissors. Then each can be either painted with gouache paints, or pasted over with colored paper. So that the paint does not stain the baby's hands while playing, all the details on both sides can be covered acrylic varnish. It has no smell, dries quickly, and the plane will look brighter, the colors of the paints will appear more juicy.
At the end of the work, it remains to assemble the parts into a single whole. The wheels are put on a wooden or metal stick. If it does not work out, then you can simply glue them along the edges of the case. That's it, the cardboard airplane model is ready. You can play!
Airplane from a toilet paper cylinder
Before you make an airplane out of cardboard, you need to find: a solid cardboard tube left after using toilet paper, a sheet of corrugated cardboard, a simple pencil, scissors, a knife, a felt-tip pen or paints, a brush, a simple pencil.
In the tube, you need to cut a hole for the pilot, bending it forward. The next cuts for the wings and shank will be more convenient to make with a sharp knife. In the back for the tail, a hole can also be made with scissors.

The next step is to draw the details on a sheet of cardboard. These are two oval wings: long and short for the shank. Then you need to draw a triangular tail and round off its hypotenuse. The most complex part of the whole design is the front propeller. When the drawing is drawn up, all that remains is to cut out the elements and assemble the plane. It's already easy. The screw can be glued, or you can put it on a nail or paper clip, having previously glued the nose of the liner.
At the end of the work, the product is decorated. This can be done with paints, felt-tip pens, pasting with colored paper. It is already at your discretion.
big model
This version of the aircraft is the most time-consuming, and a small child is unlikely to be able to independently carry out this undertaking. The help of an adult will not be superfluous. If your baby early age, then this version of the technique can be made for games by parents or older children in the family.
To get started you need to have big box from corrugated cardboard. If the parents have recently purchased a refrigerator or washing machine, then the cardboard from the packaging can be used for this craft. Before you make an airplane out of cardboard, you need to consider the size of the future structure. If the box is large, and there are two children, then you can make the design long so that two pilots can sit down calmly at once.

Having cut off the extra parts of the box, they first make the body of the aircraft. You can try on by putting the baby there. Should be comfortable for the feet. Then work on the details begins. Since the model shown is a maize, there are two wings on each side, one above the other. They are fastened together with stops, representing structures in the form of the letter "I".
In order for both the wings and the tail to hold tightly, they need to be glued with strips of paper both from below and from above. You can use adhesive tape, gluing each part a couple of times. The screw is made of less thick cardboard in the form of an ordinary windmill. Wheels can not be installed, so the baby will have a stronger base and he will not fall. If dad or older brother makes such a model, the joy of the baby will exceed all expectations.