How to make a paper giraffe with your own hands. Children's master class on creating crafts from colored paper “Giraffe. Step by step photo lesson
print Thanks, great tutorial +1
The giraffe is one of the animals that has a long neck. If you print a craft template, then after a short time such a cute creature will stand on your table. It does not have so many details, which allows you to make a giraffe even with small children. Of course, separate the stages with scissors for yourself. After all, you should carefully work out all the small details. Also work on each line and glue the torso to make it look like a cube. But you can instruct the baby to glue a long spotted neck with a head and a small tail on the back.
Necessary materials:
Step by step photo lesson:
From the printed sheet, cut out all the necessary details to create bulk crafts in the form of a giraffe with a long neck. In total, three main details should turn out - a torso in the form of a cube scan, a head with a long neck and a small tail.

We bend the torso of the future giraffe along all lines.

Apply glue to the white areas of the workpiece and glue all sides together to create a square torso.

Now we will add a detail with a long neck and head to the finished torso. Glue it in the upper part on one of the side faces.

Our giraffe is almost ready. It just lacks one small detail - the tail.

Bend the tail in half along the line. Apply glue to the white area. We lean against the body and let it dry.

On this, our cute giraffe from the printed template is ready! Place the finished craft on the table and decorate with miniature flowers or palm trees.

Giraffes are the tallest animals in the world, but Senya is still a very small giraffe. Like all kids, he loves to run and jump. You invite him to play catch-up or tag, he will gladly agree, but as soon as he sees beautiful flower, Senya can think and stand like that all day. What a dreamer he is!
You will need:
— Double-sided colored cardboard:
- yellow .
Round push pins:
- yellow,
- black.
Orange confetti.
empty rod ballpoint pen.
Pencil, black marker.
Figured (officer) ruler.
Stack of old newspapers.
PVA glue and glue brush.
Fold a sheet of yellow double-sided cardboard in half, and fasten its edges with a stapler. In this craft, you will need two sets of identical parts, so it's best to cut them out of a double sheet of cardboard.
With the help of an officer's ruler, draw a circle with a diameter of 2 centimeters on yellow cardboard. Nearby is another one with a diameter of 1 centimeter. Above the big circle, draw two very small circles. Outline the circles with a smooth line, as shown in the figure (this will be the head and horns of the giraffe).

Draw a strip 5 cm long and 1 cm wide under the ruler - this will be a long neck; four identical legs - stripes 4 cm long and 1 cm wide, the body is a large rectangle with sides 2 and 4 cm. A small elongated triangle will be the tail.

Cut out the details along the contour and round their corners. Fold the paired parts in piles on a pack of newspapers. Using a pushpin, poke holes in the middle and bottom of the head, at the ends of the neck and legs, at the corners of the torso and at the base of the tail.
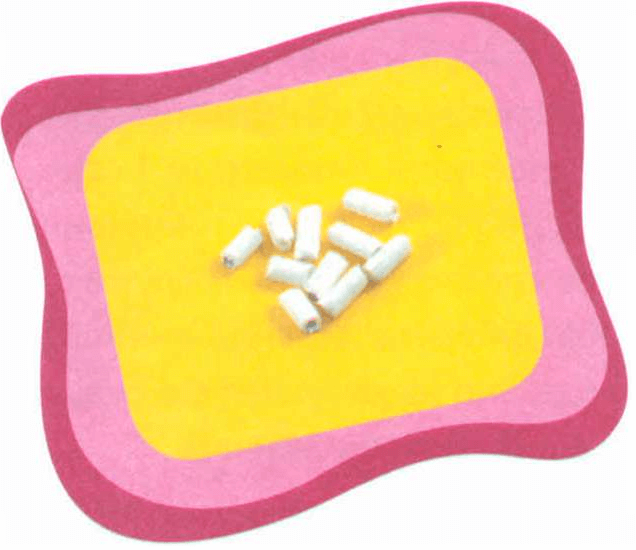
Cut an empty ballpoint pen into half-centimeter pieces (if you don’t have enough strength, ask one of the adults).
Divide the parts into two identical sets (head, neck, torso, four legs, tail).

Connect them together using the yellow buttons. Also insert the yellow buttons into the holes at the ends of the legs. Insert the black button into the hole in the middle of the head.

Connect the two sets of parts by inserting the tips of the buttons into the pieces of the rod from the ballpoint pen.

Glue the ends of the tail together. Cut out ears from yellow cardboard and glue them to the head. Make eyes out of white and black paper and stick them on the hats of the black buttons. Draw a mouth with a black felt-tip pen. Decorate the giraffe with circles of orange confetti.
Have you thought? If yes, then this article is for you. modular origami full of surprises. The well-known animal with a long neck in the chosen technique turns out to be unusual and funny.
To assemble a giraffe from paper triangles, you will need:
- 118 modules of golden or orange paper, 6.5x3.5 cm in size;
- 89 details from brown leaves of the same size;
- glue to give strength to the craft;
- thick black paper for the eyes;
- scissors.
See how to make modules. Use 80-100 gsm paper. m is best option in order for the giraffe to be neat, durable and look aesthetically pleasing.
Giraffe in the technique of modular origami
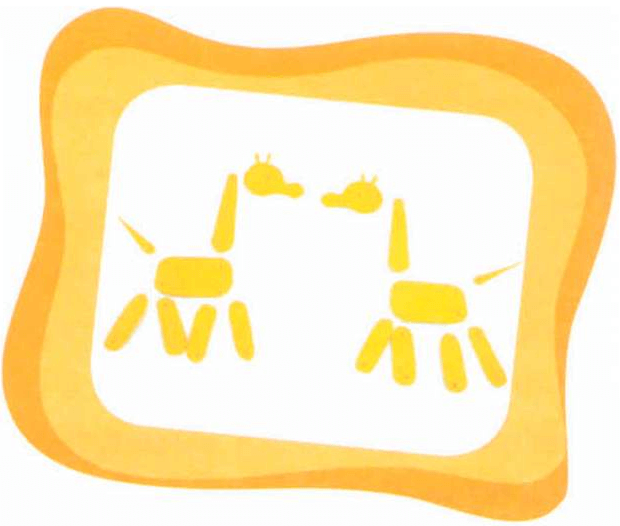
Start by studying the schematic. It will help you assemble the figure correctly. The animal consists of a body, a long neck and head, and two pairs of legs. The diagram shows which colors to use. There are also symbols.

torso
Make the body. Assemble the base first. It is the same as and. 18 modules in a row different colors. For strength, they can be glued together.


Continue to collect the body according to the scheme. There will be 8 rows in total.

Neck and head
Now move on to the long neck. It folds up and down. Alternate the number of modules in rows - two and three pieces.
In the 11th row, make sure that the three corners are included in the pockets.
Insert two golden modules into the extreme corners of the previous row - these are the ears.
In the last row, insert two brown triangles (these are horns) so that the modules of the previous two rows fit into the pockets.
Take two golden triangles and glue them together. Position them at the top so that the sharp end looks forward - this is the muzzle of a giraffe.

Legs
Assemble four identical legs, focusing on the diagram. Insert them into the pockets of the base modules where indicated.


It remains only to cut out small eyes from black paper and glue them. The giraffe is ready! He turned out just like a living thing. You can also test yourself by doing .

The world of origami is diverse and amazing. To find something new, keep browsing the site!
Any good for kids creative work, but they are especially pleased with those that you can later play with. Paper giraffe is not only interesting craft, but also a toy that includes small small holes at the bottom, into which children can insert their fingers, imitating the limbs of an animal.
After that, the giraffe can participate in all games, roam all surfaces, the apartment. You can create comrades for him and the game will become even more interesting, acquire a plot and dialogues.
What will be needed for work?
- Double-sided yellow cardboard, orange, a little bit of brown for the crown, white and black paper for the eyes;
- Gouache, two shades are needed - dark brown and its lighter version;
- Ruler, scissors, pencil, brown marker, glue.

Paper giraffe: cut out the details
We cut out two circles from yellow cardboard: one larger for the body, and the other smaller for the head. For the neck, you will need a strip of yellow cardboard, in the calculation that it should capture two circles and have some free space. We also cut out the ears from the cardboard folded in half. So they will be absolutely identical than when cut them separately.

After that, we move on to orange cardboard, cut out horns from it, thickened and rounded at the end, by the way, they are called ossicons, as well as an oval-muzzle, half the height of a giraffe's head and slightly wider than its length.

We also prepare small details - white and black circles for the eyes, a brown crown. In fact, the giraffe does not have just such a crown in the forehead area, such an image is more cartoony, just for kids. The giraffe, on the other hand, has a peculiar bone growth in that place, which is sometimes mistakenly considered to be another pair of horns.

To finish preparing the details for the paper toy giraffe, you need to cut two small holes in the large yellow circle from the bottom, the size of the child's finger. It is better if adults do this, since it is difficult to punch cardboard and a child may get hurt. The problem disappears if you have a special composter that quickly and beautifully cuts holes.

Glue and draw
All the components needed for the giraffe are ready, let's start gluing them together.

At the first stage, we glue the neck to the body.

Then glue the head to the neck.

Attach the muzzle and ears to it.

Add eyes and horns with a crown.

We print spots with a finger to a giraffe. To do this, let the child dip his finger in dark brown gouache (you can also use watercolor), and place spots on the body and neck of the giraffe. After the paint dries quite a bit, on top of each speck you need to add another light brown print.

Everything, the paper giraffe is ready, after the spots have dried, you can start an exciting game.

This time we will try to collect paper giraffe origami. The model has an increased level of complexity, but is available for execution by any amateur Japanese art by following detailed instructions.
By learning how to fold a giraffe, you will understand how to make a dragon or a unicorn. Many beautiful models have the same base. If you master the proposed technique, then it will be easier.
The paper giraffe looks graceful and majestic. You will be proud of your craft if you manage to fold all kinds of folds, sides and corners.
For work you will need:
- thick paper of any color, square shape(the ideal sheet size is 20X20 cm, but it can be different);
- positive attitude and 15 minutes of free time.
Origami paper giraffe: step by step instructions
Take a square sheet and mark diagonal lines on it, bending it in half so that the opposite corners meet. Repeat the action in the other direction. Mark the horizontal and vertical lines. Unfold the paper and place it in front of you in a diamond shape.

Now we fold the base shape “ double square". Read more about the main basic forms. Remove the left corner along the vertical fold. Do the same on the right side, ironing the folds well. Get a double rhombus.


Position the workpiece in front of you so that the free ends are at the bottom. Form a triangle with the top pointing down by bending the outer sides towards the center. Straighten it again.


Remove the sides along the fold lines inward. Lift the bottom end up. Get it like this.


Turn the shape over by changing the front and back sides. Repeat the steps with folding the sides into a triangle and bending the corners inward. It turned out a two-layer elongated rhombus.

The most crucial moment has come. Fold the base for the future giraffe using the origami technique. To do this, expand the resulting figure to make it look like a four-pointed star. All lines must be clearly visible.

Press inward the center vertex where the vertical, diagonal, and horizontal folds intersect. Sink the sheet inward along a horizontal line to make it look like a boat, and triangles were visible below and above.

Direct these triangles down by bending the shape along the top line. Fix the side inner lines of the triangles. One will remain on the front side, the other on the wrong side. Get the design, as in the photo.

Legs and neck of a giraffe
The two side ends will turn into the legs and neck of a giraffe. Let's start with the neck and front legs. They are on the same line. Press the right end inward and lift up. If you look from the side, you will see that it consists of two halves folded together. Straighten them to the front.


At the resulting rhombus, bring the upper sides to the center. Direct the obtained details along the body of the giraffe, making the middle the outer contour of the neck and front legs.


Form the back legs of the giraffe by bending the other end of the workpiece obliquely. Iron the fold well in both directions. Focusing on it, turn the part inside out. The inside becomes the outside.


Head
Form the head where the neck ends. Step back about 3 cm from the sharp tip and make an oblique fold in both directions. At the fold, bend the end inward to make a protruding angle, about 90 degrees or a little more.


Bend the thin end obliquely at a distance of 2 cm from the edge. Direct it inward so that the edge protrudes beyond the border of the giraffe's head. It turned out a small horn.


Let's put the finishing touches on our model. Bend a straight line on your back where there is an angle on both sides. On the folds, remove the extra sections inside the back. It will become round.


It remains only to remove the sharp ends of the legs inside to paper origami giraffe could stand.

