How to make a personalized keychain with your own hands. Three ideas on how to make a personalized keychain. Fashion leather keychain
Soft keychains in the form of a cat and a whale will easily become an original addition to keys, a pencil case or a bag, despite the fact that making them is quite simple.
Here is a list of required materials:
- Fabric of two colors you like;
- Lace (about 40 centimeters);
- Elastic band (for eyelets, for which the keychain will be attached);
- Threads for sewing;
- Needle and pins;
- Carbine;
- White and beige floss threads (or any other of the same thickness);
- Black beads;
- Scissors;
- Matches or a lighter;
- Filler (waste fabric, cut into small pieces, synthetic winterizer or cotton wool).
Let's get started.
First of all, we will cut out templates from paper for patterns of future key chains.

From the selected fabric, cut out the details according to the blanks.

Now let's put the whale pattern aside and take care of the cat. We divide the lace into several segments: one is 4 cm long, four are 5 cm long and one is 9 cm long. See photo.

Each piece must be folded in half and with a lighter or matches set fire to the ends so that they stick to each other. The largest detail is the tail, four smaller ones are paws, and the remaining one is a loop for fastening.


Sew upper part, then position the presser feet in the same way and sew the rest.

Remember to leave a small hole through which you will turn the product inside out. front part out.

Fill the toy with padding polyester or any other material and carefully sew up the hole.

Now the most interesting thing is embroidering the cat's face. White threads need to embroider eyes and eyebrows.

Then sew on a couple of beads.

We embroider the muzzle, nose and mustache with beige threads.

Attach a carabiner and you're done!

The whale remained, it will be a little easier with him.

We fold the parts of the pattern and the elastic for fastening, then we sew, leaving 3-4 cm along the edge intact.

We turn the product inside out, fill it in, embroider eyes, a smile and a fin, sew on a bead, in addition, you can walk decorative seam along the edge of the toy with threads of the same color as the elastic. That's all!

Pretty easy and fast!
As a result, you have two original key chains that you can give to friends and family. Creative success to you!
Hi all! The series of gifts will never stop, so today I offer you something interesting. You will find a fascinating article on how to make a keychain with your own hands.
This is a necessary, but at the same time, a miniature gift for all occasions. I have prepared 25 master classes and just original needlework ideas that will help you make the very keychain that you want.
First of all, advice: if you want to make a cool keychain, then be sure to get good fasteners (rings, laces, etc.) At the end of the article, I will tell you what to buy and where to do it.
How to make a keychain with your own hands: 25 workshops and ideas
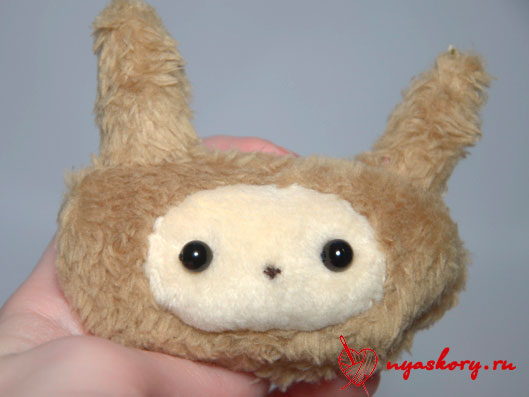
Soft keychain made of "Fluff" fabric
What do we need?

- velsoft (you can also use faux fur);
- fleece or minky fleece;
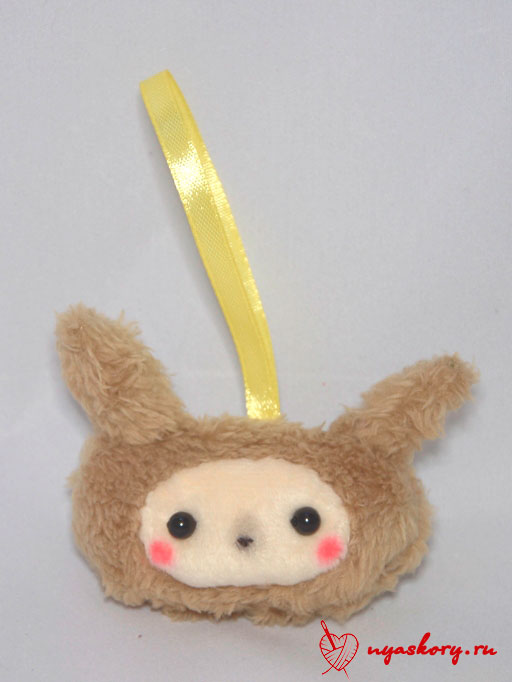
- satin ribbon for fastening;
- threads;
- pastel for painting the nose and cheeks (you can take acrylic paints);
- synthetic winterizer for stuffing;
- cotton swab;
- scissors;
- needle;
- eye beads.
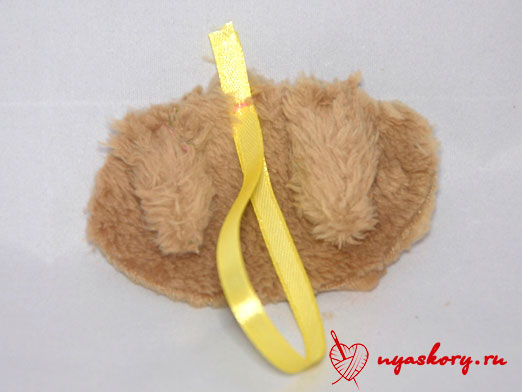
DIY keychain - sew a bunny Pushka
You can make Cannon patterns yourself by looking at the final version of the toy. You can print a photo and circle the elements, increasing each by about a centimeter so that there are seam allowances.
First, sew the ears, folding them with the right sides inward. Turn them out.

Now take a pre-prepared piece of tape. Fold it in half and attach it to one of the parts of the head approximately in the middle. Also attach the ears. So that they do not move out, you can attach them with a thread.
Now attach the second part of the head to our workpiece and sew, leaving a hole for eversion. Turn out the future keychain.

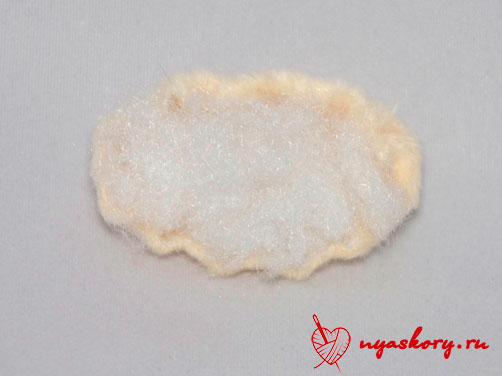
We fill the workpiece Cannon. Stuff tightly, but in moderation. Sew up the opening of the keychain with a blind stitch.

Take the muzzle detail and go over it with a running stitch. Pull off the future face a little (but not much).

Lightly stuff the muzzle with a padding polyester. Attach the muzzle to the head with a hidden seam. While sewing, gently hold the face so that it does not “run away”.
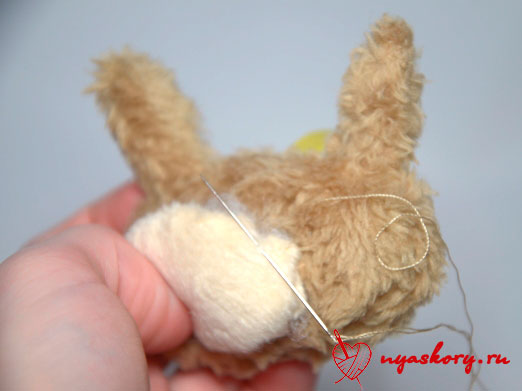
Now sew on the eyes and embroider a small nose on the hare with black thread, making a few stitches between the two eyes for this.
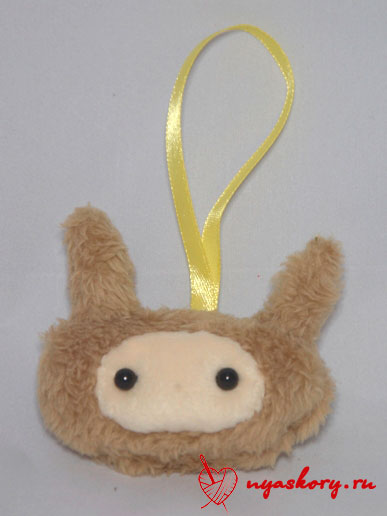
Take a cotton swab and lightly rub the desired color of the pastel chalk. Then just rub this cotton swab muzzle Fluff in the cheek area. You can also paint the nose area, but now with black pastel.
Keychain is ready
More Keychain Ideas
The matter will not be limited to one Fluff - as promised, 24 more cool ideas for making key chains.
Beaded orange
Enough simple circuit accessible even for beginners. You will need a thin fishing line and beads (for sure, monofilament is also suitable).

Blackies from fur
For them you will need a circle of black fur with a long pile, a little felt and the bindings themselves.

Leather keychains on the bag
A very stylish and simple option, obtained by folding a rectangle with a fringe at the ends into a tube. Inside is a piece of leather with a carabiner. By the way, any key chains of a simple shape from two parts can be made leather.

Cute animals for keys
Absolutely simple forms of such cats allow you to fantasize endlessly with colors, accessories and materials. And yes, you can use any mounts here.

Beads on the go!
From wooden and plastic beads you can make very original accessory. Two beads, a keychain ring, knitting needles or sticks, paper tape, a brush, acrylic paints and an elastic cord will come in handy. First, color the beads as you wish, leave to dry on the needles. Fasten the elastic on the ring and thread the elastic through both beads, tie a knot at the bottom.

Fantasy on wood
All you need here is a wooden base and acrylic paints. And then only your artistic abilities and imagination.

Interesting key chains made of polymer clay
From it is just a fairy tale to sculpt simple little cuties. Cupcakes, animals, snacks - whatever! For you, as many as 6 ideas from this malleable material.


Great gift option for boyfriend different holidays(including February 23) — two pieces of polymer clay puzzles. Roll out the pancake, cut out the puzzles, making holes for fastening, bake them and paint them.

Made of felt and wool
I want to show you some interesting ideas for making different animals (and not only with the help of these materials).


Other materials
Something is just not used when they want to make beautiful and cool key chains and more! Look, for example, at these seals - they are made of special beads that melt when ironed. You can find similar ones in the departments for children's creativity.

Do you throw away wine corks? And in vain - they make excellent key chains. All you need is paint and fasteners. 
But even there you have to keep your eyes peeled. More recently, I successfully purchased some elements for making key chains there, I share the links:
Thread fasteners- perfect for soft accessories.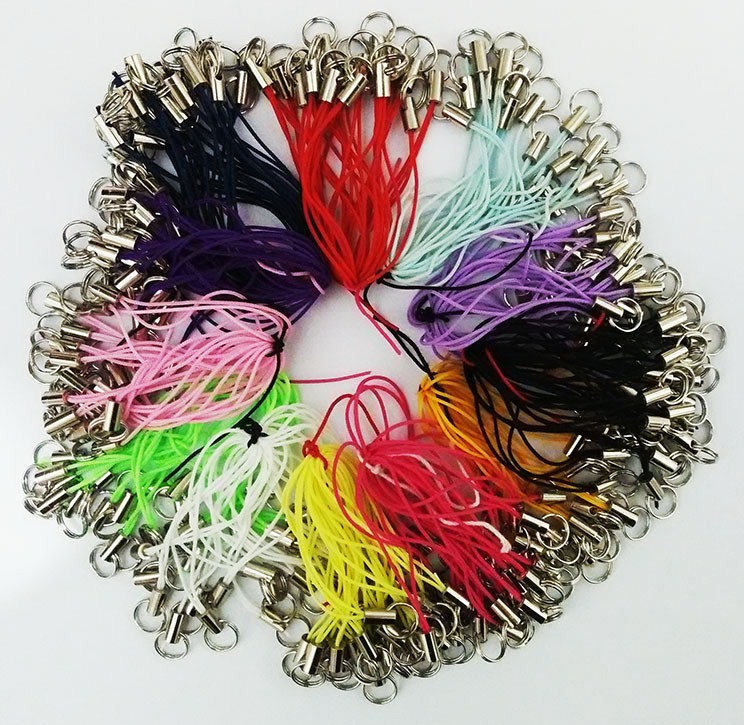

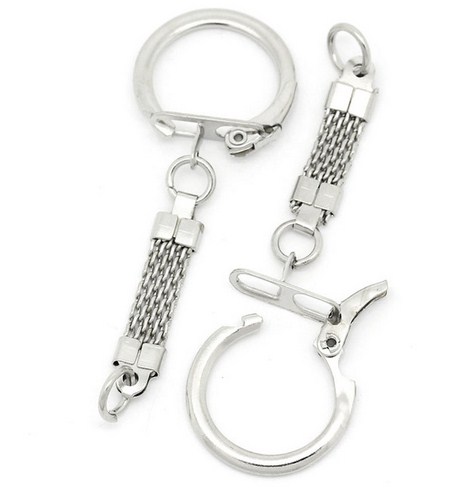
And finally small threaded loops for screwing into solid products (chains are attached to them).
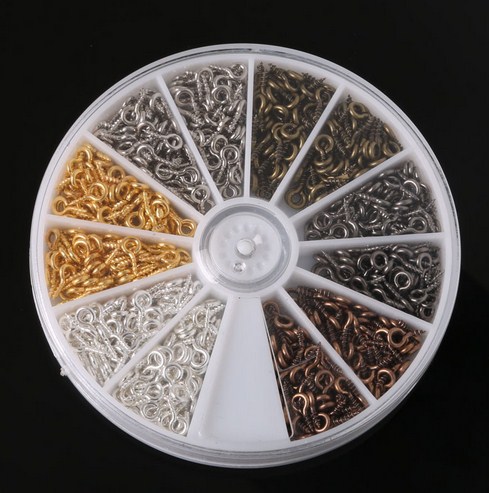
These are the most profitable offers that I myself have used - I can recommend
On this I say goodbye to you! Share your experience and link to interesting material with friends!
Sincerely, Anastasia Skoreva
A lot about a person can be told by such a thing in his everyday life as a keychain. A small flight of fantasy, peacefully dangling on the keys or the phone, one way or another corresponds to the inner qualities and desires of its owner. For people who have a negative attitude to a bunch of randomly dangling bells or sparkles, a book keychain will be an ideal solution. This is a real miniature of the book, created for a short time and it can serve for many years. To create it, I needed the following tools:
sheets of A4 paper;
a small piece of cardboard;
pencil;
ruler;
scissors;
stationery knife;
PVA glue;
needle and thread;
metal chain;
an awl or similar tool.
The first step is to prepare the paper for the future filling of the book, namely the pages. To do this, with the help of a knife and scissors, we grind sheets of white paper into rectangles measuring 3 by 6 centimeters.

By the way, the paper does not have to be white. It all depends on the page color you choose. We fold the resulting leaves in half so that we get double pages 3 by 3 centimeters. We group them into small books of three.

Now on the fold of each pack we make holes at an equal distance from each other.

I did this procedure in two stages so that the pages would not move.


If you know of any other binding option, you can use it. The end result is something like this.

The final step is to thoroughly coat the resulting spine with PVA glue and let it dry under pressure.

While our future book dries, you can do its cover. For its manufacture, I used ordinary cardboard and a small piece of paper with a print. To begin with, we cut out two pieces of cardboard that correspond to the size of the pages, and one spine that fits the parameters.

With the help of PVA glue them on the chosen for the cover beautiful paper leaving gaps.

Then we make cuts on paper like this.

Now, fold the remaining edges and glue.

In that part of the spine, which will fall on the top of the book, with any sharp object (I used a tool from sewing machine to cut the threads) make a small hole and fasten the chain.

The most crucial moment is coming. Putting together the cover and the book. To do this, glue the spine of the book to the space allotted for it on the cover. For better fastening, we also glue the outer pages to the cover.

This also solves the problem of open seams in the paper intended for the cover. This is the beauty I got.
Many people are very fond of all kinds of knickknacks like cute key rings, pencil cases, backpacks, etc. Today, you can buy any such trifle, since the range of goods is incredibly large. But you must admit that the craft made by you personally will look unique and bring more joy than the next Chinese product. And since you can make a keychain with your own hands from almost any materials that can be found at home, there should not be any big difficulties in this matter. In this article, we will offer you some interesting ideas that you can easily use even without any needlework skills.
What can be made into a cute and stylish accessory?
In addition, such things carry an energy message, which is why it is advisable to start making it with good mood and, quite possibly, then your craft will become for you a real amulet or amulet for good luck.
What can such a thing be made of? Yes, almost anything, for example:
- From materials such as beads, paper, thread, polymer clay, coins, rubber bands, etc.
- You can also use old unnecessary parts from watch movements and leather straps for steampunk key chains.
- Pencil stubs, wine corks, ribbons, scraps of fabric and more are all good too.
It all depends on the materials available and your imagination.
Paper
To begin with, I would like to talk about how to make a paper keychain, because this material can be found in every home. There are many options for crafts of this kind, here is one of them:
- Take old unnecessary magazines or newspapers, or rather their covers, several sheets of thick multi-colored paper.
- Cut them into long strips in a triangular shape.
- Attach a toothpick to the wide side of the strip.
- Start wrapping the piece. Seal the end with glue.
- Open with varnish, then put on a string, if desired - add beads.
Important! You can also make such an accessory using quilling or origami technique from paper. Highly interesting idea miniature book. However, do not forget that such crafts are short-lived, as they are quickly overwritten.
Threads and rubber bands
Various key chains for a backpack can be made from ordinary threads. To do this, you will need your imagination, threads and a scheme for work.
Important! Since it is better to make a keychain from durable threads, yarn or shoe threads are better suited. Thin elastic bands or floss will also fit.
Idea 1
As an example, you can try to make a dream catcher. For this:
- You need to take the base ring and wrap it tightly with threads.
- Then start knitting a pattern in the center of the ring.
- Separate segments are intertwined in beautiful patterns. With their help, you can set a specific value for the key fob.
Idea 2
But how to make crafts from floss? Alternatively, you can try to weave a keychain according to the principle of making friendship bracelets. This technique implies the interlacing of segments with each other, as well as tying knots, which as a result allows you to give the product a certain shape.

Idea 3
You can also weave a keychain from stationery rubber bands, for this you will need:
- Five colored rubber bands (purple in our case) - for the most bright flower, several pieces for a chain;
- Ten elastic bands in two contrasting colors (we have gray and white);
- Crochet hook.
We create a keychain with our own hands:
- Take one purple rubber band, twist it on the hook in four turns.
- Then take two elastic bands of different, contrasting colors and pull the purple one over this pair. Make five such blanks.
- Take one purple elastic band and drag all the blanks from the hook onto it, then tie this elastic band with a knot, stretching one end of the elastic band through the second.
- Now you need to weave a “chain” of the required length. To do this, stretch one purple rubber band through the one that we tied in a knot. This will be one link in your chain. Next, weave the desired length for your keys or phone.
Beads and beads
Since it is probably the easiest way to make a keychain of any shape from beads and beads, this method is the most popular.
You will need:
- a set of beads;
- thin wire or fishing line;
- diagram for work.
Work sequence:
- Cut a piece of wire and bend it in half.
- Put a bead or bead on one end and push it to the middle. Pass the other end of the wire through it.
- Put on the second row of beads - one more, the next one more, and so on. To make the petal interesting, use beads of other colors around the edges, starting from the third row.
- When you reach the middle, start reducing the number of beads in the row. Thus, make the required number of petals.
- Put black or yellow beads on the wire, on top - a larger bead. This will be the stamen.
- Connect all the elements, twist the wire, and secure it with a larger bead at the bottom.
Polymer clay and plasticine
Also, a beautiful keychain can be molded from plasticine, but it is better to use polymer clay, because it can be baked for strength. Since a plasticine or clay keychain can be made in any shape and color, there are no restrictions. However, please adhere to the following rules:
- To work, take a small piece of material and fashion any figure out of it. The rest of the clay should be well wrapped in polyethylene so that the clay does not dry out.
- Use a metal mount. It can be inserted into the craft and baked along with the product or attached after work, into a previously prepared hole.
- Clay can be baked in the oven or a hair dryer can be used for this purpose.
- Coat the product with varnish on top.
Important! Every keychain needs the right mount. You can find them in any of the handicraft stores. Feel free to contact the sellers for help, they will help you find exactly the mount that is most suitable for your craft.
coins
A stylish DIY keychain can be made from simple coins. For this you need coins. different sizes. You need to drill holes in them and fasten them with a chain, alternating elements of different diameters.
The first way is from metal
You will need:- Unused shampoo.
- Aluminum wire, with a cross section of 4-5 millimeters.
- Aluminum (or copper, brass) tube, for example from an antenna.
- File.
- Emery machine.
- Felt disc.
- Paste GOI.
- Thin strips of leather, or leatherette.
- Second glue.

So let's start with the base. Namely: cut off a piece from the skewer, ten centimeters long. Further, with the help of an emery machine, we give it an approximate shape of the future sword - we sharpen it at one end, cut a pin (1.5 - 2 cm) for the handle at the other. Now we need to bring a groove in the middle of the workpiece, along, on both sides.

I used salt water and a 12-volt power supply for this purpose, varnished the workpiece, removed the varnish in the right place with a ruler and a knife, tied a plus to the workpiece, lowered the minus into salt water and placed the workpiece in the same water for ten minutes. Salt water and electricity etched the areas I needed. But if you don’t feel like messing around, then you can carefully make grooves with a cutting wheel, 1 mm thick. and grinder. Now you have to work with a file. For the manufacture of skewers, soft stainless and not hardened steel is usually used. So it will not be difficult to file the cutting edge on the blade with a file. Next, cut off a piece of 1.5 mm from the wire. Slightly flatten it, drill a hole in the middle, give it the desired shape with a file and put the resulting guard on the pin.

Now we cut off a thin tube, 3-4 mm shorter than the remaining pin, put this tube on it, slightly flatten it so that it acquires oval shape, and instill second glue into the tube so that the guard and the handle-tube stick to the pin. On the remaining tip of the pin we put some bead or a turned piece of metal, also with the help of a second glue.

We will make the sheath from a brass tube from a broken antenna. We flatten a tube of suitable diameter, sharpen one end, under the point of the sword, glue (or solder) the edges of the resulting triangular point.

We glue (or solder) the ear for the ring and wrap the resulting sheath with a strip of leather in any combination you like.

It remains to process everything with goy paste on felt. Keychain is ready.

The second option: cartridge-container for oil perfumes

You will need:
- Cartridge case 7.62 × 51
- Threads internal and external, with a diameter of the inner diameter of the sleeve.
- Soldering iron, tin and flux.
- A piece of brass for the bullet cap.
- Flat neodymium magnets 2 pcs.
- Second glue.

When the metal of the sleeve reaches the desired temperature, it is enough just to touch the solder to the right place and it will spread itself through all, even the thinnest cracks. Now let's make a bullet cap. To do this, from any suitable piece of copper or brass, we cut out a cone on the emery, like a bullet, suitable in caliber for the sleeve. Solder the outer thread to the bullet. Inside the thread on the bullet, glue the cork from the flask of oil perfume.

We close the resulting cork perfume. We collect the container with the cone together.


Now we glue one of the magnets to the cartridge case primer, and the second to the chain (or lace) with the ring.


This keychain is very like the female half.
The third option is not so laborious: a stone arrowhead
Finding flint is a simple task. This mineral is most often found on the banks of rivers, as well as in pine forests.
If it was not possible to find flint - it does not matter; you can take any, similar in structure, pebble. Of course, we will not chip off pieces from it in order to give it the necessary shape, as primitive people did, especially since with the miniature sizes we need, this is almost impossible. In our technological age, there are easier ways to get the desired result.
You will need:
- A hammer.
- Emery machine.
- Boron machine.
- Clear nail polish.
- Drill and drill 3 mm.

Next, you need a boron machine, with which we grind pieces from a stone plate in the form of chips. In a mess In general, we give the appearance of a stone tip.

Next, drill a hole in the tip with a 3 mm drill. And finally, we cover the tip clear varnish and thread an iron ring or nylon thread into the hole.


Ready.
There are many more options and types of homemade key rings. For example, a flash drive disguised as a lighter, or a bracelet made of shell casings (although this is probably more decoration than a key chain…) Any of these key chains, due to their uniqueness and originality, will decorate your keys, jeans or car alarm remote control.