Knitting booties and hats for newborns. Knitted hat and booties. Olga's work. Description of knitting booties
A very cute set for a newborn, which is perfect for discharge from the hospital, because. looks very elegant.
Knitted with yarn Yarn Art Baby and Alize soft. It took about 100g. For decoration I used beads, ribbons, lace.
Main patterns: 1*1 elastic band and "Asterisks" pattern.
We knit the pattern "Asterisks" with knitting needles
Asterisk pattern - obtained by knitting from three loops on a knitting needle - three loops. To do this, we insert the knitting needle into three front loops on the left knitting needle and knit them together with the front loops for the lower lobules, without removing the knitted loops, we make a crochet on the right knitting needle and once again we knit the same three front loops, after which the knitted loops are removed from the left knitting needle.
Knitting pattern for a checkered star pattern
The number of loops is a multiple of 6 + 2 chrome. 1 row - * knit 3, make 3 out of three, repeat from * 2 and 4 rows - purl loops 3 row - * make 3 out of 3, knit 3 - repeat from * 5 row - repeat from the 1st. Use the star pattern for knitting sweaters, jackets, vests. Especially often it is used when knitting children's kits. Such knitted children's things look especially original.
Description of knitting hats
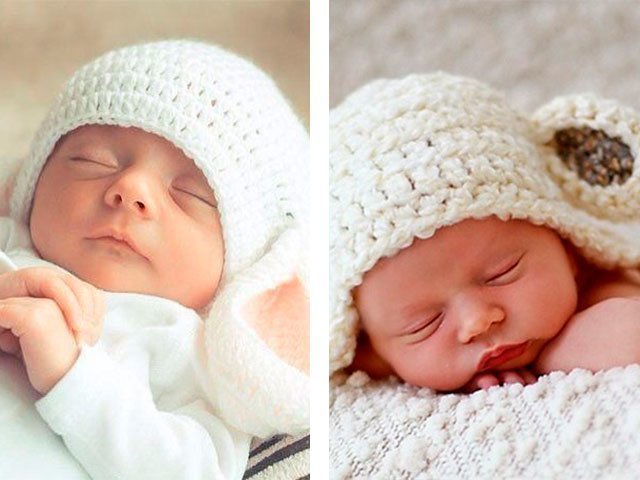
knitted hat for a newborn with knitting needles with a star pattern, decorated with crocheted frills, pink yarn.
In order to knit a cap for a newborn with knitting needles, you will need: 50 g of wool blend yarn white color, a few meters of pink yarn for finishing the hat, knitting needles No. 3, knitting needles No. 2 - 5 pcs, hook No. 3. We collect 55 loops on knitting needles No. 3 and knit with an elastic band 1x1 - 6 rows. We knit the 7th row with the wrong ones, evenly adding 10 loops = 65 sts from the broaches. From the 8th row we begin to knit with an asterisk pattern - we knit 20 rows.
Star pattern 1 row - * 1 star, knit 1 - continue to the end of the row 2 row - purl loops 3 row - knit 2, * 1 asterisk, knit 1 - repeat from * to the end 4 row - purl loops 5 row - repeat from 1 row.
We begin to form the crown of the cap for the newborn - we switch to 5 knitting needles No. 2, we begin to knit in a circle. immediately after the “star” pattern, we knit one circular row with purl ones, evenly decreasing 5 loops in it = 60 loops. we knit the top of the head with the front stitch, decreasing the loops with 10 wedges, for this in the first row we knit together the front every 5th from the 6th loop - 10 times then we knit one row without decreases (so that the wedges are more elongated)
3 row - we knit together 4 and 5 loops
4 row - all facial
5 row - together 3 and 4
6 row - no decrease
7 row - together 2 and 3
8 row - facial without reductions
9 row - we knit all the loops 2 together with the front remaining 10 loops with a needle and sew up. Then, with the help of a hook, we begin to knit frills on a hat.
In the 7th row of the hat, which was knitted purl, in each loop we knit 2 columns with 2 crochets, with a pink thread.
Then we make out the edge of the frill with a white thread, for this we knit * 3 sts without a crochet - 2 air loops - st without a crochet into the same 3rd loop - repeat from * to the end of the frill.
You can make a second row of flounces at the crown, in the row that was knitted on the wrong side after the star pattern.
We tie the laces and the hat for the newborn girl is ready.
Description of knitting booties:
I used children's yarn, as well as ribbons and beads.
Types of knitting - 1) "garter" (all front loops) 2) elastic band 2x2 (2 front, 2 wrong loops) 3) elastic band 1x1 (1 front, 1 wrong)
We start knitting from the middle of the sole. The sole is knitted in garter stitch. Cast on 40 sts on needles.
1st and 2nd row - all facial loops. Starting from the 3rd row, it is necessary to add in every second row 4 times 4 loops (one loop at the edges and two loops in the middle). We add a new loop from the constrictions between the loops. The constriction must be twisted before knitting so that a hole does not form and the knitting is denser. We lift the constriction between the loops, twist and knit.
3rd row - 1 edge, 1 loop add persons., 18 persons., 1p. add persons., 2 persons, 1 add persons., 18 persons., 1 add persons., 1 edge.
4th row - all facial.
5th row - 1 edge, 1 person., 1 loop add persons., 18 persons., 1p. add persons., 4 persons, 1 add persons., 18 persons., 1 add persons., 1 persons, 1 edge.
6th row - all facial.
7th row - 1 edge, 2 persons., 1 loop add persons., 18 persons., 1p. add persons., 6 persons, 1 add persons., 18 persons., 1 add persons., 2 persons, 1 edge.
8th row - all facial.
9th row - 1 edge, 3 persons., 1 loop add persons., 18 persons., 1p. add persons., 8 persons, 1 add persons., 18 persons., 1 add persons., 3 persons, 1 edge.
10th, 11th and 12th rows - all facial loops. A total of 16 stitches were added. There are now 56 stitches on the needles. The sole is ready.
We divide the loops into 3 parts - two side and middle part. The sides are knitted in garter st, the middle part in 2x2 ribbing.
Join our groups - there is even more interesting:
The loops must be calculated so that the middle part of the booties begins and ends with two facial loops. In my example, it turned out - the middle part of 18 loops and two side parts of 19 loops each, including the edge loop.
1st row - 1 hem, 18 facial, 18 loops with an elastic band 2x2 (k2, 2 out, 2 persons, 2 out, 2 persons, 2 out, 2 persons, 2 out, 2 persons), 18 facial, 1 edge.
2nd row - 1 edge, 18 front, 18 loops with an elastic band 2x2 already according to the pattern (2 out, 2 persons, 2 out, 2 persons, 2 out, 2 persons, 2 out, 2 persons, 2 out), 18 facial, 1 edge. Repeat the 1st and 2nd row 5 more times. Now 12 rows are knitted after the sole. From the next 13th row, we begin to make decreases.
13-row - 1 edge, 18 facial, 2 together facial, 2 together purl, 2 together facial, 2 together purl, 2 together facial, 2 together purl, 2 together facial, 2 together purl, 2 together facial, 18 facial, 1 edging. When decreasing, knit the loops so that they are not twisted. Then the drawing will be smooth.
14th row - 1 edge, 18 facial, 1 out, 1 persons, 1 out, 1 persons, 1 out, 1 persons, 1 out, 1 persons, 1 out, 18 facial, 1 edge.
15th row - 1 edge, 18 facial, the next 1 knit and 1 out of the loop knit together the front, 2 together the front, 2 together the front, 2 together the front, 2 together the front (1 loop from the elastic band and 1 loop from the side part - “garter "knitting"), 17 facial, 1 edge.
16th row - 1 edge, 17 facial, 5 purl, 18 facial, 1 edge.
17th row - 1 edge, 18 front, 2 together front, 1 front, 2 front together, 17 front, 1 edge.
18th, 19th, 20th rows - all facial loops. Next, we knit with an elastic band 1x1 24 rows. Close loops. Break the thread, leaving 20-25 cm for stitching.
We sew with a vertical knitted seam (we sew along the front side, and the seam remains on the wrong side) You need to start sewing the booties from the wrong side so that the seam on the lapel of the booties is on the wrong side. Sew about ¾ of the 1x1 elastic band. Turn right side out and continue to sew to the end.
Cap and delicate sandals for princess 1 year crocheted. Size 46 cm.
- Children's hats, without adult models
Yarn 100% mercerized cotton Violet_duz YARNART white (1 skein), 282m, 50g.
Description of the cap:
1st row: cast on 6 ch. and close out into a ring, knit 3 ch. lifting and 15 tbsp. s / n, close a number of connections. loop.
each next row begins with a lifting column and ends with a connecting loop at the top of the lifting column.
2nd row: knit * 2 tbsp. s / n between the stobics of the previous row, ch 2, skip 2 loops of the previous row *, repeat from * to *
3rd row: knit 2 tbsp. s / n in chains from v.p. the previous row. In the intervals between Art. s / n - 1 cp
4th row: knit 3 tbsp. s / n in chains from v.p. the previous row. In the intervals between Art. s / n - 1 cp
5th row: knit 3 tbsp. s / n in chains from v.p. the previous row. In the intervals between Art. s / n - 2 v.p.
6th row: knit 4 tbsp. s / n in chains from v.p. the previous row. In the intervals between Art. s / n - 2 v.p.
7th row: knit 4 tbsp. s / n in chains from v.p. the previous row. In the intervals between Art. s / n - 3 v.p.
8th row: knit 5 tbsp. s / n in chains from v.p. the previous row. In the intervals between Art. s / n - 3 v.p.
9th row: knit 5 tbsp. s / n in chains from v.p. the previous row. In the intervals between Art. s / n - 4 v.p.
this number of loops was enough for me for the required volume of the cap, but if you need to knit a cap of a larger diameter, then you should continue to increase loops in the same way as 8 and 9 rows.
Finished knitting hats in rows of Art. b / n and "crustaceous step" is of a different color. Flowers can be varied (there are many schemes on the Internet).
Booties-sandals knitted according to this description
crochet pattern for the soles of children's sandals, found on the Internet:

1. We collect a chain of 16 loops
2. We make one c. lifting, seven tbsp. b. n. and seven st. double crochet
3. In last loop put 7 tbsp. double crochet
5. To lift, you need to knit 3 in. n. and make 15 double crochets
6. Then we knit 2 tbsp in each loop five times. from n.
7. In reverse side knit 16 tbsp. from n.
8. In the loop we make 3 tbsp. from n., in the next 4 tbsp. from n. and again 3 tbsp. from n.
9. The final row of sandals is crocheted as follows: 3 c. p. and 15 double crochets
10. We do 2 tbsp. from n. and 1 tbsp. from n. and again the same thing. Then in each of the loops we knit 3 tbsp. s.n. and again 1 tbsp. from n. 2 tbsp. from n. and repeat this moment
11. We knit 16 tbsp. from n. and to complete the heel we knit the same semicircle as on the toe of the sole
12. We begin to crochet the sole with a green thread. I do this from the edge where the back of the sandals will then be fixed.
13. We tie to the end
14. We start with three lifting loops, and then we do 5 tbsp. from n.
15. We knit a chain from the 16th century. P.
16. We add 5 tbsp. from n.
17. We knit fasteners for the strap of the 20th century. P.
18. We begin to tie the strap with single crochets
19. Then comes a row of double crochets. Here we make two holes for the buttons. To do this, skip one loop, and above it we make 1 c. n. and continue the double crochets
20. Finish off the back of the bootie sandals with a row of single crochets
21. We tie the whole part with green thread
22. We collect a chain of 20 loops
23. We knit three rows of double crochets, this top part knitted sandals
24. Sew on this part. We tie it with a green thread
25. We knit the sole of the second shoe in the same way. But the back part needs to be slightly changed so that it turns out in a mirror image. To do this, first we knit 20 loops (this will be a strap fastener) we attach with five tbsp. from n.
26. Making the 16th century n. and again 5 tbsp. from n.
28. Sew on the buttons and sandals for the baby are ready.
Knitted with yarn Yarn Art Baby and Alize soft. It took about 60-70 grams of pink and 40 grams of white. For decoration I used beads, ribbons, lace.
Main patterns: 1*1 rib and star pattern.
We knit the pattern “Asterisks” with knitting needles
Asterisk pattern - obtained by knitting from three loops on a knitting needle - three loops. To do this, we insert the knitting needle into three front loops on the left knitting needle and knit them together with the front loops for the lower lobules, without removing the knitted loops, we make a crochet on the right knitting needle and once again we knit the same three front loops, after which the knitted loops are removed from the left knitting needle.
Knitting pattern for a checkered star pattern
The number of loops is a multiple of 6 + 2 chrome. 1 row - * knit 3, make 3 out of three, repeat from * 2 and 4 rows - purl loops 3 row - * make 3 out of 3, knit 3 - repeat from * 5 row - repeat from the 1st. Use the star pattern for knitting sweaters, jackets, vests. Especially often it is used when knitting children's kits. Such knitted children's things look especially original.
 interesting selection to the website 36 exclusively girly hats
Here is the cap description
Knitted hat for a newborn with a star pattern, decorated with crocheted frills, pink yarn.
In order to knit a cap for a newborn with knitting needles, you will need: 50 g of white wool blend yarn, several meters of pink yarn for finishing the hat, knitting needles No. 3, knitting needles No. 2 - 5 pcs, hook No. 3. We collect 55 loops on knitting needles No. 3 and knit with an elastic band 1x1 - 6 rows. We knit the 7th row with the wrong ones, evenly adding 10 loops = 65 sts from the broaches. From the 8th row we begin to knit with an asterisk pattern - we knit 20 rows.

Star pattern 1 row - * 1 star, knit 1 - continue to the end of the row 2 row - purl loops 3 row - knit 2, * 1 asterisk, knit 1 - repeat from * to the end 4 row - purl loops 5 row - repeat from 1 row.
We begin to form the crown of the cap for the newborn - we switch to 5 knitting needles No. 2, we begin to knit in a circle. immediately after the “star” pattern, we knit one circular row with purl ones, evenly decreasing 5 loops in it = 60 loops. we knit the top of the head with the front stitch, decreasing the loops with 10 wedges, for this in the first row we knit together the front every 5th from the 6th loop - 10 times then we knit one row without decreases (so that the wedges are more elongated)
3 row - we knit together 4 and 5 loops
4 row - all facial
5 row - together 3 and 4
6 row - no decrease
7 row - together 2 and 3
8 row - facial without reductions
9 row - we knit all the loops 2 together with the front remaining 10 loops with a needle and sew up. Then, with the help of a hook, we begin to knit frills on a hat.


In the 7th row of the hat, which was knitted purl, in each loop we knit 2 columns with 2 crochets, with a pink thread.
Then we make out the edge of the frill with a white thread, for this we knit * 3 sts without a crochet - 2 air loops - st without a crochet into the same 3rd loop - repeat from * to the end of the frill.
You can make a second row of flounces at the crown, in the row that was knitted on the wrong side after the star pattern.
We tie the laces and the hat for the newborn girl is ready.
Booties are connected according to MK booties “Dogs”
Booties description
I used children's yarn, as well as ribbons and beads.
Types of knitting - 1) "garter" (all front loops) 2) elastic band 2x2 (2 front, 2 wrong loops) 3) elastic band 1x1 (1 front, 1 wrong)
We start knitting from the middle of the sole. The sole is knitted in garter stitch. Cast on 40 sts on needles.

1st and 2nd row - all facial loops. Starting from the 3rd row, it is necessary to add in every second row 4 times 4 loops (one loop at the edges and two loops in the middle). We add a new loop from the constrictions between the loops. The constriction must be twisted before knitting so that a hole does not form and the knitting is denser. We lift the constriction between the loops, twist and knit.
3rd row - 1 edge, 1 loop add persons., 18 persons., 1p. add persons., 2 persons, 1 add persons., 18 persons., 1 add persons., 1 edge.
4th row - all facial.
5th row - 1 edge, 1 person., 1 loop add persons., 18 persons., 1p. add persons., 4 persons, 1 add persons., 18 persons., 1 add persons., 1 persons, 1 edge.
6th row - all facial.
7th row - 1 edge, 2 persons., 1 loop add persons., 18 persons., 1p. add persons., 6 persons, 1 add persons., 18 persons., 1 add persons., 2 persons, 1 edge.
8th row - all facial.
9th row - 1 edge, 3 persons., 1 loop add persons., 18 persons., 1p. add persons., 8 persons, 1 add persons., 18 persons., 1 add persons., 3 persons, 1 edge.
10th, 11th and 12th rows - all facial loops. A total of 16 stitches were added. There are now 56 stitches on the needles. The sole is ready.
We divide the loops into 3 parts - two side and middle part. The sides are knitted in garter st, the middle part in 2x2 ribbing.

1st row - 1 edge, 18 facial, 18 loops with an elastic band 2x2 (k2, 2 out, 2 persons, 2 out, 2 persons, 2 out, 2 persons, 2 out, 2 persons), 18 facial, 1 edge.
2nd row - 1 edge, 18 front, 18 loops with an elastic band 2x2 already according to the pattern (2 out, 2 persons, 2 out, 2 persons, 2 out, 2 persons, 2 out, 2 persons, 2 out), 18 facial, 1 edge. Repeat the 1st and 2nd row 5 more times. Now 12 rows are knitted after the sole. From the next 13th row, we begin to make decreases.
13-row - 1 edge, 18 facial, 2 together facial, 2 together purl, 2 together facial, 2 together purl, 2 together facial, 2 together purl, 2 together facial, 2 together purl, 2 together facial, 18 facial, 1 edging. When decreasing, knit the loops so that they are not twisted. Then the drawing will be smooth.
14th row - 1 edge, 18 facial, 1 out, 1 persons, 1 out, 1 persons, 1 out, 1 persons, 1 out, 1 persons, 1 out, 18 facial, 1 edge.
15th row - 1 edge, 18 facial, the next 1 knit and 1 out of the loop knit together the front, 2 together the front, 2 together the front, 2 together the front, 2 together the front (1 loop from the elastic band and 1 loop from the side part - “garter "knitting"), 17 facial, 1 edge.
16th row - 1 edge, 17 facial, 5 purl, 18 facial, 1 edge.
17th row - 1 edge, 18 front, 2 together front, 1 front, 2 front together, 17 front, 1 edge.
18th, 19th, 20th rows - all facial loops. Next, we knit with an elastic band 1x1 24 rows. Close loops. Break the thread, leaving 20-25 cm for stitching.
We sew with a vertical knitted seam (we sew along the front side, and the seam remains on the wrong side) You need to start sewing the booties from the wrong side so that the seam on the lapel of the booties is on the wrong side. Sew about ¾ of the 1x1 elastic band. Turn right side out and continue to sew to the end.
Walking for a child is very important not only in summer, but also in the cold season. To do this, many parents do not just buy hats for their children, but also knit them with their own hands with knitting needles or crochet. Today we will talk about knitting hats for newborn babies, because for them it is warm - the most important thing when walking.
How to knit a hat with knitting needles? Which material to choose? Where can I find the right scheme, find out the dimensions and read the detailed description of the work? We will try to answer these and many other questions in our knitting section.
Knit a hat for a newborn with knitting needles
Hat for a newborn with knitting needles knits very quickly and easily. New models and scheme knitted products for girls, boys detailed description waiting for you below in the article. Also, you will know how to crochet a baby hat for beginners . The most important thing here is the freedom of creativity. Can be crafted a hat with a pompon, a hat - a helmet, with braids, ruffles, a hat - earflaps, a cap, like Pinocchio's, and so on. In any case, the child will be delighted.
How to start knitting beautiful fishnet cap with patterns? For starters, decide on color and the material of the future headdress, pick up density mating. This product is designed for a child 2 – 6 months. Choose yarn 50 gr of the desired color, and we will take pink (Baby Cotton), straight and stocking needles. Choose threads of the same thickness you need. Now let's go through the patterns - there are only 7 of them, some knit in circular rows.
- Front surface. Here L.R. knits L.P., and I.R. – I.P.
- Garter stitch. L. and I.R. - L.P., in circular R. - knit loops alternately, then one R. - L.P., 1 R. - I.P.
- Openwork pattern No. 1. 1 R.: L.P., 2 and 4 R.: all P. and crochets - I.P., 3 R.: 1 yarn over to make 2 P. together L.P., repeat to the end of R.
- Openwork pattern No. 2. We knit according to the scheme.
- Hole Pattern #1. 1 R.: 2 L.P., 2 P. together L.P., 1 yarn. = repeat to the end of R. 2 R.: all knit I.P.
- Hole Pattern #2. 1 K.R.: 1 yarn over with 2 P. together L.P. \u003d to the end of R. 2 K.R.: all P. and nakida - L.P.
- Relief pattern: 6 R. garter stitch, 4 R. - openwork No. 1, and so on until the end.
Detailed description:
So we are recruiting 90 P. Between chrome. knit 6 R. garter stitch
, the next 4 R. - openwork pattern №1
. 2 R. - garter stitch
, 4 R. - openwork №1
, 6 R. - shawl. Between chrome. - openwork №2
. Close the knitting process after 12 cm on both sides 1 * 11 P. + 2 * 12 P. in every second R. The remaining 20 P. - L. smooth surface (in each 8 R. remove 4 * 1 P.). make another 25 cm of the canvas and close the product.
back seam
perform very carefully, along the bottom edge with the help of 72 P., knit between chrome. \u003d 2 R. garter stitch, 2 R. hole pattern, 2 R. again garter stitch. This completes the master class - the loops can be closed. To make beautiful strings
- 15 V.P. + 1 V.P. lifting, 1 R. \u003d S.S.
Knitting hats for a newborn with a description and patterns
Hats for newborns from 0 to 3 months are the easiest to knit with knitting needles . "Knitted" video tutorials on creating such hats for beginners and not only.
Hat for a newborn girl with knitting needles
This hat, unlike those presented above in the video tutorials, is designed for babies from 8 to 12 months. We chose white as the main color, and took the leftovers pinkish shade. Knitting tools: hook and knitting needles No. 2.5. Yarn is better than cotton.
- Facial surface. Here L.R. knits L.P., and I.R. – I.P.
- L.P. always when knitting in a circle.
- Wrong side performed simply - with circular knitting - I.P.
A hat with knitted ears begins with these “ears”. We start from the right ear: 3 P. knit with front stitch (in each 2 R. + 1 P.). follow the pattern until there are 21 sts on the needles. Make the left eye in the same way. - For the back of the head you will need: 14 P., which must be knitted in P. of the right, then the left ear. You should get 84 loops in total.
Now we will use immediately 4 spokes: you need to place all the loops on them and start working in a circle (4 R. L. G. and I. G.). At 9 R.: 5 and 6 P. together. Do the reduction 3 more times. In I.R. in each R. - 2 P. together I.P. every 3 P. In order to make a bottom - L.P., where in each R. 2 L.P. together through 2 P. Continue to work up to 12 loops. 
To edge headgear turned out beautiful — take pink color yarn and tie it with C.B.N. What is a hat for a newborn without ties? Twist two strings of white and pink thread together!
Cap for a newborn boy with knitting needles with a description
To tie winter hat knitting baby with an interesting and stylish application with your own hands is very easy! Our detailed master class and step-by-step instruction We'll help you get the job done in a matter of hours! The color that will go well with our headdress - White (50 percent wool - winter all the same). You will also need some threads in the following shades: brown, orange, yellow.
- All loops at facial surface in circular knitting, perform L.P.
- Elastic : alternation 1 L.P. and 1 I.P.
- First we will use orange a thread with which you need to dial 76 P. (19 P. for each of the knitting needles). bind rubber band 3 cm. After this step, the thread must be changed to white (you can choose acrylic) and run 11 centimeters L.G.
- Next you need to use another color(orange thread) 1 R. + close the loops step by step. Sew the detail along the edge of S.B.N. using an orange tint, pre-fold the canvas in half.
- crochet we recruit 30 V.P. + 3 C.S.N. in each P. is the basis of the spiral. Make 4 of these: two orange and two brown. If you are satisfied with our option, then feel free to sew them to finished product as shown in the photo below.
Of course, you can not decorate a hat for a newborn. lion cub applique , but we will still tell you how to do it. According to C / X 1, knit a small head orange yarn, the last R. of which is brown. yellow color make the ear right and left (C / X 2). Head almost ready - it remains to attach the muzzle. It is easy to knit according to scheme 3. Connect all parts in one pattern, you can adjust the size yourself. For babies – the best way with rubber band and funny character. Your child will love this hat! You can also crochet a hat for a newborn, but with knitting needles it will turn out to be denser and warmer.
Booties and cap for newborns
Tie with your own hands cap and knitted booties for newborns with knitting needles with description - the best solution for your kids. Such a simple set can be created both for your child (up to a year: 6-9 months), and presented to present. You can choose colors and material to your taste - any method is good. Our choice fell on white threads - universal for a future boy or girl. If you are making a thing for a boy, replace the beads with blue ones, we took pink ones. We suggest taking a ribbon of the same color, or a ribbon of about 1 meter.
- Front surface performed as standard. L.R. – L.P., I.R. – I.P.
- Garter stitch– all R.L.P.
- Openwork pattern No. 1 according to S / X1 (L.R.), openwork pattern No. 2 according to S / X 3 (L. and I.R.).
- Large puffs according to scheme 2, small ones - according to scheme 4. All L.R.
- In schemes 2 and 4, all P. according to the figure. In C / X 3 - I.P.
Knitted booties for newborns with knitting needles with a description, let's start with knitting a hat. Openwork pattern No. 1 knit 87 P.L.G. - 2.5 centimeters. We close: in each 2 R. - 1 * 9 P., 1 * 10 P., 1 * 14 P. All other loops - close in one R. This is the front of the cap. Rear completely according to C / X 2.
Putting our pieces together
: behind the caps - puffs according to C / X 2. 
 To hide those places where the loops are pulled together - mask them with beads. Connect the front and back parts with S.B.N. + 1 R. "PIKO" (1 S.B.N., 3 V.P. in this S.B.N., 1 S.B.N.) = to the end of R. For the lower edge of the product - 70 P .=3 R.L.G. + 1 openwork R., 3 R. L.G. Close the work - bend the bar inside out. Sew on, then insert the ribbon/ribbon for the ties into it.
Now let's make knitted booties. If you do not succeed the first time - do not be discouraged, dissolve the knitting and start again. This is more difficult and meticulous work. 46 P. knit L.G. 4 cm
- Openwork R .: 1 L.P., 2 P. together L. + nakid - repeat to the end of R., close it L.P.
- I.R. with the help of I.P.
- The first 17 P. and the last 17 P. - postpone.
- Working with the middle: openwork pattern №2.
- The first 17 P. -L.P., after each 3 P. + 5 times 1 P.
- On the right and left, dial 16 P. with a garter stitch, along the short edge - 12. Those delayed 17 P. - L.P. + 5 times 1 P. after every third. I.R. – I.P. and according to S / X 4.
- 1 L.R. L.P. (3 and 4 P. - together). Close the rest of the P. In the place connected by C / X 4 - make small puffs. Hide the loops again with beads.
Let's move on to the design of the main part - sole. 6 P. + garter stitch. In each 2 R. + 3 * 1 P. on the left and right. straight drawing- 8 centimeters. Close product.
We collect with the help of S.B.N. according to the scheme + "crustaceous step". They can also decorate the toe of booties. Top the product as follows: 1 R.: S.B.N., 2 R.: S.B.N., 1 S.B.N. with "PIKO" from 3 V.P. - until the end of R. Don't forget the braid or string to decorate our brand new stylish booties!
Hat for a newborn with knitting needles: video
Knitting hats with knitting needles: patterns and descriptions 2018
Knit a hat for a woman, child, newborn - new models of such hats with descriptions and diagrams for free on our website
. Prepare yourself and your loved ones for the winter and autumn cold very simple
if properly taken care of now. can link men's hat- a helmet or a men's hat - earflaps with knitting needles or crochet, for girls - with cat ears, fashionable berets from video tutorials (in Russian) for yourself, dolls, even dogs. For beginners, the article contains excellent patterns and a description of the knitting process. 


Knitted hats for babies
- Knitted hat with knitting needles for a newborn baby or a two-month-old baby: a hat as from the picture - a berry! The main color of the product is orange. You will need a little more green or light green for the "handle".
To begin, dial 72 P. in orange, perform L.G. three circular R. 28 next R. knit pattern " BLACKPINK" according to the scheme. After that - again L.G., where 1 R.: 5 P. orange, 1 P. - green. And so until the end of R. try to find green loops and place them between the removed P. from the pattern " BLACKPINK". In R. below - repeat the color pattern. The next two R.: 4 P. orange, 2 P. green.
Next R.: 3 P. green (the last orange P. and the first green - together). It remains 3 green and 2 orange loops according to the scheme. Continue to decrease the orange color until it completely disappears from the canvas. Remove 12 P., next. R. - 6 P. knit in a circular row for another 2 centimeters. On this, tighten the thread, and postpone the work.
- Knitted hat for a newborn with knitting needles with a description and a diagram with your own hands. A must have for this winter! For work, we recommend using a twin thread. We take three colors: green, light green and grey.
gray - 72 P. - 20 R. L.G. (all I. and L.R. - L.P.). the next 20 R. - a pattern with "bumps" green shade . 3 R.L.G. the lightest yarn . In each 2 R., we evenly remove 8 P. In the next 2 R. - 2 P. Knit the fabric for another 2 cm, after which the thread can be cut. Knitted hats and knitted things are good, but we can not always find the exact size of the product. In this case, it is better to crochet - there you can try on clothes during the work itself in the process. We will not offer such an option in this article, but an alternative should always be considered!
Knit a cap for a newborn - for the winter for boys
Baby hat for a boy for the winter
You can learn to knit in a few hours. This requires a good understandable scheme and a clear description of the process itself. If you want, you can tie in the kit: cap and scarves, booties, mittens
- anything to dress your baby!
Watch a few videos on knitting a cap for a newborn.
And we will provide you with another model - knitted baby hat for a newborn with funny ears - pom-poms . Threads of two colors: blue and mint.
- All rows knit with a thread in two layers.
- Elastic band: 2 L.P. alternate 2 I.P.
- L.G. = L.R. – L.P., I.R. – I.P.
- Garter Stitch: All L.P.
blue tint 70 P. \u003d 8 R. with an elastic band. Alternating 2 blue R. and two mint - L.G.
When there are 3 mint strips - 2 R. blue thread L.G.
canvas, which turned out, fold in half and make a seam from the center by 8 centimeters. Fold the free sides again - sew up. Make pom poms with blue yarn. 

Knitted bonnet
The size of the doll's head corresponds to the average head size of a newborn. Spokes 3.0. Pekhorskaya yarn “Elegant” 100% merino wool. 100 gr - 250 meters. Calculation for the size of the head of a newborn. Written by Signor and Fairy.
Cast on 52 stitches (tail when casting on 85 cm) with white yarn and knit 1 row with white yarn with knit loops. Then knit 2 rows in pink, knit 2 in white, knit 2 in pink, knit 2 in white, knit 1 in pink. Next, knit with a “hedgehogs” pattern (it is also called “corn”).
Watch the video on how to knit this pattern:
Tie 8 strips of these “hedgehogs” or “knots”. After the eighth row of hedgehogs appeared on the front side of the cap, we knit another row on the wrong side as the loops look (front front, wrong side) and proceed to knitting the back of the head. It can be knitted with any pattern: front stitch, rice pattern (or, as it is also called “tangle”), it seemed to me that “tangle” with alternating loops not in each row, but through the row would be most suitable. I don't know what this pattern is called.
Break the thread, reshoot 19 loops on the right knitting needle, attach a new thread, knit 13 loops, as the loops look, and purl 14 and 15 together. Turn knitting, knit the front purl, purl the front, the 14th and the first not knitted together with the front, turn the knitting. To avoid a square nape, in the next row, yarn over at the beginning and at the end of the row. Then knit in accordance with the chosen pattern. When about 5 loops remain on the sides, you can knit while knitting the back of the head, cut 1 loop at the beginning and at the end of one or two rows. When knitting a pink hat, I did not do this.
So, the back of the head is connected. We look at the face of the work and see that on the right one loop of the sidewall remains, all the occipital loops are knitted, on the right the last side loop is knitted together with the occipital purl loop and the working thread “sticks out” from it. With a free knitting needle, we raise (or dial, I don’t know how correctly) the edge loops, starting from the typesetting white row. Raise 17 loops and knit them with the front ones. Turn the work and go back with the front loops.
Raise from the edge 17 loops with a free knitting needle and knit from the front ones. The next row is knitted with a white thread with face loops. At the end of the row, cast on about 16-17 loops with this white thread in any way. Track. a row of facial loops, at the end dial 3 more air loops. Following. We knit the first row with a front loop with a blue thread and the whole row is also with a front pink thread. Following. make holes for the loops in a row: yarn over and two together. Then with a white thread, two rows of front and close all the loops.