Hat with ears knitting pattern. Fashionable women's hats and caps with cat ears. Hat with braids with imitation ears * Isabelle
A headpiece is a must-have accessory for the cold season. Today, hand-made products are especially popular. They are unique, attractive, keep the energy of warmth, because the needlewoman puts her soul into her work. To knit a baby hat with ears with knitting needles means to create a fashionable item of clothing in which your baby will be cute and attractive. Such products can be additionally decorated with beads, decorative buttons or other knitted elements. In such a hat, you can safely carry out a photo session.
Features of a baby hat
Knitted baby hat with ears will protect your baby from the piercing wind. The child will not pull off the hat, because it is fixed on the head with attractive ties. It is important for the child that all products are appropriate for his size. This is especially true for the hat. After all, each baby has its own build, and finding a suitable option is just as difficult as for an adult. A small hat will poorly cover the forehead and the back of the head, while a large one can be blown out, especially in the area of the ears. And this can lead to persistent otitis media and colds.
If the mother does a little needlework, then it will not be difficult for her to independently knit a children's hat with ears of the appropriate size. In addition, hand-made things are characterized by a special warmth, which means that your baby will be comfortable and warm even in severe frosts.
Preparation for knitting
For creating warm hats choose a good yarn. It is desirable that only wool is included in its composition. In addition, it is better to choose the one with the "Baby" mark. Often this yarn is soft, pleasant to the body, does not prick at all - perfect option for kids.
We decided on the yarn, now you need to choose the appropriate size of the knitting needles. To do this, we will knit the sample with several options of knitting needles, choose the appropriate one. Now let's create a swatch with the selected knitting needles with a pattern that will be used for the entire hat. We make the appropriate measurements on it. Remember that this item is required, because the main thing is to correctly calculate the number of loops.
Loop calculation
We measure the circumference of the child's head. For example, 43 cm. Now we subtract 2-3 cm from this number and divide by 4. Accordingly, 40/4 = 10 cm. Two parts are ears, the third is additional for the formation of the front of the cap and the back loops, the fourth is in front of the cap ...

Using a knitted pattern, we calculate how many loops are in 1 cm.In the example, the knitting density is 22 x 32 = 10 x 10 cm.
Pattern
Every mother knows what her child needs. This also applies to the pattern, the pattern made can be different. You can knit a head pattern with a simple front satin stitch, over which you can decorate the product with beads, rhinestones, buttons, etc. If you want to knit a hat, for example, with a "braid" pattern, then you should start knitting it from the second row. Or after an elastic band.
Knitting hats
Consider the example of a nursery. You will need about 100 g of yarn, 50 g each in a skein. Knitting is done with 2.5 mm needles. You can use both circular and hosiery.
We start working with the ears of the cap:
- To do this, dial 7 loops, and knit several rows, adding 1 loop at the edges in each row.
- When there are 23 loops on the needles, knitting must be postponed. It is approximately 6.5 cm tall.
- The last row should be purl.
By the same principle, we knit the 2nd ear. After chgeo, it is necessary to connect 2 ears to each other, forming the back of the cap:
- for this we knit front row 1st ear;
- we collect 12 loops on the knitting needles and knit the front side of the 2nd ear.

At this stage, you should form the front part of the baby hat with knitting ears. The diagram of the future drawing should already be prepared, because very soon it will come in handy:
- Now there are 5 loops on the needles. Now we knit 8 more rows of the cap, adding 1 loop each in a row. This will create a beautiful transition from the ears to the front of the product. And at the back, these rows will reliably cover the child's neck.
- Now on the needles 66 loops.
- In the 9th row we knit 66 loops and dial 22 more. At this stage, knitting is closed in a circle and switched to circular knitting needles.
- We knit a fabric with a height of 10.5 cm. This is enough for knitting a baby hat with knitting needles for a baby up to 1 year old.
Now they begin to make a decrease in the loops. To do this, the dialed number of loops on the needles should be divided into 8 wedges. We decrease at the beginning of each wedge, knitting 2 loops together. Let's say there are 88 loops in the hat. This means that 1 wedge has 11 loops. Decreases are performed in this way:
- 1 time subtract 1 loop in every 4th row.
- Decrease once 1 loop in every 2nd row.
As a result of such cuts, 16 loops will remain on the needles. Now we knit every 2 loops together, and the remaining 8 loops are just well pulled together with a working thread. Carefully hide the thread from the seamy side, fix it.

Now we twist 2 tie cords. The edges of the cap can be crocheted, single crochet. Sew on strings, pompoms, beads.
Conclusion
To create a chic, attractive hat for your baby, you should prepare some yarn, knitting needles and good mood... Believe me, your baby will be comfortable and warm. If you want to tie a headdress for fierce winter frosts, experts advise to make a lining of warm fleece.
And also to all those who want to learn how to knit by themselves (by themselves)
Once I went to the next forum on needlework, they asked how to tie a baby cap with ears.
And at that moment I was already knitting such a hat for my friend for her three-year-old daughter Lisa's birthday.
The customer asked to knit two hats at once from threads of different yarns.
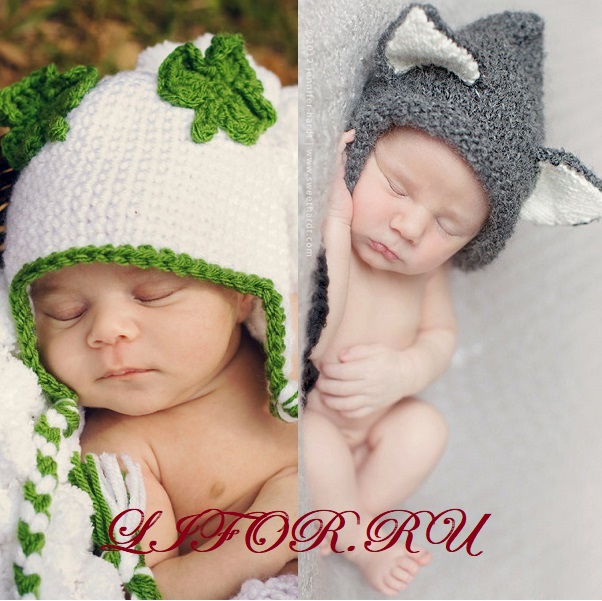
That's what I did. Two hats, one pattern and pattern. I share my experience.
I knitted them in a couple of days. Longer fiddling with photos to put it all here.
Both the one and the other caps are knitted with a front stitch - the simplest pattern for beginners.
How to take measurements for a hat correctly?
The ties on the caps are made using macrame technique. In the photo, perhaps, it is not very visible, but in the description I will talk about it.
Description and knitting pattern for a baby cap with ears.
1. Knitting in garter stitch: front row with front loops, purl row with purl loops.
2. Be sure to knit the sample with those knitting needles and threads from which we will knit a hat. And the pattern is performed by the person who will knit the hat. And then for the sake of experimenting with the customer, we did this: she is a beginner knitter and knits very tightly, like all novice needlewomen. And my knitting is free. That's when she knitted a sample, and then I calculated the loops for knitting a hat using it and began to knit, then the hat was bigger size than we needed.
Therefore, it is imperative that you do not be lazy and tie the sample yourself.
Taking measurements

3. For a three-year-old child, the volume of the head is 52-50 cm.
For knitting, you need to dial in loops for the volume of the head minus 2 cm - for the tightness of the cap.
I took 50 cm for the calculation - the volume of the head. 
4. For the sample, scored 20 stitches on the circular needles. And I knitted a pink hat on 5 stocking needles. tied 15 rows in height, which corresponds to 6cm. Then I measured the length of the sample in 20 loops - it turned out 12 cm.
I put on 82-84 loops on the red hat.
I knitted a pink hat on 5 knitting needles. The red hat was knitted on circular knitting needles and both with a seam on the head.
Since I think that this way the hat sits better on the head and can be sutured if necessary.
I also want to add this photo to the lesson - calculation of loops

How to make a schematic drawing of a product?
She took a sheet in a cage, felt-tip pen and began to draw. I know that I need 9 cm for the width of the ears, 12 cm for the back of the cap.If the entire volume of the head is 50 cm, then on face caps remain 20 cm.

5. In addition to the sample, I always make a drawing of the product, so that it is easier to knit and clearer. I never use the design loops shown in a book or magazine. Since the yarn is different, the thickness of the knitting needles may be different for me than indicated in the magazine and the knitting density for each master is different. Therefore, it is easier for me to calculate everything by my own model. It will be more accurate and faster. And I also recommend you to do it.
In the drawing, on the left, I indicated all measurements in cm, and on the right, the number of loops corresponding to these cm
6. So, according to the drawing, you can see that I need 9cm for the ears, in length, which corresponds to my sample - 15 loops; on the back of the head only 12 cm: 6 cm to the left and right of the seam. Which corresponds to 10 loops to the left and right of the seam.
On the forehead, or the front of the cap, 20 cm remains, which corresponds to 34 loops.
Is it clear where it comes from? These distances and sizes are a matter of taste.
7. Knit started from the left ear with three loops in garter stitch, adding one loop to the right and left after the hem in each row, or you can through the row. I watched that the height of the ear was about 6 cm and go out to 15 loops in width (horizontally).
Check your theoretical calculations all the time with what you get when knitting. There may be errors.
Orient yourself in time so that later you do not bandage the entire product as a whole.
When I tied the left ear about 6 cm high and 9 cm long or 15 loops on the front side to the left, I took 15 loops on the back of the head (left) and left this knitting. The thread can be cut off, leaving 5 cm to be sewn later.
8. I start to knit the right ear in the same way. I cast on 3 loops, leaving the tip of the thread about 30-35 cm for tying.
(Since I made the tie using the macrame technique. But it doesn’t matter. You can make the ties by crocheting or in some other way.)
After I have 15 loops of the right ear on the knitting needle, and the thread on the right, I dial on the front row an additional 10 -12 loops of the back of the cap. Then I turn the knitting to the seamy side and knit the seamy side.
9. So that when additional loops are set (for the front of the cap and the back of the head), the first row (the edge of the cap) does not twist up, make sure that additional loops are typed along the front row. That is, on the front side, I did this: I knitted the left ear - 15 loops, scored additional 10 loops on the front side for the back of the cap and left knitting. Then I knitted the right ear, on the front side from left to right (that is, on the same knitting needle) I scored an additional 10 loops for the back of the cap.
Having knitted the front row of the right ear, I scored an additional 34 loops on the third knitting needle for the front of the cap. See the diagram. And she attached the left eyelet, continuing to knit with the front loops on the front side. Then, she turned the knitting and knitted all 82-84 loops on the seamy side with purl loops.
10. I knit a garter stitch in a height of 11-13 cm. It's a matter of taste.

Assembling the product. Weaving strings.
When I knit 11 cm in height, I began to decrease.
11. Decrease the loops every 10 loops, knitting two together, in each front row. It turned out 8 subtractions. I did the subtractions in the same place. But you can decrease the loops in different places. I cut both hats in different ways.
12. When there are 8-6 loops left on the knitting needles, I threw all the loops onto the circular knitting needles, closed the row, pulled it into a circle and left a thread of such length from the ball so that it could sew a seam.
13. To sew a seam on the back of the cap, take a crochet hook and sew a seam. Can be sewn with a needle.

14. Strings.

In the first hat (pink), I woven a chain of square knots to create a ribbon. And in the second (red) hat - I made a cord with the Chinese "lotus" knot.
15. Pompon. I made a pom-pom from the same threads that I knitted a hat and sewed on. The result is beauty !!! We haven't had time to decorate the hat yet !! But we will certainly do it!
If you want to make the hat with ears more open from the side of the face, then, accordingly, increase the number of loops from 34 to the desired length, then the width of the ear will decrease from 15 loops to the width you need.
But my customer asked exactly this: to cover the child's forehead and neck. That is, as warm and closed as possible.
In a cold winter, you can't do without such an attribute. outerwear like hats for girls. A hat can become not only an item that keeps you warm and protects your head from snow and piercing wind, but also a part of your child's image. On sale there is a huge number of hats of a wide variety in color and style, but it is not difficult to knit them yourself - both crochet and knitting needles.
Knitting a hat for a girl with knitting needles is not difficult. There are many types of knitting that are easy to perform even for novice needlewomen. If you have some experience, you can choose a more complex pattern.
What kind of knitted hat for girls to choose?
If you are a fan of "rustic" knitting, you can knit a hat with knitting needles from yarn different color(option "patchwork"), in this case, you do not need to buy threads on purpose - use the remnants of skeins that were purchased earlier. Natural wool warms better, although it is better for a girl to take semi-wool. But do not forget that wool can shrink, so be careful when choosing a combination of skeins: it may happen that after washing the product is deformed.
The flight of fantasy is not limited. Knitted hat for a girl, with knitting needles, it can imitate the heads of fabulous and real animals (if you add ears and "wool" on top). Sew buttons instead of eyes, add contrasting yarn for the “muzzle”. Such hats are worn with pleasure not only by children and girls, but even by men with a sense of humor. An original piece of clothing invariably attracts attention.
Hats for girls are knitted both in a circle (in this case, you can not sharply decrease the loops in the last rows, but simply pull them off with a thread), and with a straight cloth - then at the end of knitting you will need to sew the cloth vertically, the seam will remain behind.
Below you can read how hats for girls are knitted: the description will allow you to avoid mistakes when knitting. It will only be necessary to calculate the consumption of yarn (in the event that its parameters - composition, number of meters in a skein - do not coincide with those proposed in the text) and tie a control sample to calculate the loops.
Knitted hat for girls. Interesting works from the Internet
Knitted hat for girls - raspberry
In such a cute “tasty” hat, your baby will not go unnoticed. A raspberry hat is what you need to dilute the colors of a dull autumn.
Hat size: head circumference 50-52 cm.

Knitted hat for girls "Sweet"
To knit a hat you will need: Lion Brand Modern Baby yarn (acrylic / nylon, 158m / 75g) on a skein of such colors as: pink (A), white B), yellow (C) and blue (D). Also some green and red thread. Knitting needles 3.5 and 4 mm and hook 4 mm.
Knitting density: 20 pt + 28p = 10 × 10 cm in stitching.
Sizes S. M. L for head circumference 43 (48, 53.5 cm).

Knitted hat for girls "Foliage"
Written by Anastasia Warkentin. Yarn ONline Linie 165 Sandy 100% mercerized cotton 120m / 50g, consumption about 80 grams. Circular knitting needles # 2.5 for elastic and # 3.5 for the main pattern. The hat is knitted in a circle.
Size 3-5 years old (head circumference 51-54 cm). The height of the cap is 20 cm.


Hat - a cat for a girl with knitting needles

Hat for girls with knitting needles "Snowball"
Hat for head circumference: 42 cm. You will need: 90 g of Merino de luxe yarn (280 m / 100 g), double spokes hosiery # 3 and # 3.5

Hat for girls knitting Owl
The cap is tied for a head circumference of 36 cm.
Knitting needles number 2. Threads 100% wool, 50 g - 135 m.

Knitted hat for girls with ponytails

There is no description of the hat, but there are knitting patterns:
Knitted hat for girls
The hat must be knitted from the bottom up, from the plank to the crown. Hat size for head circumference 51 (55) 60 cm.
Height: 23.5 (24.5) 25.5 cm. Photo shows an average size of 4 year old child.

Knitted hat for girls - design by Elena Podel
This hat is one of the designs from a series of Fair Isle knitted clothing. Fair Isle design offers many possibilities for different color combinations, this version is just one of them. You can use only one contrasting color, or as many as you would like. You can also use any DK sectional yarn, or you can knit a hat with plain or semi-solid yarns for a more classic look. The hat is tied completely in a circle from bottom to top.
 interesting selection to the website 22 models for girls only
Knitted hat for girls and scarf
Cap sizes: for exhaust gases 40/43/46/49 cm.
Cap height: 17/17/23/23.
For knitting you will need: 3/4/4/5 skeins of phildar castel (132 m / 50 g; 65% acrylic, 25% wool, 10% others) or any yarn of suitable density.
- 3.5 mm (40 cm) circular
- 3.5 mm (80 cm) circular needles.
- 3 mm (80 cm) circles, knitting needles.
- a set of 3.5 mm straight knitting needles or of such a size that will obtain the indicated density
- marker for the beginning of the row
- stitching needle
- 5 buttons 1.5 cm in diameter

Knitted hat for girls. The work of our needlewomen
Knitted scarf and hat for girls. Works by Tamara Matus

A hat for a girl with knitting needles with chanterelles. The work of Marina Stoyakina

Set Pink bubbles - hat and snood. The work of Tamara Matus

Baa ble hat for children. The work of Marina Stoyakina

Knitted scarf and hat. Tatiana's works

Knitted hat for girls. Anastasia's work

Knitted scarf and hat. Works by Tamara Matus

Knitted hat and scarf Chocolate. Works by Marina Stoyakina

Knitted cardigan and hat. Works by Marina Stoyakina

Knitted hat. Valeria's work

Knitted hat. The work of Olga Yaroslavskaya

knitting hat for girls. Valeria's work

Knitted hat for girls. The work of Svetlana Shevchenko

Pullover and beanie with pompom. Works by Svetlana Shevchenko (Sova Fotina)

Knitted hat for girls. Valeria's work

Trends and fashion trends coming season. Animal hats and wolf hats are for adults. And for the kids, the designers have prepared cute cats, dogs, bunnies and "Mickey Mouse".
Fashion hats with ears in winter 2019 will be popular both among very young public attending the nursery-garden, and among teenagers adolescence, in everything striving to imitate adult ladies. They can be purchased ready-made, or you can experience the torment of creativity and create a headdress from wool yarn, felt or insulated fleece with your own hands. A pretty hat with ears can be quite simple. It is enough to knit two square halves and sew them in such a way that ears are formed on the sides.
Easy to sew, even easier to knit or crochet. The ideas proposed in the photo will help you choose the right model and translate it into reality. A standard knitted hat with ears for a girl will require 100 grams of wool yarn with a thread length of 250 m / 100 grams. For an adult model, you will need 50% more of the same yarn. Children's hat with ears for a girl can be pink, dove, lilac, white or gray. For boys, it is recommended to choose deep blue, green, brown and chocolate shades. At the right choice color baby hat with ears will perfectly match the rest of the baby's outerwear. The responsibility for this lies entirely with the parents. So be careful and try to dress your children nicely, stylishly and fashionably.
Look at the children's hats with ears in the photo, which shows styles for girls and options for women's hats for teenage girls:

Knitting hats with Mickey Mouse ears will suit both boys and girls.

Hats with ears for babies can be bright and quite strict, but in any case soft and pleasant to the touch.
Cozy and warm: children's knitted hats with ears (with photo)
Any knitted hat with ears can be either an accessory or a warm headdress. It all depends on the manufacturing technique. If you take a thin crochet hook and threads of the "Iris" type, you will get a wonderful summer panama hat, which partially protects against sun rays and nothing more. Therefore, please note that a children's knitted hat with ears must correspond to the season and climatic conditions, primarily from the selected type of yarn. For spring, cotton can be advised. For the summer you can knit openwork models from silk and acrylic. But for autumn and winter, you need to choose either natural wool or angora with a small percentage of added synthetic fiber, which allows the finished product to better keep its shape.
Look at the photo of children's hats with ears - all the ideas are quite simple and can easily be translated into reality with the help of an experienced craftswoman: 


THE BASIC SCHEME OF KNITTING A SIMPLE HEADGATE OF A SIMILAR TYPE IS CONCLUDED IN THE FOLLOWING STEPS:
- measure the circumference of the head, positioning the measuring tape as the hat will "sit" in the future;
- cast on the needles 10 loops and knit several rows;
- measure the resulting sample, divide the resulting head circumference by this number of centimeters, and multiply by 10 - this will be the required number of loops for knitting a hat with ears;
- type this number of loops on the knitting needles with fishing line;
- knit 7 cm with an elastic band alternating 2 front and 2 purl loops;
- then knit with a simple front stitch or a pattern you like to the height that is needed;
- finish knitting by closing all the loops;
- sew the hat on the back with a blind seam;
- sew the milestones, forming the ears.
According to this scheme, you can knit both children's and adult hats with ears. different types... Further, it remains only to decorate the product with pom-poms, tassels, embroidered or glued eyes and antennae. 


Knitted women's hats with ears for teenage girls (with photo)
Fashionable women's hat with ears is in demand among modern youth. Animalistic sentiments dominate not only on the catwalks in the form of luxurious coats and prints on all types of clothing. A suitable hat with ears for a girl can be fur and leather, suede and felt, fleece and knitted. But the most important trend is still hand-made. Therefore, knitted hats for women with ears in 2019 will be especially popular, especially since manufacturers of hats offer them on sale today in a huge variety of models and styles. 


You can puzzle the teenager with needlework, buy a ball of thread for the girl of your favorite color and knitting needles, or a crochet hook. Several evenings of developing fine motor skills hands of creativity and a wonderful headdress in an individual style will be ready. The general knitting pattern is detailed in the steps above on the page.
It is worth noting that hats with ears for teenagers should be consistent in a certain color palette. So, pink and blue colors are completely excluded. In teenage fashion, purer shades with deep filling dominate. These are all shades of gray, white, black, brown. Yellow should be used with caution, since, although it is in fashion in winter 2019, it is not for everyone. 


Look at the photo knitted hats with ears in various colors - among them those models and styles that can be adopted when planning a seasonal wardrobe for a teenage girl are likely to be puffed up: 


Another topical trend of the current fashion season is the large-scale use of decor using volumetric embroidery, appliques and stripes of various plastic and wooden parts. All this can be used to decorate the finished product.
Look at women's hats with ears in the photo of models for teenage girls - they allow you to choose a headdress for any urban look: 


Hit of the season for girls - winter hats with cat ears
Style trends are changing. Children's fashion does not stand aside either. The hit of the upcoming winter 2019 season is animal prints and animal imagery wherever possible. Hats are no exception. Stylish winter hat with ears for a girl can be in the form of a funny little animal and at the same time reliably protect from the cold and frosty wind.
The most popular animals among girls are bunnies, cats and bears. In second place are foxes, squirrels and Mickey Mouse.
A black hat with cat ears is more suitable for adolescents. It can be fur or knitted from fluffy yarn. There are also simple knitted models of the beanie style (fitting the head) and decorated with sewn cat ears. You should also pay attention to felt bowlers with small rounded cat ears and an applique in the form of a Cheshire cat smile.
Bright multi-colored (pink, blue, yellow, beige, salad) hats with cat ears are suitable for preschool girls or primary school girls. They will be happy to wear such hats if they are matched with voluminous scarves and soft fluffy mittens.
A warm winter hat with faux fur ears is the trend of the coming winter. A high-quality inner filling in the form of a heat-insulating material will serve as an excellent protection for the head. These hats for children are presented in a wide variety. We recommend choosing such hats for the winter that are securely fixed (at least, this requirement is relevant for children under the age of 10 inclusive), and cover the back of the head and neck line. 


Fur hats with ears for the winter
Hats for the winter with ears can be different in their cut. If you take hats for very little ones, then you should pay attention to the long ears, which can be easily tied under the chin and thereby save the ears from the chilly wind and prickly snow. For older kids, you should choose denser hats that are securely fixed on the head and do not move out at the slightest turn of the head. More loose-fitting hats can be recommended only for children over the age of 10.
note that a fur hat with ears is not always the best choice for infancy. An allergic reaction can occur to fur microparticles. Therefore, for babies under the age of 3, it is better to choose hats with ears exclusively from quilted materials. There must be a hypoallergenic insulation inside.
A wider selection of fur hats with ears for teenage girls. Here are a huge number of models of animal hats. Thanks to a well-chosen headdress, a girl can look like a real Amazon. As an additional detail of everyday bow, you should choose fur vests, which are stylishly worn in combination with a wide leather belt in a massive decorative buckle.
Fur hats with ears can be made from fluffy arctic fox or smooth-haired mink. But it is much more humane to teach a child to respect nature from early childhood. Moreover, modern artificial fur are not much inferior in their consumer characteristics to natural ones. 


Simple hats with pom-pom ears for kids
In fact, any knitted, fleece or fur hat can be turned into a stylish designer item in no time. Stylists suggest this season to make the most of various pom-poms to decorate hats, accessories and outerwear. It's chic for kids.
Even the most simple hat with ears will help to make the image of a child memorable and extraordinary, favorably distinguished from the mass of children. A beautifully designed hat with pom-pom ears is ideally combined with down jackets, quilted overalls, ski jackets and sheepskin coats. In general, this is a universal thing that should be in the wardrobe capsule of every modern child.
Look at a variety of hats with ears for children in the photo, which offers a lot of different models and styles: 


Models of hats with ears: scarf, snood, beanie and others
A variety of styles allows you to solve functional problems of ensuring reliable protection of the child's head and neck from frost and cold wind blowing. Models of hats with ears cope with these tasks better than other hats only if the style is correctly selected. So, a stylish felt cap or baseball cap for a teenage girl will not solve the problem. It will be used exclusively for decorative purposes. But a beanie hat with ears for a girl will be an excellent headdress for late autumn and early winter. At least some kind of headdress. After all, for the most part, it is very difficult to force teenagers to wear a hat.
For younger schoolchildren, a snood hat with ears will be an ideal everyday option - this is both fashionable and beautiful and very warm. Moreover, the choice of such snoods is very large today. The mother of the craftswoman will be able to tie such a model in a couple in the evening. And you need very little thread - 150 grams.
A practical hat scarf with ears is suitable for both preschoolers and girls who adhere to a certain style in everyday streetwear. The scarf is suitable for both a meringue look trendy parkas and on the platform of the quilted jacket. It is better to choose a different style of headdress for a sheepskin coat or fur coat, for example, a beanie. 

Hats with owl and bear, bunny and fox, Mickey Mouse and cat ears
The hat with bunny ears, which is popular among toddlers, is gradually becoming less relevant by the age of 3-4 years. At this time, the child is already beginning to be interested in the world of animation and he has completely different heroes, ideals and role models. It is not worth resisting this. It's just a process of developing your own taste.
A hat with Mickey's ears, a funny and nimble mouse from the Walt Disney cartoon, enters the stage. The choice is great. Manufacturers offer hats with Mickey Mouse ears for every taste, color and wallet. It can be a very simple fleece or knitted hat. For a cool season, a knitted model is suitable. And for a harsh winter, you can recommend a fur style. 

Addiction to Mickey Mouse passes by about 5 years. At this age, the child begins to imitate adults and prefers stricter and more realistic forms in the drawings on clothes. A hat with fox ears with the appropriate decor in the form of applique or embroidery would be appropriate. A realistic look can be complemented by a matching scarf imitating a fox's tail.
Closer to the age of 7-8 years, the child begins to give preference to slightly different directions. He becomes interested in new species of animals, and at the same time strives to be like his classmates. And this season, certain looks will be in vogue. Therefore, with a high degree of probability, one should expect that the child will ask to buy a hat with owl or bear ears, since this is the real trend of the season.
A hat with cat ears is a dream come true for middle school girls. Teenage girls in the winter of 2019 will unconditionally give preference to animalistic trends. This will apply to both makeup and the choice of prints for everyday wear.
Winter is approaching, and first of all we need to think about children. A cute baby hat with cat ears will warm your child in cold weather. There are many hats for children in stores, but most of them are from artificial materials... Our hat will be wool. And if there is enough wool for the same scarf or mittens, then you will have a whole ensemble. The size of the cap goes to size 46 of the head. For a child 2-3 years old. can be worn under the hood, for more warmth we sew a fleece lining inside. We knit in two strands.
We will need:
- 100% wool yarn (220m 100g.) - 2 skeins (enough for a hat and mittens or a scarf)
- knitting needles, number 3
- big needle
- button
Getting started
Sample: 18 sts = 8 cm, so 1 cm = 2.2 sts. The total number of loops is 103 p.
After taking measurements, it turned out:

We knit the ears of the cap
We collect 9 loops. 1 row purl loops. Further, in each 2nd row, we make an increase in one loop. We knit until there are 25 loops on the needle. Cut the thread and set it aside. We also knit the second ear, only we do not break the thread, but we collect the loops of the back of the head (17 loops), attach the first eyelet, the next row is the wrong one.


Cast on the loops of the supra-frontal part (31 loops), close the circle and then knit 34 rows in a circle without additives.


Next, we begin to subtract. To do this, we will divide the product into 6 parts. We mark the 7th loop. Next, mark every 17th loop. As a result, we will get a convenient location of the wedge line, ears will be sewn along one wedge.

We subtract like this: the loop that is marked is the central one, and the loops on both sides of it are subtracted by knitting 2 together in every 3 row. It turned out like this: we transfer the remaining 8 loops to the needle, tighten and fasten.
We knit kitty ears
We collect 17 loops, 1st row purl, 2nd front, 3rd purl. Starting from row 4 (front row), we decrease one loop on each side in every 3 row until there are 7 loops on the needle. The remaining loops are tightened and secured. We knit 3 more ears. Sew over the edge, sew on. Sew on a bow and a button.
Fleece lining
Cut off a rectangle with sides of 47 cm, with a height equal to the height. We put our hat on the fabric and circle it.

We cut and grind the side seams on the machine or on the hands. Sew the lining to the cap. In the future, when you wash the hat, after washing, dry it by pulling it over a 2 liter jar so that it does not lose its shape.
